Sunday, 5 April 2015

Easter Project

Having cleared most of the lead pile, I needed an Easter project, so I turned to the old stand by - terrain. I need several gun positions for a Russo-Japanese War game that will be played later in the year.

Each model had to be large enough to take one gun model and crew which, when based, measures 40mm wide and 90mm long. So the model would be 105mm deep and 80mm wide. The forward edge would be angled back. The model would be open backed. The height of the walls would be 20mm.

The first thing was to make the basic form, which was pretty quick to build - just cardboard roughly cut and glued with PVA. This could be quite rough at this point.


The basic cardboard form.

Next was to construct the interior, which would have been constructed from whatever materials that were availble. I chose to use logs and timber. I gathered some twigs from the garden, roughly broke them to the right length and glued them into position, before gluing a few matchsticks in front of them vertically as though holding the logs in position. For the rest of the retaining timber I used matchsticks broken roughly and layed in a mix of vertical and horizontal. Finally on the base of the model I glued a track of matchsticks as a bed of timber on which the gun will stand.


The basic form with the retaining timber in place.

When all of the glue is set, I cut a piece of polystyrene about 150mm square. Roughly centred on the back edge, I cut the shape of the emplacement from the polystyrene and glued the emplacement into its final location, trimming the polystyrene to the apptoximate final outline.


The polystyrene cut to shape and the emplecement glued in place.

Once the glue is set, the polystyrene is roughly shaped.


The roughly shaped polystyrene

The next step is to tidy up the joint between the rough cut cardboard form and the rough cut polystyrene. First is to glue a few more broken matchsticks along the joint, as though they have been hurredly thrown aside. Then, using an epoxy putty, I constructed sandbags across most of the top edge of the retaining timber. I also put some sandbags at the open ends of the emplacement.


The sandbags in position

When the putty is dry, I coated the polystyrene with PVA, scattered a coarse builder's sand over it and left it to dry.


The whole piece with sand glued in place

Once dry the whole model is painted with a black undercoat. Then the whole model is painted with various tones of brown. Then a few finishing touches - some grass flock, a broken wheel and a bit of Woodlands Scenics foliage - the model is complete.


Sunday, 29 March 2015

Slow Times

Things have been slow on the painting front in the last few weeks.


I haven’t quite run out of things to paint, because there was a number of odd items lying about in the lead pile (like some Franco-Prussian artillery and some left over 1866 Piedmontese Bersagleri that have been repurposed for the Crimea). 


When cleaning up in the study I found these old Foundry WSS command figures that have been painted as a brigade command group. 


I also made a whole stack of markers for use in future games, but otherwise things haven’t quite worked out the way they were meant to.


Two weeks ago I needed to get some unexpected dental work done. By some miracle the cost of that work came in at half the quoted value, but I didn’t get to bask in the glory of that small win for long, because that same evening the washing machine died, and with all my hopes of being able to order the next batch of WSS figures.


To make matters worse the order I placed for Russo-Japanese War figures went missing in the post. A replacement parcel was sent, but I lost a couple of weeks as a results.


Then last Thursday the RJW parcel arrived. It contained enough Russian infantry to finish off another infantry regiment, plus a few more figures for eventual conversion to Frontier Guards and finally this fantastic little set from the Tsuba Miniatures Japanese ammunition train set.


Sunday, 8 March 2015

War of Spanish Succession Game

For the last month I have been working on a project that has seemn me deviate from my usual periods of mid-nineteenth century (that I have allowed to stretch forward as far as early WWI). I have been working on a Bavarian army for the War of Spanish Succession. I am no stranger to this period since I collected, and subsequently sold, a sizeable WSS Bavarian army back in the late-1980s. I often regretted selling that army.

The rebuild was prompted by our decision to play a WSS game at our annual wargames weekend later this year. I decided to contribute some Bavarians. My original intention was to build half a dozen battalions and a couple of regiments of horse, but when I saw an order of battle for Blenhiem and noted that the entire Bavarian force comprised of only nine battalions and the equivalent of five regiments of horse, all plans for a token force went out the window - this is such a predictable result for my plans for wargames projects. I figured that a force of this size was doable, and by using the plastic figures from Wargames Factory, was doable at a reasonable cost. So I ordered four boxes of infantry and in just under a month had five battalions of 28 figures each completed.


The First Battlion of Bavarians - Regiment Maffei

Today the Bavarians saw action on the table for the first time when four of us played a War of Spanish  Succession game. This was a significant sized game with nine battalions of Anglo-Dutch infantry and seven regiments of cavalry, against a Franco-Bavarian force of fifteen battalions and seven regiments of cavalry. Both sides had four units of guns, while the British had four battalion guns.

The terrain was rolling, but largely unobstructed. Looking from the Franco-Bavarian side, to the left was a village, the control of which was more or less the objective of the game, and then moving to the right, about half way between the town and the right hand edge of the table was a small farm with a number of hedged fields.

Both sides deployed simultaneously, 300mm in from the table edge. Both armies deployed their cavalry on either flanks. Between the cavalry wings, we Franco-Bavarians then deployed a brigade of three battalions of French infantry to the right of the village, then the guns, followed by one brigade of French then one of Spanish infantry further to the right. Next were my five battalions of Bavarians, with a French battalion attached. The Anglo-Dutch pretty much mirrored our deployment.

It became clear to me at the start that my Bavarians were poorly posted behind the farm, and any possibility of  manoeuvre was negated by the hedges. So I opted to shift further right. To cover this move the cavalry on the right advanced and was promptly countered by the English cavalry. A sharp action between the leading regiments ensued in which I came off the worst and one of my regiments was driven from the field. The next round I lost another regiment of horse, but managed to hold the line with the other two regiments, while the infantry filed into line.

The opening cavalry action on the Franco-Bavarian right

On the opposite end of the line the English cavalry forced the French regiments back, but failed to break them. A seesaw action ensued here which eventually saw the English regiments driven off.


The early stages of the great cavalry action on the left

In the centre the infantry fight developed slowly. The English guns played havoc on the leading French battalions and when the two forces came within musket range, the superiority of the Anglo-Dutch musketry was quickly demonstrated. Three of the leading French battalions were badly cut up. However, the battalions to the rear pressed forward and smashed the leading English battalions, but at a terrible cost to themselves and the left wing of the Franco-Bavarian line was compelled to retire from the village. Two battalions to their right held their ground, despite severe losses, while still further to their right a French and a Spanish battalion drove forward, routing one English battalion and pushing another one still further back, before being forced back themselves.


The French infantry prepare to advance


The English infantry press forward towards the village...


...but the French and Spanish counterattack

On the extreme right of the Franco-Bavarian line a combination of good Bavarian musketry and good luck on the part of the French cavalry destroyed two English cavalry regiments. The Bavarian infantry then  advanced and drove back two English battalions, but failed to break them. The fight here settled into a stand off.


The Bavarians finally get into action

At the other end of the table, the English took the village, but the the French cavalry, with the British cavalry destroyed, was free to operate against the flank of the Anglo-Dutch artillery and the rear of the English line.

The game ended here. The honours were fairly even. If anything the Franco-Bavarians held the upper hand because the French cavalry was set to sweep into the English rear. 

Monday, 16 February 2015

Austro-Prussian War Game

Yesterday we played an Austro-Prussian War game. The scenario was quite straightforward. A Prussian infantry division, supported by a cavalry brigade, a Landwehr infantry regiment plus six batteries from the Corps reserve were sent to secure a railway bridge in Bohemia. Three Austrian brigades, supported by a cavalry brigade and the corps artillery reserve were sent to oppose them.

The armies were organised so that the Prussian battalions consisted of four stands, while the Austrians were three stands. To represent some of the tactical differences, the Prussian Needle Gun infantry would roll one and a half dice per stand when they fired. To represent the Prussian schnellfeur good order infantry could re-roll misses in closing fire. The Austrians has the advantage of rifle range, but had a slower rate of fire (one side per stand). The Prussian landwehr infantry, armed with rifled muskets, had the same rate of fire as the Austrians. The Austrian line infantry were encouraged to make use of attack columns by making it one point more difficult to activate if not formed in column. If the columns got into contact, the full depth of the column cold contribute to the melee. The rules, as usual, were home grown and suit our style of play.

The terrain was pretty straightforward. Looking from the Austrian side, on the right was a stream crossed by a railway line. Near that crossing was a small farm. About one and a half meters to the left, pretty much dead centre of the table, was a small town, laying in the hollow of a shallow valley. Still further left was a walled farm.

The Austrians were on the table at the start of the game with all three infantry brigades near the centre of the table, one slightly to the right of the town with the other two slightly to the left. The cavalry held the extreme left. The Prussians had to march on and were centred near the town

The action began slowly. First because the Prussian troops rolled really badly for their activation and were "tardy" and second because neither side had any artillery in position. That said both sides split their forces into three groups, each aiming to control the three key points on the table: the railway line, the town and the farm on the Austrian left.

The "tardy" Prussians

The Austrian left and centre

The action developed on the Austrian left first, where an infantry brigade and the cavalry brigade faced off against the landwehr regiment and the Prussian cavalry. The initial cavalry tussle proved inconclusive with each side driving back one of each other's regiments before each side pulled back to observe. But the infantry action was more deadly. The landwehr occupied the farm but a powerful assault by the Austrian jagers, supported by two line battalions, drove them out, while two other battalions took care of the other landwehr battalion and then drove up the hill beyond and, despite heavy losses, captured two Prussian batteries there.

Th Austrians asdvance on the left

They carry the farm...

...and attack the Prussian batteries on the hill

The cavalry renewed it tussle and although the Prussian troopers pushed off most of their Austrian counterparts, they were held in check by the Austrian artillery.

The cavalry fight

In the centre the fighting became particularly hot. The Austrian seized the initiative and stormed forward in their assault columns, covered by the jagers. Two Austrian battalions were badly knocked about early by artillery fire and the initial assault by the jagers was stopped short of its target. However, three battalions following the jagers managed to press home the attack and drive back the Prussians in front of them. Two battalions to their right drove forward against a badly battered Prussian battalion and, despite taking heavy fire into their flank, drove the Prussians from the field. The Austrians then struck the second Prussian line which, despite being heavily disadvantaged, held. A desperate fight developed. In the end the Prussians came through the town and struck the rear of the attacking Austrians, all but destroying this Austrian brigade, but they had taken severe losses themselves in doing so.

The Prussians occupy the town

The Austrians move on the town

The Austrians attack in the center

The Austrians on the right made it across the stream and covered the railway. The Prussians on this flank continued to move tardily but when they did finally get into position, their superior musketry began to tell. As the game came to an end it became obvious that the Prussians would eventually gain the upper hand here.

In the end the honours were pretty much even. The Austrians were in good shape on their left, with only a regiment of Prussian cuirassiers left there to oppose them. In the centre the Austrian infantry brigade was wrecked, but the Prussians had suffered heavily too and were in no shape to press forward against the massed Austrian artillery. On the Austrian right, the tardy Prussians had been roughly handled, but were pretty much taking out one Austrian battalion at a time with rifle fire.

The tweaks made to the rules had worked really well and caught the flavour of the period. The Prussian musketry was dominant and by making the battalions four stands it meant that they could outshoot the Austrians two to one in a  stand up fire fight. The Austrian assault columns were also well represented. Against a well-positioned Prussian battalion, they could take terrible losses, but if they did manage to close they could sweep the field. The problem for the Austrians was keeping the momentum going. Only on a few occasions could the Austrians make use of their additional rifle range. 

Thursday, 29 January 2015

Fresh Crimean Paint

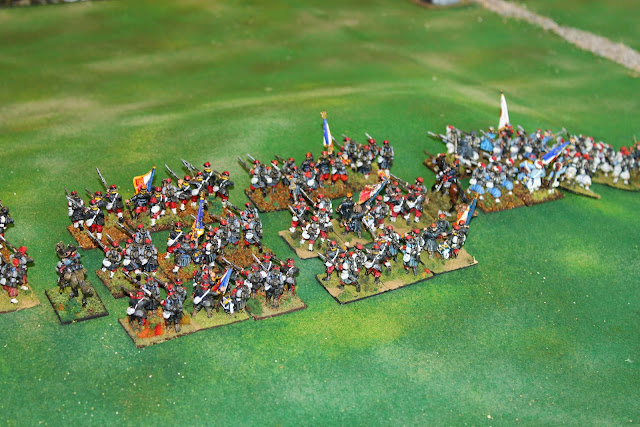
My summer holiday painting project was the first batch of Crimean War French. 

I have chosen to build Général de division Mayran's First Division from 2nd Corps at the Battle of Tchernaya.  This first batch of figures makes up Général de brigade de Peueux de Lavarande's First brigade, consisting of the 19th Chasseur à Pied Battalion and the 2nd Zouave Regiment.

For the zouaves I chose to use the Perry plastic ACW zouaves. The figures are not quite correct: The water bottle was different, the bayonet should be a sword bayonet rather than a triangular one, the drum should be of the African type (although some sketches show a standard drum) and there is no eagle on the standard pole. These few things I am happy to accept. So I bought one box plus six additional command frames. This gave me enough figures for all three battalions of the regiment. There were even two figures left over to make up the brigade command group.

The entire regiment
Brigade command

I wanted all of the figures to be advancing at slope arms and about one third would have fez, while the remainder had turban.
The First Battalion, 2nd Zouaves

The Chasseur à Pied were from the Great War range.

The 19th Chasseur à Pied battalion

With the same order from Great War I ordered Lord Raglan and his staff, together with Baron Osten-Sacken and his staff.


The Crimean War will take a back seat for a month or two, but when I start again, probably in May, I will split purchases between Russian and French.

Monday, 26 January 2015

Franco-Prussian War Game

Last week we played a Franco-Prussian War game. The scenario was based very loosely on the battle of Borny. The French were in retreat, preparing to cross a major river, when a Prussian force appeared behind them more rapidly than anticipated. Two French infantry divisions turned back to face Prussian corps.

The objective of the Prussians was to secure the road that led off the table toward the river crossing. The French objecitive was to deny the Prussians control of the road.

The terrain was relatively open with two parallel ridges. Between the ridges was a village. 

The French were permitted to deploy 350mm in from the table edge, with the exception of the six batteries of the reserve artillery that had to move onto the table after the first turn. The French chose to deploy on the reverse slope, with a division either side of the road. They chose to bring the reserve artillery on between the divisions, opposite the village.

The Prussians could deploy 300mm in from the table edge. Their divisional artillery could be deployed, but the six batteries of the reserve was in limber. They too chose to deploy either side of the road. The division on the right was to push one brigade through village. The reserve artillery and the cavalry brigade were also assigned here.

The initial Prussian deployment on the right.

The French position to their left, opposite the Prussians show above

For the first turn the French remained concealed behind the ridge, while their reserve artillery arrived on the table. The Prussians, meanwhile, deployed all their artillery while one brigade occupied the village.

The Prussians take the village

On turn two the French reserve artillery rolled into position. At the same time the French divisional artillery came forward to cover the reserve's deployment. This commenced a battle for fire superiority that lasted for the next four turns. At first the French guns held their own against superior numbers, but in the end the numbers began to count and the French batteries were being driven off or destroyed one by one.

With fire superiority achieved the Prussian right hand division prepared to step off. Then a battalion of French chasseurs à pied rushed forward and occupied a small farm on the Prussian flank. The Prussians were compelled to turn three battalions to neutrailise this threat, while the remaining nine battalions advanced.

The Prussian right advances

As the Prussian reached the foot of the ridge, the French pushed to the top of the ridge and opened fire, but failed to halt the Prussian advance. When they attempted to close the French stopped the advance with a second volley then counter attacked and drove back three Prussian battalions. But when the French attepted to push the advance further the Prussian gun mass held them in check.

At that moment the other Prussian division went forward. The brigade on extreme the left was abruptly halted by the French divisional artillery and pushed back, but the right hand brigade, assisted by some battalions from the other Prussian division, forced the French back.

The French right begins to give way

At that moment the Prussians on the right pushed forward again, gaining the flank of the French, driving them back. A large gap was opened in the French centre and the Prussian established themselves in a dominant position astride the road to the bridge. Unable to dislodge the Prussians the French broke off the action.

It was a good game lastng for six hours. It was good to see theses armies out if their boxes, for the first time since November 2012.


Friday, 16 January 2015

Franco-Prussian War Infantry Formations

Following on from a query on the Miniatures Page, I have included some illustrations of typical Prussian infantry formations in the Franco-Prussian War.

The first image shows the formation taken by the 9th Bavarian Regiment, covered by the 6th Jägers, prior to their advance into the woods opposite Langensoultzbach at the Battle of Froeschweiller. It shows three companies of the jägers in the advance (the fourth company was detached to support the artillery) led by a chain of skirmishers formed by one platoon from each of the companies, with the remaining two platoons formed 100m to the rear in company lines. Two hundred metres further to the rear were the 1st and 2nd battalions of the 9th Bavarian Regiment in line of companies, with the three platoons formed one behind the other. A further 200m back came the the 3rd battalion, in double column of companies, sometimes referred to as column of companies by half battalion.

The second image shows the 2nd and 3rd battalions of the 37th Regiment formed in double column of companies astride the Woerth-Soultz road with the, 4th company from 1st battalion attached.


In the third image the deployment of the 41st brigade is shown with the 1st and 3rd battalions of the 87th Regiment in the front and the 1st and 2nd battalions of the 80th Regiment to the rear. All the battalions are formed in double column of companies.

This image shows the Geman movement around Morsbronn. The two battalions of the 32nd Regiment are deployed forward as a heavy skirmish line with supports to the rear, while the 2nd and 3rd battalions of the 94th are formed in double column of companies to the rear. Three companies from the 80th Regiment are behind the 94th.


This final image shows the French 20th Chasseurs at Rezonville with an odd mix. The 1st company is in the skirmish line with 2nd, 4th and 5th behind in line, while the flanks are reinforced.

It should be noted that the use of the column of companies was generally only used to approach the point of combat, but it was a very common practice and the Germas Staff History is riddled with such references. There are examples of the French infantry attacking in this formation, but rarely did the Gemans remain in column once they came under small arms fire. To do so was quite against their tactical  doctrine.

Further Reading

There is no one book (that I have found) that gives a clear description of the formations of the Franco-Prussian War, but there is ample information on the subject if you are prepared to read some of the more obscure works out there. All of the works referred to here can be found in the Internet Archive.

A good place to start is the Geman Staff History The Franco-German War. It is heavy going and dreadfully biased (it is the victors writing a victorious history afterall), but it does describe the action often down to company level. 

The French Staff History La Guerre de 1870-71 is equally vaulable, not only because it contains the original reports of the various commanders, but also because if offers a critique. The downside of this work is that it is very difficult to read.

Boguslawski's Tactical Deductions from the War of 1870 is worthwhile, but doesn't go down into the detail that we wargamers often seek.

Henri Bonnal's Froeschwiller and La Manoeuvre de St Privat (from which the images here are drawn) are good sources, as is Lehautcourt's monumental 7 volume Histoire de la Guerre de 1870

Ardant du Picq's Battle Studies Ancient and Modern is worthwhile, but was published before the introduction of the Chassepôt and the change of French drill.

Helvig's Tactical Examples is interesting. Although it provides insight asto how units approached specific situations, it was published several years after the war.
Hohenlohe-Ingelfingen's Letters on... provides much discussion, but there is a fair amount of hero worshiping going on and needs to be read with a degree of caution.

De Lonlay's Français et Allemandes... is a colourful read, but not totally reliable.