Sunday 31 December 2017

Farewell 2017 - the Year's End Wrap Up

So I have finished my last two items for 2017.

The 3rd Battalion, 85th Demi-Brigade de Battaille...


...and an oasis...to put my recent palm tree studies to practical use.


And the annual results? What was intended to be a quiet year on the painting front wasn't quiet at all - how many times have I said that over the years?

I managed to complete three projects from previous years, the WWI East Africa, the Retreat from Moscow and the Russian Napoleonics. I started and completed two projects in their entirety, the Dark Ages and War of 1812. I have started two new projects, the French in Egypt and French Napoleonic (1812-1813). I made numerous scenic items in support of the armies.

The count is impressive I must admit. In all there were:

842 foot figures
190 mounted figures
26 guns
6 pieces of equipment
117 pieces of terrain

By project these are broken down:

Retreat from Moscow
69 Foot
7 Mounted
1 gun
1 piece of equipment
Russian Napoleonic
316 Foot
75 Mounted
10 Guns
Prussian Napoleonic
4 Foot
27 Mounted
1 Gun
French Napoleonic
24 Foot
12 Mounted
French in Egypt
169 Foot
65 Mounted
8 guns
4 pieces of equipment
WWI East Africa
76 Foot
3 Mounted
5 Guns
Dark Ages
108 Foot
War of 1812
75 Foot
1 Mounted
1 gun
Scenic Items
117 pieces

When the painting points (5 points per foot, 10 points per mounted, 10 points per gun or piece of equipment and 10 points for every 1 hour session of scratch building) are applied a total of 10,730 points is arrived at, 1,397 short of last year's total of 12,125.

Broken down by project the score looks like this:


I had hoped to play more games this year, but managed only 20 compared to last year's 21. Of those 20 games they were spread between 11 different historical periods: 4 x First Carlist War, 4 x Napoleonic, 2 x English Civil War, 2 x Spanish Civil War, 2 x WWI, one each, Wars of the Roses, American Civil War, Dark Ages, Crimean War and WWII.

So what does the New Year hold in store?

First up will be the completion of the French in Egypt, which should be done by the end of January - although watch out for a bit of scope creep here. Next up will be the much delayed Heavy Brigade for the British Crimean army. Third will be the British in Egypt, supported by a small force of Ottomans. While all these are going on I will plug away at the French Napoleonics, but this is an army that will build up over a longer period of time.

Beyond those four projects I am still keen to dabble in the Great Northern War. I am very keen to see the Perry Napoleonic Swedes, which would also require a small expansion of the Russian Napoleonics. The new Perry Spanish Napoleonics also look interesting. 

Happy New Year to all!

Friday 29 December 2017

A Welcome Break

I have been off grid for the last few days...well not strictly off grid but in an area with reduced access. We chose, for the second year running, to head up to a resort in Fiji for Christmas. We have not both had a busy year and a few days in a place where one’s biggest decision is whether to have the cocktail or the beer at happy hour was pretty much irresistible. So we headed there on Christmas Eve and returned on the 28th.

Christmas in the tropics is pleasantly different. For one Santa, with no snow to land his sleigh on and no chimneys to descend, has to make a few changes. For those vital deliveries he trades in Dancer and Prancer and their friends for a solitary Japanese bred reindeer called Yamaha, as evidenced below.


Obsessed as I am with our magnificent hobby, my mind did not stray too far from my current French in Egypt project. Since my last post was about palm trees I spent some time studying them in great detail, from beneath.


Later in the day, as the temperature soared to 30 degrees Celsius, I did some more study.


Now that I am back at home its back to the hobby related items. Before we left for Fiji I finished off two more items for the French in Egypt. The first was the second battalion of the 85th Demi-Brigade.


The second item is the limber for the third field gun.


Sunday 24 December 2017

'tis the Season...


Greetings from down under where Christmas holidays are about beaches, swimming in the ocean and BBQs.

Wishing all my readers a great Christmas and a Happy (and safe) New Year.

All the best 

Mark Strachan

Saturday 23 December 2017

The 22nd Chasseurs á Cheval and Palm Trees

The latest unit to ride onto the parade ground is the 22nd Chasseurs á Cheval, one of two regiments of light cavalry that served with the French in Egypt.


This unit adopted a hussar style uniform of bright green jackets and overalls, with orange facings and white braid. The trumpeter wore the long tailed coat, in reversed colours, and cocked hat.


The second light cavalry regiment, the 7th Hussars, is scheduled to pass through the uniform store in early January.

When I came home from work on Thursday there was a parcel on the doorstep from China containing 60 palm trees, with a height varying between 75mm and 150mm. I bought these off eBay for the princely sum of $NZ25.09 including freight so at an average price of 42 cents each they are remarkable value. Ordered on December 11th and delivered on the 21st, I am pretty happy with that service.


I glued a few of them to bases, textured the base, put a brown wash on the trunk and then varnishrf the trunk to protect the wash.  I am pretty pleased with the result.


I now have an urge to make an oasis....

Wednesday 20 December 2017

More French in Egypt

The French in Egypt units are mustering into service at an alarming rate. In the last five days two infantry and an artillery unit have entered service.
 
First is the Third Battalion, 88th Demi-Brigade de Bataille. This demi-brigade, readers may recall, was variously uniformed  with either crimson or violet coats. I presented the first battalion in violet and the second in crimson coats. This third battalion I have done with a mix of coat colours, I have also given the officer green trousers for some variety.


The second unit is the First Battalion, 85th Demi-Brigade de Bataille, with brown coats, scarlet collar and yellow cuffs and coat tails. I was a little unsure about the brown coats at first, but now that the unit is completed I like it. The drummer in reversed colours helps to lift the unit (even though yellow is such an awkward colour to use).


The final piece is another 8lb gun and crew for the field artillery, this time in hats and not casques.


This will be the last of the field artillery for the army. A future order will include another four 4lb guns that will be attached to the infantry brigades.
 
On the painting table at the moment is the 22nd Chasseurs á Cheval and the limber for the 8lb gun above.

Sunday 17 December 2017

French in Egypt Six-Horse Limber

I finished painting the French in Egypt 6-horse limber set, for use with the horse artillery set, earlier this week, but since it’s basing is quite involved I put that task off to the weekend. I have included the process of the basing in this post.
 
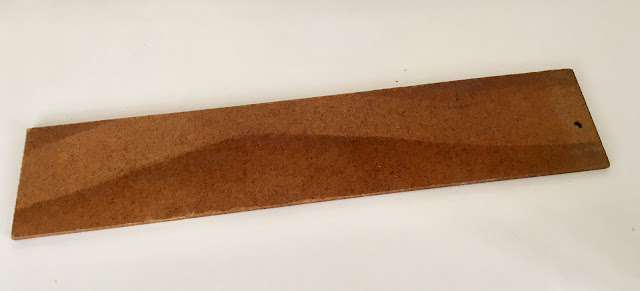
For this model (since it needs to be large to accommodate the gun, limber and six horses) the base is 250mm long and 50mm wide. This is a little too long for my usual cardboard bases which would warp and since many of the connecting “ropes” are quite fragile connections the model could damage easily. So instead of cardboard I chose to use a piece of 3mm hardboard that I had in the garage. I cut this to size by scoring both sides, then simply snapping the required piece off. I then rasped and sanded the edges.
 

The next step was to roughly position and mark location of the various pieces on the base.
 

The material I use on the surface of the French in Egypt bases is an artist’s moulding paste, usually used to build up texture on canvas, applied with a palette knife. You can buy this as a smooth or textured finish. 


I prefer the smooth type to which I add sand - in this way I can control the depth of texture by varying the coarseness or volume of sand. For this base I have used a very fine sand. My technique is to roughly apply the paste to the surface, then add a pinch of fine sand and mix it in. I keep adding pinches of sand until I get the texture I want. Then I spread it over the area of the base.


I started with area around the limber and as far forward as the middle pair of horses spreading the paste to a thickness of between 1 and 1.5mm and smoothing it off with a palette knife, wetting the blade of the knife as required to get a smooth finish.


I then pushed the horses bases into the surface of the pasre until they are hard against the base and with the pallet knife and a cocktail stick spread some of the paste over the top of the base. When the paste sets, it will hold the models to the base without the need for glue. I then carefully positioned the limber model, pressing the wheels slightly into the paste and gluing the ropes to the limber model. 


I then positioned the wheel horses and glued the ropes to the limber.


I then mixed up some more paste and applied it over the rest of the base. Before fitting the gun I used a cocktail stick to mark some wheel ruts for the limber in the paste.

 
I then placed the gun, again with the wheels slightly set in the paste, again etching some wheel ruts. I then added a few small stones to represent rocks, pressing them into the paste and adjusting with a cocktail stick as required. 

The next phase is pretty much like the first. Mix and spread the paste. Fix the horses and glue the ropes to the limber for the middle pair of horses. Then fix the lead horses 


Then to my horror I noted that the base had warped! I didn't think that the water soluable paste would penetrate the hardboard surface. I should have painted the surface first. Then I figured that the paste would contract as it set and should level out. So I set it down on a flat surface with  some weight in the edges to hold it flat and  left over night to fully set. To my relief the next day confirmed my belief and when I removed the weights the base sat flat on the table.
 
I then painted the whole surface with a sand colour from a local paint manufacturer.


When the base coat was dry I applied a wash of thinned down Games Workshop Seraphim Sepia to the whole surface and let it dry.

The ropes for the lead horses are not supplied with the kit so while the wash dried I made some by taking a strand of 22 gauge wire about 500mm in length and folding it in half. I put the folded end in the chuck of a battery drill, held the other end in a pair of pliers and pulled the trigger on the drill until the two strands of wire are wound tight. I then cut the “rope” to length. Because the horses are standing I want the ropes to be slack, so I bent them to sag appropriately, then painted them, before gluing them in place and touching up the paintwork where they glued on.
 
I then lightly dry-brushed the surface with an off-white shade to tone down the wash a little and to provide some highlights.
 

The final step was to add a few dry grass tufts from Gamer's Grass.


Thursday 14 December 2017

An Egyptian Focus

After what some would call the “butterfly effect” that saw me flitting between projects last week, this is a more structured week focussing entirely on the French in Egypt.
 
First off the desk is the 1st Battalion, 22e Demi-Brigade Légere. I had started this a couple of weeks ago, but could not complete it until the pack of colonels arrived. 


One of the other colonels was used to complete the 1st Battalion, 88e Demi-Brigade while the third, more sedate figure (below), will find a place amongst the army’s command.
 

Next are two more completion items, and are the guns to go with the limber sets. Here are two 8lb guns in travel mode and a 4lb gun. I have another 8lb gun to be finished.


Finally the jewel of the week is the horse artillery set. For this I chose to use the “Running up 4lb gun in dolmans” set. I chose these because poses are so dramatic and seem to suit horse artillery. The uniform, with all that red, is striking. I really like this set.


The gun is accompanied by a six-horse limber set that is painted, but not yet based.