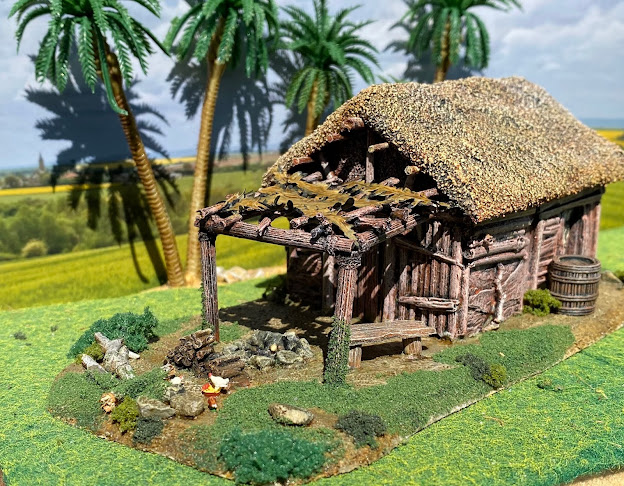
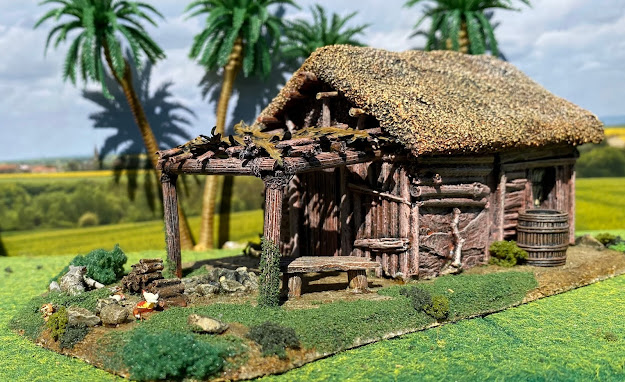
Having completed the South American Church I moved onto the first of what will probably be three rustic dwellings. This one is intended to be a peasant farmhouse. All of the images that I have found show a very basic construction so matching this was my goal. The basic structure was set as a single room dwelling with two doors and two windows. It is 60mm on its ends, 95mm on it sides and has a height of 65mm. The whole form is cut from cardboard.

For the walls I decided that were going to be made from pretty much any material that might be to hand and this might include logs of differing thickness, off cuts of finished timber and thatch. This gave me the leeway to use a variety of materials in and around the house: matchsticks, pieces of balsa, sand, plasticard, even bark from garden offcuts. So having framed up the windows and doors I just applied things somewhat randomly. While one door was wooden the other one, and the window coverings, were to be fabric, that I made from tissue soaked in PVA.
To seal and strengthen what is a relatively fragile surface I then coated the whole model with a thinned coat of PVA glue.
The roof was made from foam board, with one of the card faces removed, and then carved into shape.
The whole of the roof was then coated with a thick coat of PVA and then a coarse sand was applied. When painted this will have the appearance of thatch.
The main structure was more or less complete and ready to be painted.
First the model was undercoated black then over a base coat of terracotta, several coats of lighter browns we applied. The “thatch” had a brown base over which tones of yellow brown and white were applied. Then the whole model was given a dusting of white.
Looking again at some of the photographs of the dwellings, most appear to have some sort of covered area in front of the structure, usually roughly built from whatever wood was available. So I constructed a frame from twigs from the garden, but simply gluing them together wasn’t going to be robust enough, so I lashed them together with some thread which was Then coated with superglue. When dry it was really strong and painted with various tones of brown it was completed.
The model was then based. As a part of the basing texture I figured that given the combustible nature of the construction that cooking facilities would be outside so I formed a fire pit out of some gravel, placed a seat made from balsa and created a stack of firewood. A few rocks, a barrel and a log or two were scattered around. A variety of ground coverings added some texture and colour.


I needed some palm fronds or banana leaves to lay over top of my frame to provide shade. My first thought was to simply make some from paper, but then on Tuesday by the back door I noted some new growth on the lavender bush and these new leaves looked like palm fronds. I quickly picked six or eight leaves and then, in much the way that 19th century Victorian young ladies used to press flowers, I laid them between two sheets of waxed paper, placed them under a heavy weight and kept then in a warm dry place for three days. I then sprayed them both sides with matt varnish, then matt black before drybrushing them a light brown and fixing them into place. Then I gave them a good wash with Seraphim Sepia and then two heavy coats of brush on varnish?
As a final flourish I added a few chickens pecking about...I had bought these from a model railway supplier decades ago and they have been sitting in my bits box ever since. I couldn’t think of a better place to use them.
I am really pleased with this piece...more will come.


This is really neat, Mark! You are a master builder.
ReplyDeleteThanks Jonathan, I like being able to use any type of material for different effects. The next two will be similar, but smaller.
DeleteTerrific stuff Mark. I must say, I had never pictured you as a Victorian flower-presser. They really do look like palm fronds.
ReplyDeleteJust another of my hidden talents...I seem to recall from previous discussions that you are a palm frond expert! Actually the hardest part was spraying them black - two of them blew away with the pressure of the spray. After that I had to hold each one in tweezers.
DeleteIt is September and the palm fronds have started dropping on cue. I have only picked up two so far this morning, but will soon be up to a dozen a day.
DeleteWe cleared away about 40 last weekend from the palms around our place, but only Phoenix Palms, much smaller that those you have I suspect.
DeleteThat is superb Mark! You should be very proud of your efforts.
ReplyDeleteThank you. I am quite keen to get on with the other two now...that might be a good weekend task.
DeleteLovely bit of scratch building! I like that it doesn't look too square, which I often find is the most difficult to achieve with this kind of building.
ReplyDeleteBest Iain
Thanks Iain. I think that the “irregularness” is what helps to make it appealing
DeleteLovely work Mark, funnily enough, I have just finished off the turf sod roofs of three cottages for the Border Reivers project - I used cheap face cloths cut up then soaked with diluted PVA the when dry, I dry brushed several tones of green and brown over them - I think they look quite nice too!
ReplyDeleteYes the toweling technique gives a good turf result. I have been storing up “stock” of old towels as they get taken “out of service”.
DeleteYes...that was my plan too - but our out of service towels have already been disposed of unfortunately!
DeleteThe alternative is to go to The Warehouse and buy something for a few dollars.
DeleteSo cool. Again, thanks for the exposition on your process.
ReplyDeleteThanks. I am really pleased with this model.
DeleteThat’s worked really well Mark...
ReplyDeleteAn excellent example of up-cycling...
All the best. Aly
Thank Aly. The surprising effect was the way the bark came up. I can see myself using this some more.
Delete