In 61 years of living in Auckland I've known it to snow once. About twelve years ago on a cold winter's day in July I recall looking out the office window as a hail shower swept through. Then that hail got lighter and someone said "it's snowing!" And it was. It was very light and it didn't settle and within less than a minute the snow had turned to rain. Other parts of the city reported similar experiences so we weren't just imagining it. At 37 degrees South we are in a temperate climate zone, close to sea level so this sort of event is very rare - I think the only other recorded event was in the 1930s. So apart from my experience visiting family in Canada at Christmas time and from time spent on the ski fields of the Central Plateau my knowledge of snow behaviour is limited, so if I have made some wrong assumptions below I trust I can be forgiven.
The 'snow' I am using is the Woodland Scenic Soft Flake Snow that I bought years ago for the Retreat from Moscow project.
To get the effect of snow on the roofs I followed a YouTube tutorial, mixing the snow with PVA until it forms a paste that will not drip from the mixing stick.
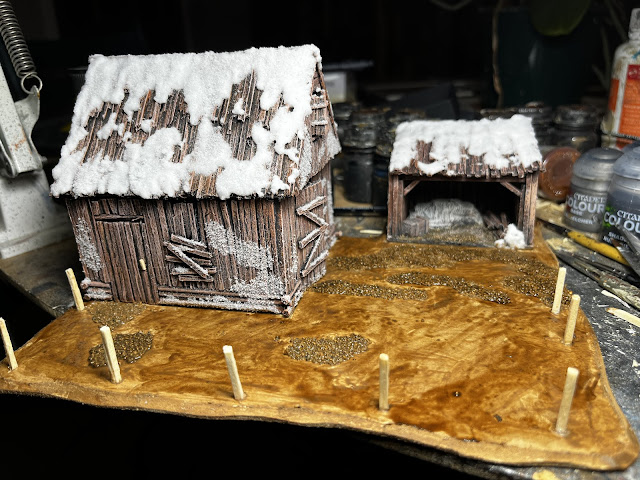
The mix is then daubed onto the surface of the roof. It is always a bit of a shame to cover over all the detailed work that has gone into making the roof in the first place, but it is the best way to get the right effect and painting the roof after the snow is applied would be difficult.
There are three gotchas when applying the snow. The first is to remember that the PVA is going to shrink as it dries and if your roof us not well anchored to the model its going to curl up...the sample piece I made on an bit of thin card curled up to a U shape. So on the outbuilding, that has a rather simple roof that is lightly connected, I started off on one corner and along the joint, just in case the shrinkage is greater than expected. Once this first bit is set I can have confidence that it won't curl because the stuff sets like concrete.
On the barn, which has a much more ridged roof structure, the mix can be applied along the full length of the ridge.
The second gotcha is that if you simply daub it on the mix it will run slightly and you run the risk of the whole thing looking like the icing on a Krispy Kreme donut. So once the mix begins to set it is important to rework the edges with the mixing stick to get a less regular edge as I have below. At the same time I have left areas where the snow has either melted or run off.
To finish off the building I applied matt varnish to parts of the walls, especially on any protruding edges, and snow powder is sprinkled on it from above.

The build process then moves onto the base. This was cut from 3mm MDF, the holes for the fence posts were drilled and the posts installed. The two buildings have been glued on and some sand has been applied to areas where I want some mud to show through the snow.
Next the whole base is painted in a light brown tone and when that is dried I washed it with a thinned down coat of Aly's Brown Liquid, the recipe for which can be found here.
The sanded areas were then given a highlight and a bit of gloss varnish to indicate mud.
The next item to be attacked was the fencing. This is a simple matchstick post and three rail fence.
The fences were then painted black and dry-brushed in various shades to get the brown / grey of weathered timber.
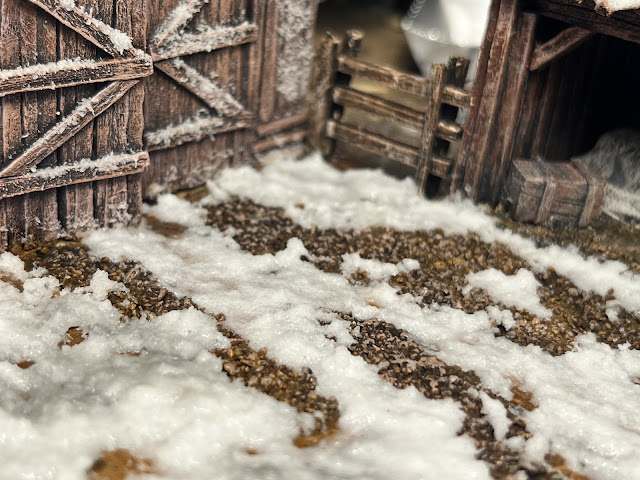
Snowmaking now begins on the base. Like the recently made house I want a slushy snow. So making the same mix as described above, but keeping it quite wet to start with, I applied the mix to the edges of the buildings and along the inner edge of the fence line. I then worked in from the edges with a slightly thicker mix, even adding some of this thicker mix to the edges as went, allowing the snow to form lumps in places. It was necessary to constantly go back and rework areas as I went in part to prevent that Krispy Kreme effect, but also to release those pesky air bubbles. The mix can always be thinned with the application of a little more glue or water. In fact using some of my disgustingly dirty paint water added a grubbiness to that slushy effect that I wanted. It took about 45 minutes to get to this state.
Here it was left for the mix to set.
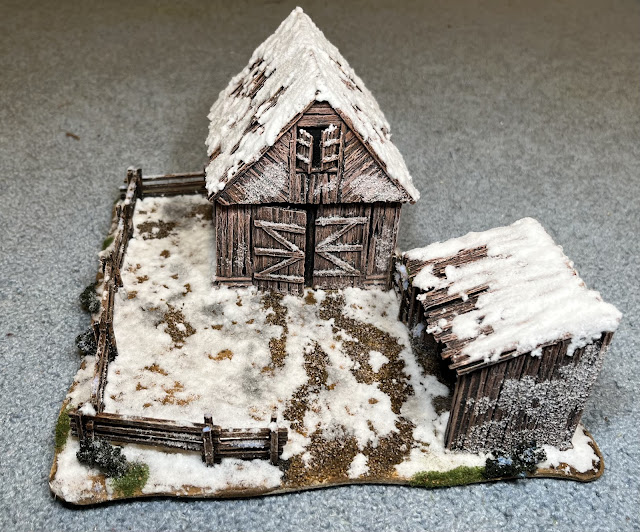
The next step was to complete the area outside the fence. I wanted this to be a little less slushy, but not Krispy Kreme icing either. I also wanted a little bit greenery be showing. And the final step was to apply snow to the fences and the few pieces of shrubbery.
Here is the completed house and outbuildings set.


That all looks suitably cold. Some useful and important tips in applying snow which are not that obvious.
ReplyDeleteAnd the ground looks like the base of the chairlift at Whakapapa ski field at the end of a weekend in September - all mush and slush...
DeleteSmashing work, Mark! The snow on the roof looks quite icy.
ReplyDeleteThanks Jonathan. I guess watching all those YouTube videos of removing snow from roofs paid off!
DeleteSuper tutorial and the finished product looks great, real good job.
ReplyDeleteThanks Donnie.
DeleteThey look superb
ReplyDeleteThank you Neil.
DeleteAn excellent tutorial Mark. To be honest that's exactly how me and Lee did our snow. Although we haven't tackled any buildings yet. I've seen the air bubbles on our bases and was wondering how to get over that on larger areas and your simple but effective pca and a sprinkle of snow looks like it dies the trick!
ReplyDeleteThanks for posting this info, any more tips for the period would be greatly received!
Ray
Those bubbles would drive me mad if I didn't fix them...
DeleteThanks for the overview of how you tackled the snow and the issues involved, which was really useful:). The finished terrain piece looks brilliant! Not that I'm likely to make any snow related terrain for the foreseeable future, but you never know...
ReplyDeleteThe snow features are an interesting challenge. The temptation is to cover the whole roof and the base with thick snow, but it makes for quite a boring model.
DeleteHonestly? They look fantastic. Almost too good to play with. Thanks for posting how you built them
ReplyDeleteThanks. I gave another few interesting pieces under way, but some need additional materials that I won't secure for a week or two.
DeleteExcellent looking pieces of terrain, I'm using some left over display snow I ended up with, I also want a patchy finish so I paint and base as normal , flock a bit so it can show through then pva and sprinkle the snow on, I've only done figures and vehicles so far and have held off the buildings but yours do look tempting!
ReplyDeleteBest Iain
Thanks Iain. I sometimes find that PVA can give an unwanted shine, so for light snow I use a brushed on matt varnish then sprinkle over the snow. An additional brush and sprinkle can be used to thicken it up. I will have some examples of this in a day or two.
Deletenice job. it looks the business.
ReplyDeleteand snow sucks, so your real life isn't missing much. 😁
Thanks Stew. Snow is a nice novelty for us...
DeleteThese are great Mark! I agree with Stew though - based on the first 25 years of my life, I can affirm, snow looks really picturesque viewed through a window but it's just a bloody nuisance if you are trying to go about your daily life!
ReplyDeleteOne of the few memories I have of living in Canada was as a four or five year old was stepping off the porch into a drift that was deeper than my I was tall. But my enduring memory is of grubby snow on the side of the roads.
DeleteFantastic scenery Mark it will lok great on the tabletop. I had enough of snow when I lived in the UK as I have reminded myself through this years hot, wet and humid Brisbane summer.
ReplyDeleteThanks Chris...there are a bunch of new snow covered buildings just completed...we are about to plunge into some humidity ourselves.
Delete