I am really pleased the way the corrugated iron finished up and will I will use the technique with the other four or five buildings needed to complete the project.
Saturday, 7 January 2017
Friday, 6 January 2017
East African Railway Station - Part 4
So the last of the construction work on the railway station is complete.
First up there was a bit of filling and the roof cap. Next was a barred window at the back of the baggage/freight area and two gates for the front of the same area.
These gates were cut from plasticard and will be fixed to the model when the painting is complete.
Finally I made the porch in front of the ticket office/waiting room. For the pillars I used 6mm square balsa wood and fixed them to a 100mm x 25mm plastic card with glue and a steel dressmaker's pins. On top of the plasticard I built a wedge and glued corrugated iron textured plasticard, that I curled down over the front edge. This piece is free standing for now, but like the gates will be glued in place once the model is painted.
Over the weekend I will paint the model.
Thursday, 5 January 2017
East African Railway Station - Part 3
Last night's task was to finish the corrugated iron roof. This entailed cutting some 50 sheets of "iron" and then fixing them to the cardboard form of the roof, overlaying the sheets as I went. This tedious task took a couple of hours, but a suitable ramshackle look was achieved.
All that is left to do on the roof now is to put a Green Stuff apex on the top and do a little filling along the ridges.
Having completed the roof, I cut a sheet of textured plasticard for the platform surface. The texture is a little more regular than I would have liked, but an irregular pattern was not available. After cutting the basic shape, I cut out the area beneath the building, not only to save some of the sheet, but also to provide a better surface to eventually glue the model to.
The final task was to fix the lintels above the windows. These I cut from 1mm cork sheeting. I used this because when painted it has an interesting rough finished stone like texture.
The next step is to construct a covered portico across the front of the main structure.
Wednesday, 4 January 2017
East African Railway Station - Part 2
Having completed the basic structures I fitted the window frames and glued in the roof bases in place.
The Back View
I then cut out what will become the platform from a piece of double thickness foam core board and cut a lip and recess of 3mm, into which I fixed strips of stoneface textured plasticard.
Back
For what will be the corrugated iron roof I constructed the basic form in heavy card and glued it in place. The corrugated iron will be fixed to this in due course.
The Basic Roof Structures
While all the glue was setting I cut pieces of roofing iron. These I cut from a sheet of HO scale cortucated iron textured plasticard - I used the HO sheeting because corrugations on the OO scale sheet, that is nearer to 28mm, looked out of scale.
The Pieces of Iron Ready for Fitting
Monday, 2 January 2017
East African Railway Station - Part 1
Well two posts in one day! Although in fairness the earlier post was written up yesterday.
With the lead pile exhausted and no figures due for a week or two, I have started on a project for some some East African buildings for use in an upcoming WWI in East Africa game later in the year.
First up is a railway station for East Africa. The inspiration for this came from the Major Thomas Foolery's War Room blog, who in turn got his inspiration from this image of the Moshi railway station.
From the start I decided to make the models from foam core board. There are two reasons for this. First is that I want to make them lightweight for ease of transport. Second is that I scored a significant amount of the stuff from work. We moved offices recently and when things were being cleared out the Safety and Wellbeing team...oh sorry they are called People Safety this month...were throwing out five 2.4 x 1.2 metre (that's 8ft x 4ft) sheets of foam core board which they could not use because they had the wrong branding. (It never fails to amaze me how people in marketing, HR or Health and Safety can go to this huge expense of producing this sort of signage and then discard it so easily because the Corporate branding people have now decided that the Company logo cannot appear as white on a blue background...while in my little department I have to justify the purchase of half a dozen iPads that will recover their cost in three months and will continue to provide savings for years to come...). But I digress...and I now have 14.4 square metres (160 square feet) of foam core board, one side printed, one side white, in my garage.
My adaption of the railway station is going to have a goods or baggage area on the left, with the booking office, waiting room and other rooms on the right. Just like the Moshi station the goods/baggage area would have a tiled roof while the other part would have a corrugated iron roof. I wanted to use the tiled roof from an old plastic model railway kit that had been kicking around for years.
This placed some size limitations on me because the roof pieces were only 75mm wide and without having a ridiculously shallow roof profile could be set to a maximum depth of 80mm. But 80mm was too narrow for this structure and I decided that a corrugated iron roof would extend beyond the tiles. The whole section would have the external dimentions of 110 mm depth, 75mm width and 75mm height (to the roof apex).
The first task was to get the roof angle set, a task easily achieved with a bit of plastic card and glue.
This completed I marked out and cut the basic shapes four the goods/baggage area then cut out the doors and windows.
I then glued the four sides together, reinforcing the corners with right angled triangles cut from thick card.
Next to make was the ticket office/waiting room part of the building. This is a simple two level 110mm x 110 mm structure with a height of 80mm.
It was quickly cut and the windows and doors cut out, but I left the cut outs for the windows in place, the reason for which will become clear later.
The two blocks were then glued together.
Finally the window frames and doors were constructed from plastic card, a task that probably looks much more tedious than it really was.
This is where work ended for the day, interrupted by guests for dinner.
Retreat from Moscow
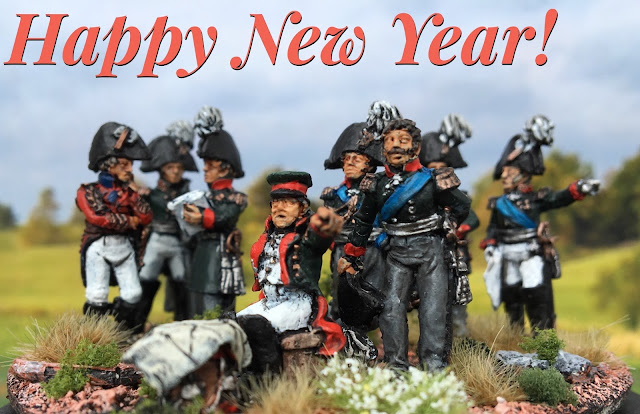
I have completed the first full units for the Retreat from Moscow project and they make a good subject for the first post of the year.
An infantry battlion...
And a cavalry regiment.
Saturday, 31 December 2016
The Year in Review
So another year has ticked by and what hectic year it has been too. Work has been a constant round of travel, three major work projects completed, restructures and the some serious stress. I am so pleased to have this wonderful hobby to allow myself to drift away at times to preserve some sanity.
Before I get on with the wrap up for the year, below are a few images of the final unit in the British Auxiliary Legion, the lancers.
With the completion of this unit, the First Carlist War project is closed out. I have completed everything I set out to finish: the Carlists, the Isabelinos, the French Foreign Legion and the British Auxiliary Legion. The entire project, 630 Foot Figures,105 Mounted Figures and 13 Guns or Equipment, has been completed in just seven months.
That makes two significant gaming projects completed this year: The First Carlist War and the Crimean War armies.
By mid-year it was obvious that this shaping up to be my busiest hobby year for some time. It wasn’t intentional. I actually expected it to be quieter than 2015 because I had no big new projects planned.
However, I underestimated just how many Crimean War figures I needed to complete for the great game that was planned for, and played, in October.
Then I decided to start the Russian Napoleonic army, punching through five packets of Perry Miniatures plastics in a short space of time.
At the same I decided to have a bit of a dabble with the First Carlist War, originally envisaging just a few units built up over the second half of the year. And then Brexit came along and the pound lost 30 percent against the NZ dollar and I decided to accelerate the my plan, so much so that it is completed as detailed above.
And then there were a few buildings.
Finally I added a few Retreat from Moscow figures from the Perry Miniatures range.
So onto the final count.
Crimean War Project
773 Foot Figures
97 Mounted Figures
19 Guns
5025 Total Painting Points
Franco-Prussian War Additions
22 Foot Figures
7 Mounted Figures
180 Total Painting Points
Napoleonic Russian Project
132 Foot Figures
3 Mounted Figures
690 Total Painting Points
Carlist War Project
630 Foot Figures
105 Mounted Figures
13 Guns or Equipment
4330 Total Painting Points
Retreat from Moscow
54 Foot Figures
20 Mounted Figures
5 Pieces of Equipment
Total Painting Points
Scenic Items
6 Pieces
1360 Painting Points
Grand Total
1611 Foot Figures
232 Mounted Figures
39 Guns or Equipment
6 Pieces of Scenery
12125 Total Painting Points
To illustrate the breakdown a few graphs.
When I look back this level probably is lower than that of the late 1980’s – early 1990’s. Back in those days, when I was involved in Military Miniatures and we ran those wargames weekends in our wargames room, I had a huge output. I can recall at one point pumping out 36 battalions each of 24 figures of 25mm French line infantry in two months. At my most productive, when I was working on the Franco-Prussian armies, I can recall consistently completing a Prussian infantry battalion of 28 figures in a day. But those were very different times.
I know I said the same this time last year, but next year WILL be a smaller year. The projects will be limited to:
* War of 1812 (new project)
* WWI in East Africa (completion of an existing project)
* Russian Napoleonics (completion of an existing project)
* Spanish buildings for the First Carlist War and Spanish Civil War (new project)
* Some Retreat from Moscow figures (completion of an existing project)
On the games front, twenty-three games were played across twelve distinct periods that included; Dark Ages, Wars of the Roses, English Civil War, Seven Years War, American War of Independence, Napoleonic, Crimean War, Colonial, Ironclads, WWI, WWII and Modern.
I want to play more games in 2017.
Subscribe to:
Posts (Atom)