Work continues on the terrain tiles.
First up is a simple road with a short bend on the edge of a plain tile. It’s a bit boring, but a necessary piece to link the various road sections.
 |
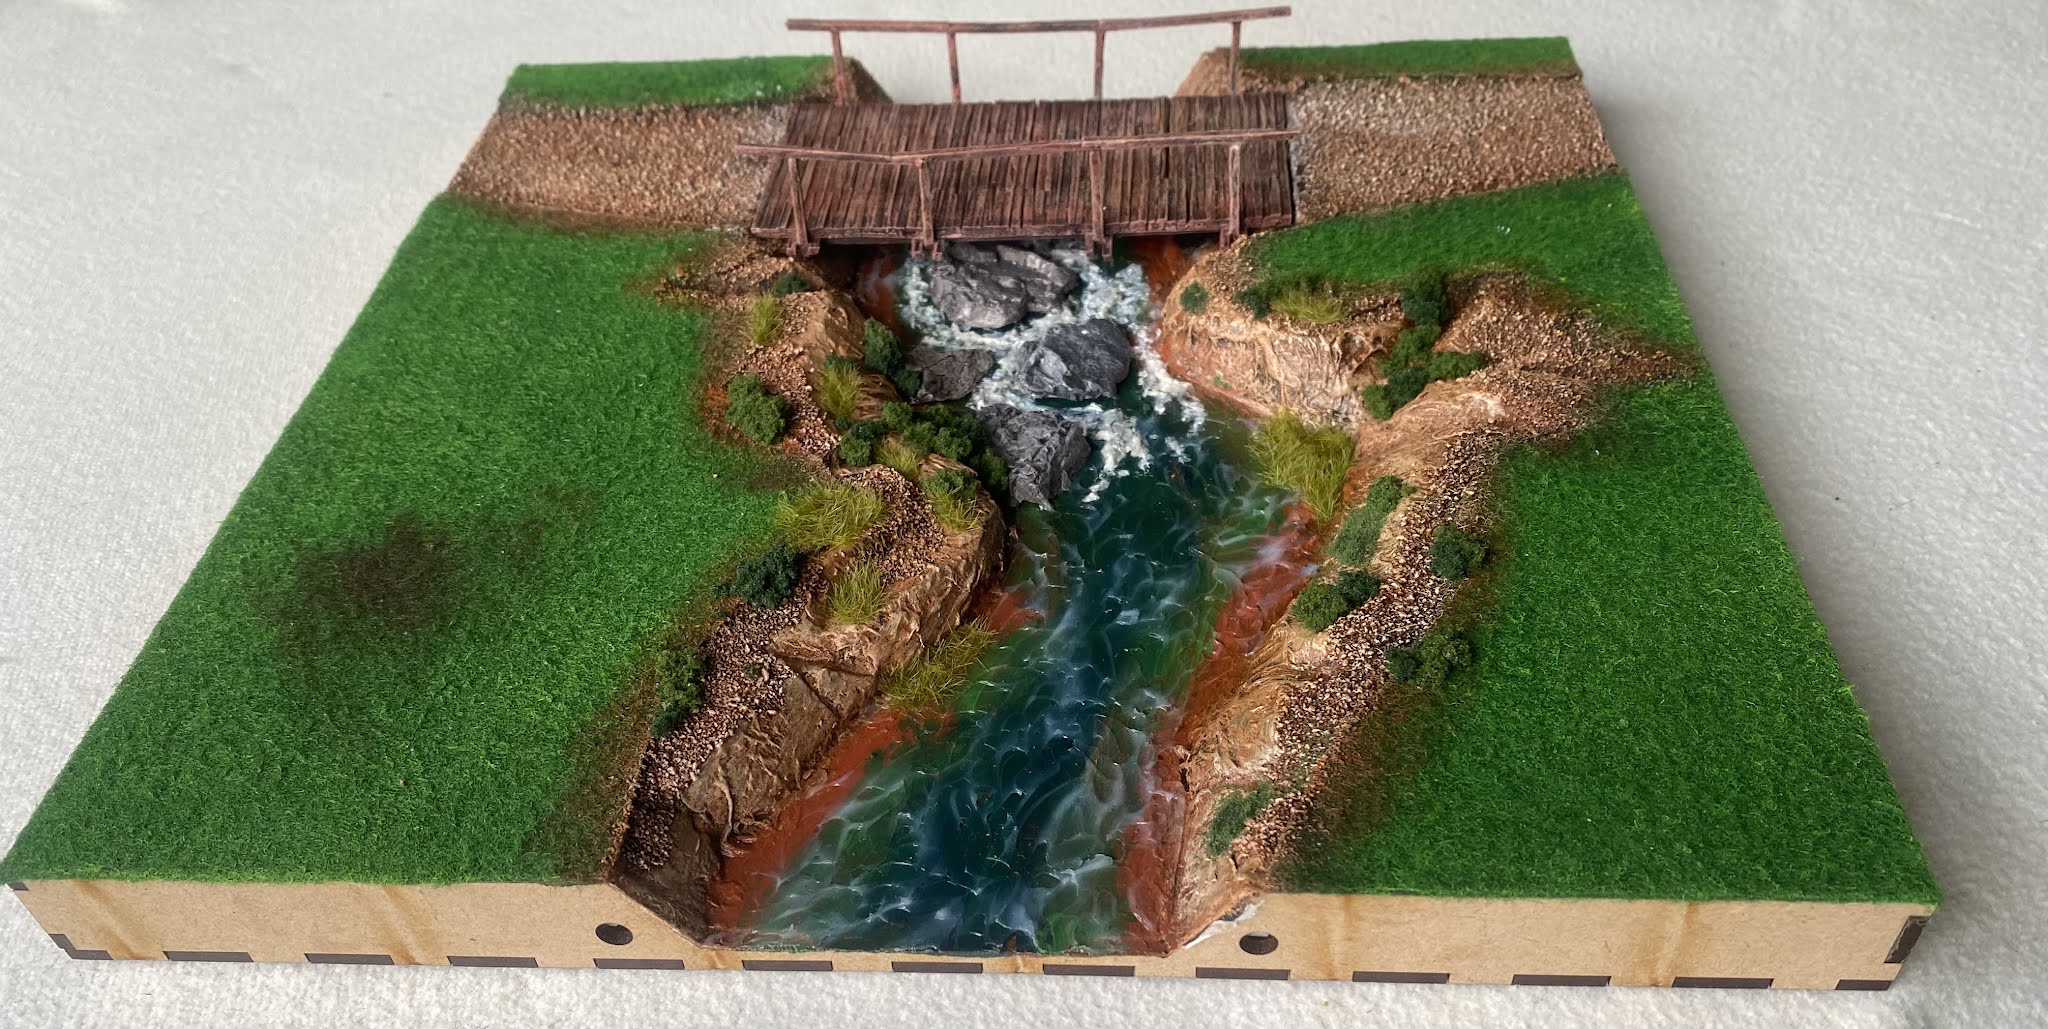
The second piece is a river section. One of the limitations of using a 300mm square tile with a central entry/exit point is that it is difficult to avoid a dead straight river. So in an effort to soften that look, this tile is one of two that will have a deep bend along the length. While it involved a bit more effort than the first piece, it too was a relative simple build.  The third piece is also a river piece with a bridge crossing it. While that in itself would have been a relatively simple, but I complicated the build by wanting to have an inter-changeable wooden or stone bridge available to span the river. This meant building two bespoke bridges and fitting them as seamlessly as possible into the tile. |
The wooden bridge was a pretty simple structure built from match sticks. Making this fit into the tile was a relatively easy task.


I wanted an additional feature around the bridge and decided on some rocks and fast flowing water, not rapids, just some foaming water. For the rocks I used the air dry clay again, pressed into a Woodlands Scenics rock mould that had been kicking around for years and painted appropriately. The rapidly flowing water was created from toilet tissue mixed with thinned PVA then highlighted with a bit of white paint and the clear water effect brushed over top. I also put some grass and foliage along the banks.


Lastly, I had been planning on buying some more of the plastic trays I use to store figures, but the plan was to buy them at the end of August. Then along came our current lockdown, that is now at day fifty-something, and the number of figures painted waiting for storage is mounting up alarmingly, as you can see below, and now a total 344 figures and two guns as below are without a permanent home. Note that the back section of the image is deliberately blurred to conceal elements of my undisclosed project.

Great idea with the bridges Mark. It must have taken a lot of patience to build the wooden one out of matchsticks, but the result looks terrific.
ReplyDeleteIt’s creating the stone work that drives me nuts. The wooden bridge is something you just persist with and was actually assembled while I was on a zoom call, proving I can multi-task!
DeleteFine work on both bridges. Great tutorial, I learn something on each of your posts. Thanks for the post.
ReplyDeleteThanks. I have another tile planned that is going to need to be bridged as well, so this is good practice!
DeleteVery nice bridges Mark…
ReplyDeleteI have also modelled stone/brick work in clay… it is not something I relish doing again.
You fell chuffed with how the first side looks… the of course you realise you have another three to do 😕.
The rough water has worked really well…
All the best. Aly
My problem is usually that I get one part right and then end up putting my thumb on it! I was surprised how well the air dry clay worked and about 5% of the cost of epoxy putty.
DeleteThe terrain tiles look awesome- looking forward to seeing a full river on the table
ReplyDeleteThanks John. There will be another four or five finished this weekend - rather boring plain ones though.
DeleteThey look great Mark and the interchangeable bridges look good and work a treat.
ReplyDeleteThanks Steve. I hope to make a few other interchangeable items.
DeleteGreat ideas on the bridges and the river section looks great.
ReplyDeleteCheers
Stu
Thank Stu.
DeleteI really like the way you have done the stream/river Mark and of course the bridges are up to your normal high standards, I am having my forensic team enhance the obscured portion of your final image as we speak! :)
ReplyDeleteAh, but I know that you know that..................
DeleteYour team will have their work cut out…I applied three different blur settings and used the Save As function to remove any image history…!
DeleteExcellent work.
ReplyDeleteNeil
Thank you Neil.
DeleteWow, very impressive work. I freely admit I could never do those bridges! I always have to buy mine.
ReplyDeleteI am very curious about this secret project too..........
Once you get the dimensions right, bridges are quite easy really. The project have to remain concealed longer with our current restrictions.
DeleteGreat looking tiles,the bridges are ace and the rapids below are a really nice touch!
ReplyDeleteBest Iain
Thank you Iain. I have started work on another bridge for the next river tile.
DeleteYour terrain tiles are works of art Mark. Wonderful!
ReplyDeleteRegards, James
Thanks James. I have another five of these in construction now, but they are rather boring plain ones. Some more river pieces, including a couple more bridges are to be done, but need to wait until a hot wire cutter arrives towards the end of the month.
Delete