I painted the last infantry unit of my ACW expansion way back in early July last year. Since I hadn’t decided on the basing method at the time they were fixed to temporary card bases. I based some on their proper bases a little while ago, but the thought of finishing the remaining ten regiments was off putting to say the least.
With nothing significant planned over the Easter break I decided to finish the project. And finish it I did. I was pleased with the result and thought why not a parade, but then I though why not go one step further and get them on a table...why not play a game.
I decided to play something from the very late war, in April 1865. So the background story is that when Lee abandoned Richmond on 2 April the various units of the Army of Northern Virginia headed west by a number of roads towards Amelia Courthouse where they would be resupplied before moving south to link up with the only other Confederate army of any strength left in the field, Johnston’s army in the Carolinas. The Union army, spearheaded by Sheridan’s cavalry, pursued. My game is a fictional scenario, in which a weakened Confederate division has taken a wrong turn and finds itself too far to the south. When the commander realises his mistake and turns back to he encounters a Union cavalry brigade in the grounds of Morgan’s Farm.
Now the Union cavalry commander is confused by the appearance of the Confederates. Although contact with the retreating enemy is yet to be established, all indications are that they are heading the west, not south, so the appearance of Confederate troops from this direction rings alarm bells. Has that wily old Gray Fox Robert E Lee tricked the Union command and this is an attempt to strike the flank of the dispersed Union army? The brigadier prepares for a hasty defence and put an urgent call out for reinforcements.
The opposing forces are:
Confederate
Infantry Division
First Brigade - 3 regiments (2 standard, 1 small)
Second Brigade - 4 regiments (2 tiny, 1 small)
Third Brigade - 2 regiments (both standard)
Fourth Brigade - 4 regiments (2 small, 2 standard)
1 battery
Union
Cavalry Brigade - 3 regiments (1 tiny, 2 small)
Infantry Division
1st Brigade - 5 regiments (1 tiny, 2 small, 2 standard)
2nd Brigade - 4 regiments (2 small, 2 standard)
3rd Brigade - 4 regiments (2 small, 2 standard)
Since this is a solo game I added a few programmed elements. First is that the Union reinforcements must dice to come on from the third turn onwards. On that third turn they roll 1xD6 and a score of 4+ will indicate that something will arrive. That score to arrive will change on turn four where a 3+ is required and subsequent turns a 2+. Once it is determined that something will arrive a second D6 is rolled - a 1 or 2 will mean the arriving unit is the 1st Brigade, a 3 or 4 the 2nd Brigade and a 5 or 6 the 3rd Brigade. Then a third D6 is rolled an a score of 5+ means that the whole brigade arrives at once while any other score means that only half the brigade will arrive that turn and must continue to dice to arrive. The Union cavalry are armed with repeating carbines that allows each unit one additional dice when firing.
The Confederate have some limitations too. The Third Brigade consists of two regiments made up of several consolidated regiments that have largely lost their esprit de corps and are treated as raw troops. The whole force is short of ammunition and must roll 1xD6 for ammunition exhaustion every time they fire, a 4+ indicating that they are low and for every turn thereafter that will roll half the number of dice that they normally roll.
So to the game. Note that in the description of the action that follows Confederate Brigades are referred to by their name in full (e.g. First Brigade) and Union brigades are referred to in the abbreviated form (e.g 1st Brigade).
The table is 1200m x 1800mm and the Confederates will enter on the road at the bottom left and exit top beyond the hill and the farm. The Union troops will enter from the right on road at the far end of the table.
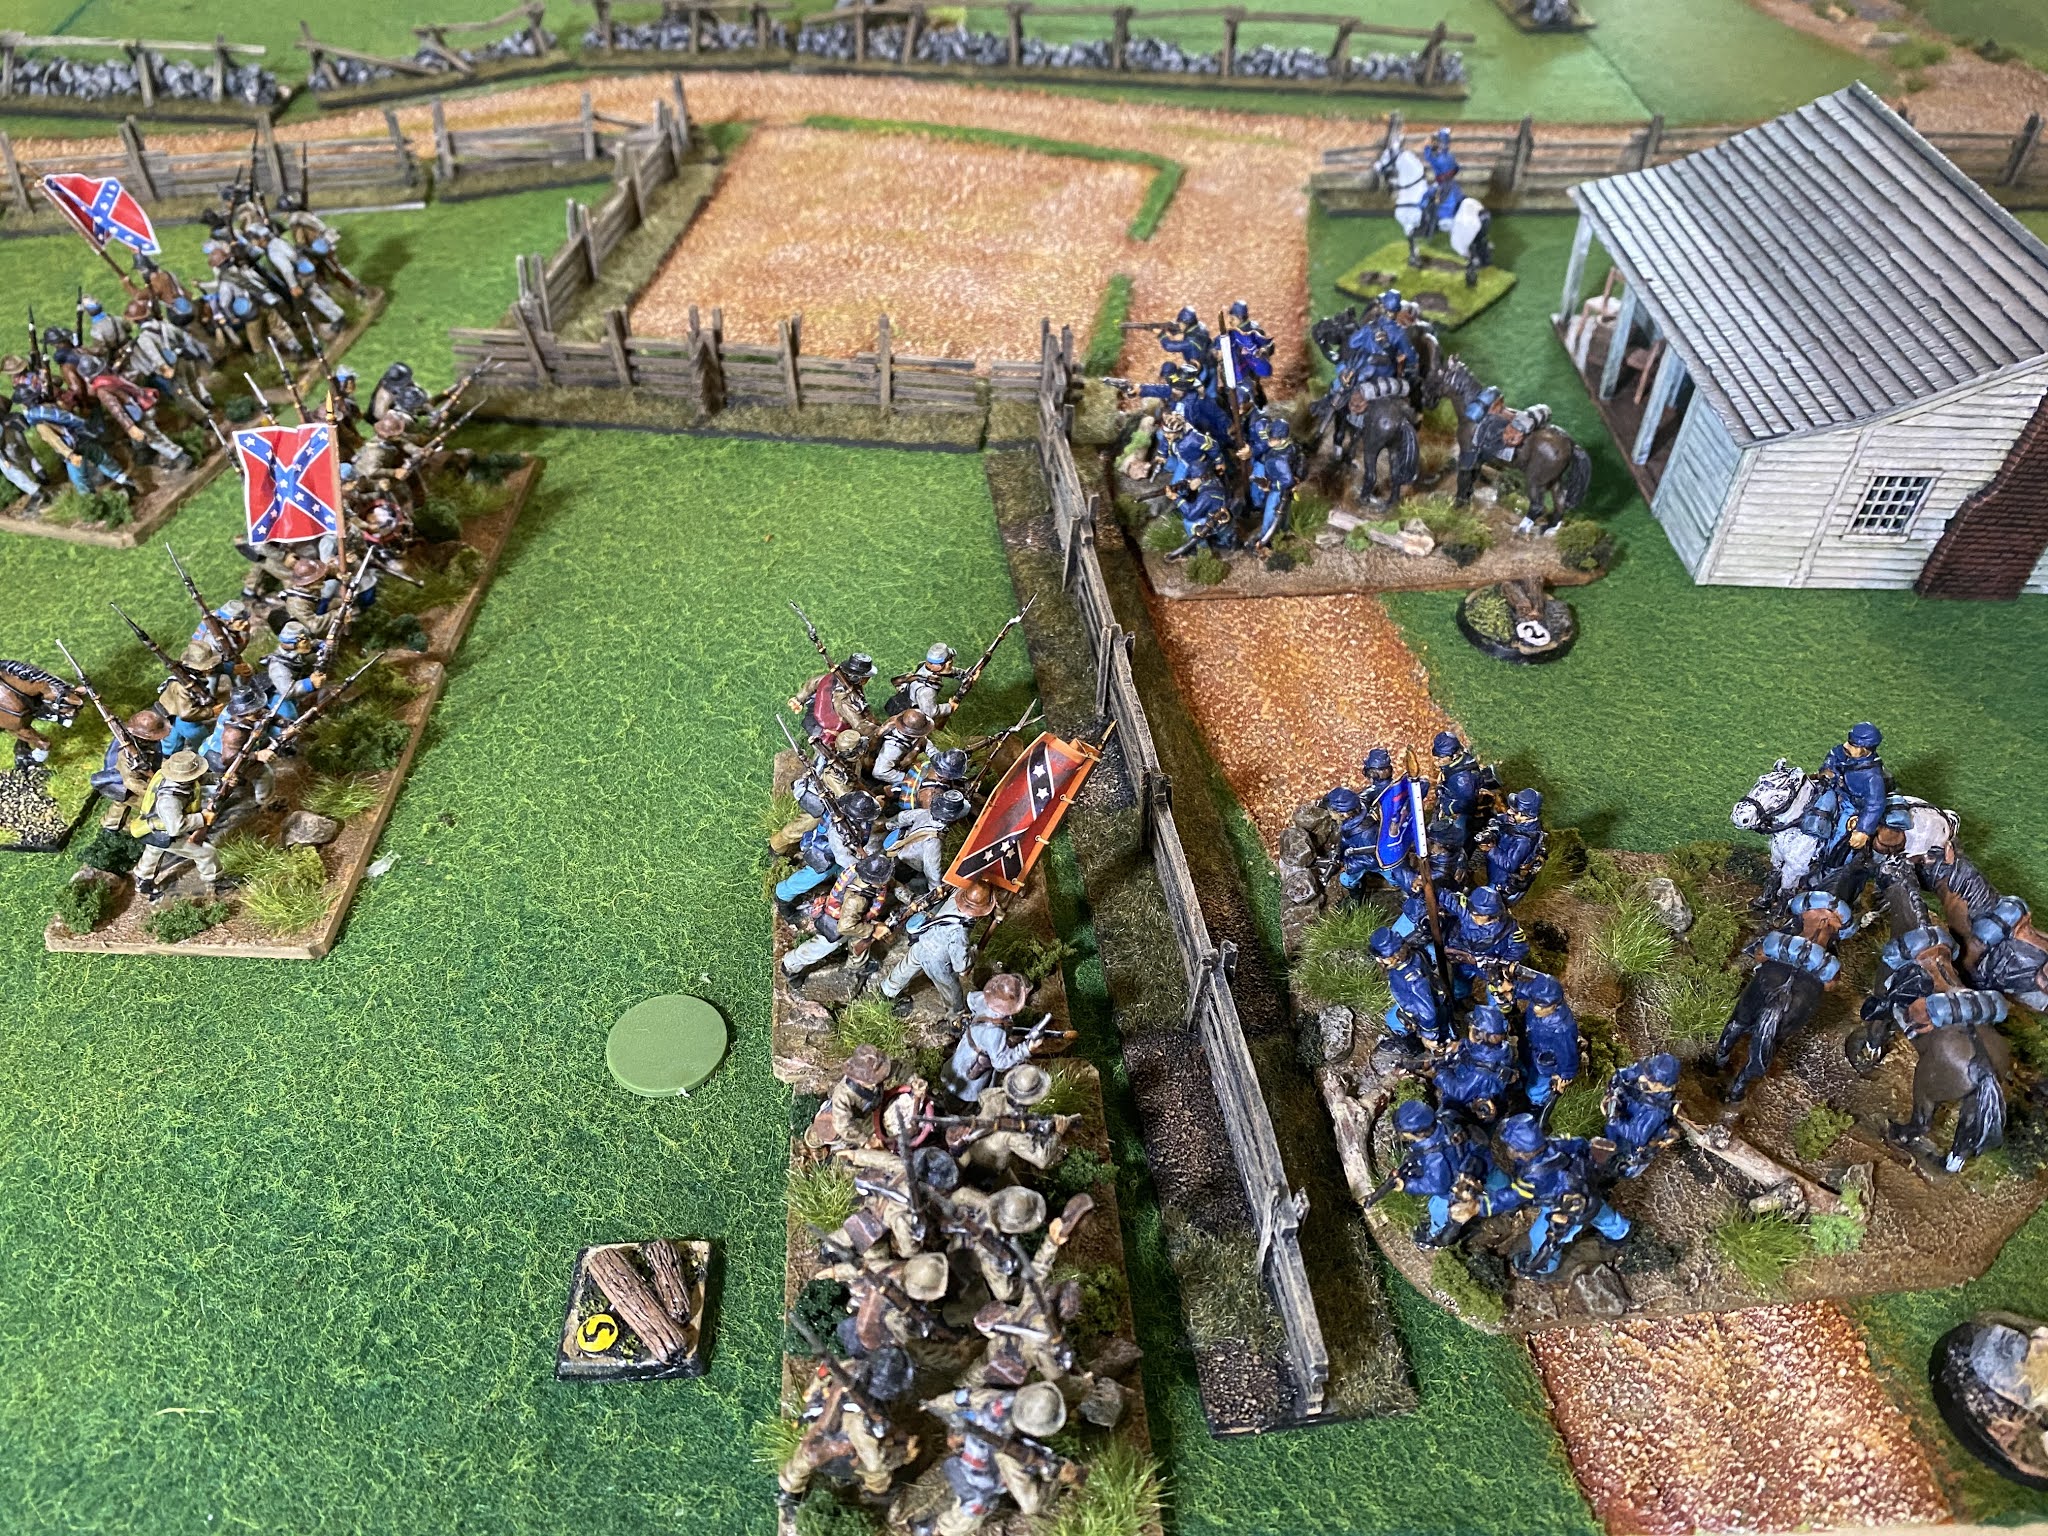
In the initial deployment two Confederate brigades have marched up the road to the junction when they spot the Yankee cavalry deployed around the farm.

On turn one the Confederates rush to deploy. The Second Brigade forms line across the fence to their left, while the First Brigade moves to deploy across the road to face the cavalry. The remaining brigades follow to form a second line.
At the end of turn two the Confederate infantry is largely deployed. The Second Brigade, on the left, has begun its advance. The Union cavalry are nervously waiting to see if any reinforcements are going to arrive!
No Union reinforcements arrived on turn three and in the face of an overwhelming Confederate advance one dismounted cavalry unit made for the woods on the high ground while the others prepared for the onslaught at the farm. Not a shot had yet been fired.
As turn four starts Union reinforcements arrive...Horray! It is the whole of the 1st Brigade and they are coming on at the double.
But the Confederate advance continues and the leading brigades advance into firing range. On the right the First Brigade engages the cavalry in the farm. One regiment fires, score two hits, not saved. The other regiment scores two hits, both saved. On the left the Second Brigade fires on the cavalry in the wood. All three regiments only manage to score one hit between them and that is saved. Two of the Confederate regiments now have ammunition problems.
The Confederates win the initiative on turn five and get first fire. The First Brigade opens fire, one regiment scores one hit which is saved and it too has ammunition problems. The second regiment fires, scores four hits but must re-roll because of low ammunition, but scores four again. The cavalry saves two. The cavalry general is within 100mm of the target and must test or leader casualties and he survives.
The Second Brigade opens on the cavalry in the wood. Again they score a solitary hit, which is saved.
On the Union side half of the 3rd Brigade arrives, right behind the first. The cavalry finally get to fire causing only minor damage to the Confederate First Brigade but three hits on one of the Second Brigade’s tiny regiments, disrupting that regiment.
On turn six the Confederates look to drive off the Union cavalry in the farm and move to the attack. In the closing fire they score only one hit on on target, which is saved and suffer two unsaved hits in reply. In the resulting combat the Confederates hold the fight to a draw, so that it will continue next turn. The second regiment of the brigade scores a single unsaved hits and takes two in reply, but in the combat the Confederates are badly defeated and routs, bursting through the unit behind them.
The Second Brigade continues its abysmal firing effort scoring only a single casualty on the cavalry in the woods. Meanwhile no more Union reinforcements arrive, but the 1st and 3rd Brigades form along the road to block the Confederate exit point. In the continuing close combat the cavalry hold their fence line and drive the Confederates off, but the Confederate unit has suffered so severely is dispersed.
The Confederates retain the initiative, but the First Brigade is in poor shape and disengages. The artillery battery opens on the cavalry in the farm, but fails to do any damage. The Second Brigade score four hits on the cavalry in the wood who save three...those troopers are living a charmed life. Meanwhile the Confederate Fourth Brigade moves to engage the Union 1st Brigade, but only causes a single casualty from their fire. The remainder of the Union 3rd Brigade arrives. Things are looking grim for the Confederates now.
The Union 1st Brigade pours fire into the leading regiment of the Confederate Fourth Brigade, causing four casualties and disrupting the unit. The cavalry in the woods opens a devastating volley scoring four casualties, while a regiment from the Union 1st Brigade opens on the right flank unit of the Confederate Second Brigade, causing four more casualties. All three regiments of that brigade are now disrupted and the brigade is in danger of dispersing.
On turn eight the Confederates retain the initiative and in the Second Brigade the brigadier and divisional commanders rush to rally the troops, but they have had enough and rolling a “1” all three regiments quit the field. The remnants of the First Brigade have rallied and begin to shift left to join the rest of the division.
A regiment of the Fourth Brigade charges the cavalry in the wood, where they take three casualties going forward yet succeed in pressing home their charge, but they are repulsed. Another unit from the same brigade pushes through the disrupted unit in front of them to close with a regiment from the Union 1st Brigade. In the closing fire the Confederates take three casualties and inflict three, disrupting the Union regiment as a result. In the fight the Confederates drive the yankees back, but fail to break them.

This was probably the last chance for the Confederates. If they had won that fight they could have cleared, the road, but now in the Union turn the Union troops take to the attack. Half of 2nd Brigade has arrived. A regiment from the Union 1st Brigade swings onto the flank of two of Confederate Fourth Brigade regiments with devastating results as the two Rebel regiments rout. The cavalry in the woods cause heavy losses in the regiment in front of them and now 75% of Fourth Brigade is destroyed or in poor shape and the brigade is in danger of collapse.
In turn nine when the Confederates test for activation, Fourth Brigade disengages. There are now only three untouched Confederate regiments on the table facing nine good condition Union regiments. With his only line of retreat blocked the Confederate commander sought terms.
Surely the heroes of the day were the three regiments of Union cavalry who held their positions well and were never seriously pressed.


That re-basing works a treat and you game was a joy to behold:)
ReplyDeleteThank you Steve.
DeleteThe troops and table look good Mark although it seemed like a somewhat one sided encounter - Johnny Reb didnt seem to be having much luck!
ReplyDeleteRemarkably bad luck...too many ones and twos were rolled!
DeleteI do like the spectacular terrain and the splendid armies, nice re-basing job!
ReplyDeleteThank you Phil. It was nice to get them all on the table.
DeleteThey all look great on the table, and it is nice to see an ACW game without the seemingly obligatory snake-rail fencing for a change.
ReplyDeleteI have some snake-rail fencing, but I prefer the look if the others, especially the stone and rail - although they are a pain to make.
DeleteA great looking and sounding game Mark...
ReplyDeleteIt’s nice to see the toys out on the table...
All the best. Aly
It was an interesting game, but would have been better if I had rolled better dice for the Confederates.
DeleteAmazing looking table- love your figures and terrain. Rebasing is such a pain - but worth it when done!
ReplyDeleteThe rebasing wasn’t too much of a chore since the figures were only attached to their temporary base with a small amount of PVA. The chore, I suppose, was that there were so many stands to do!
DeleteLovely looking game, the terrain looks excellent and the rebasing is a great success, I have had 4 pike and shot regiments sitting semi rebased since last year, but it's very difficult to get motivated about them, you are much more focused!
ReplyDeleteBest Iain
I still have a four more units to rebase - the result of a failed experiment!
Delete