Continuing my work as a miniature arbourist I have made a bunch of conifer trees. This post is a sort of a tutorial of how I made them. I take pains to point out that this is not my concept, the YouTube tutorial I based my process on can be found here - I have just added some twists of my own.
But first to honour a promise I made to Stew, here is a quick tutorial of how I make my deciduous tree armatures. Now there are plenty of YouTube tutorials about how to make superbly detailed and delicate armatures, but this is my way of making my armatures that are robust and will stand up to the rigours of the gaming table.
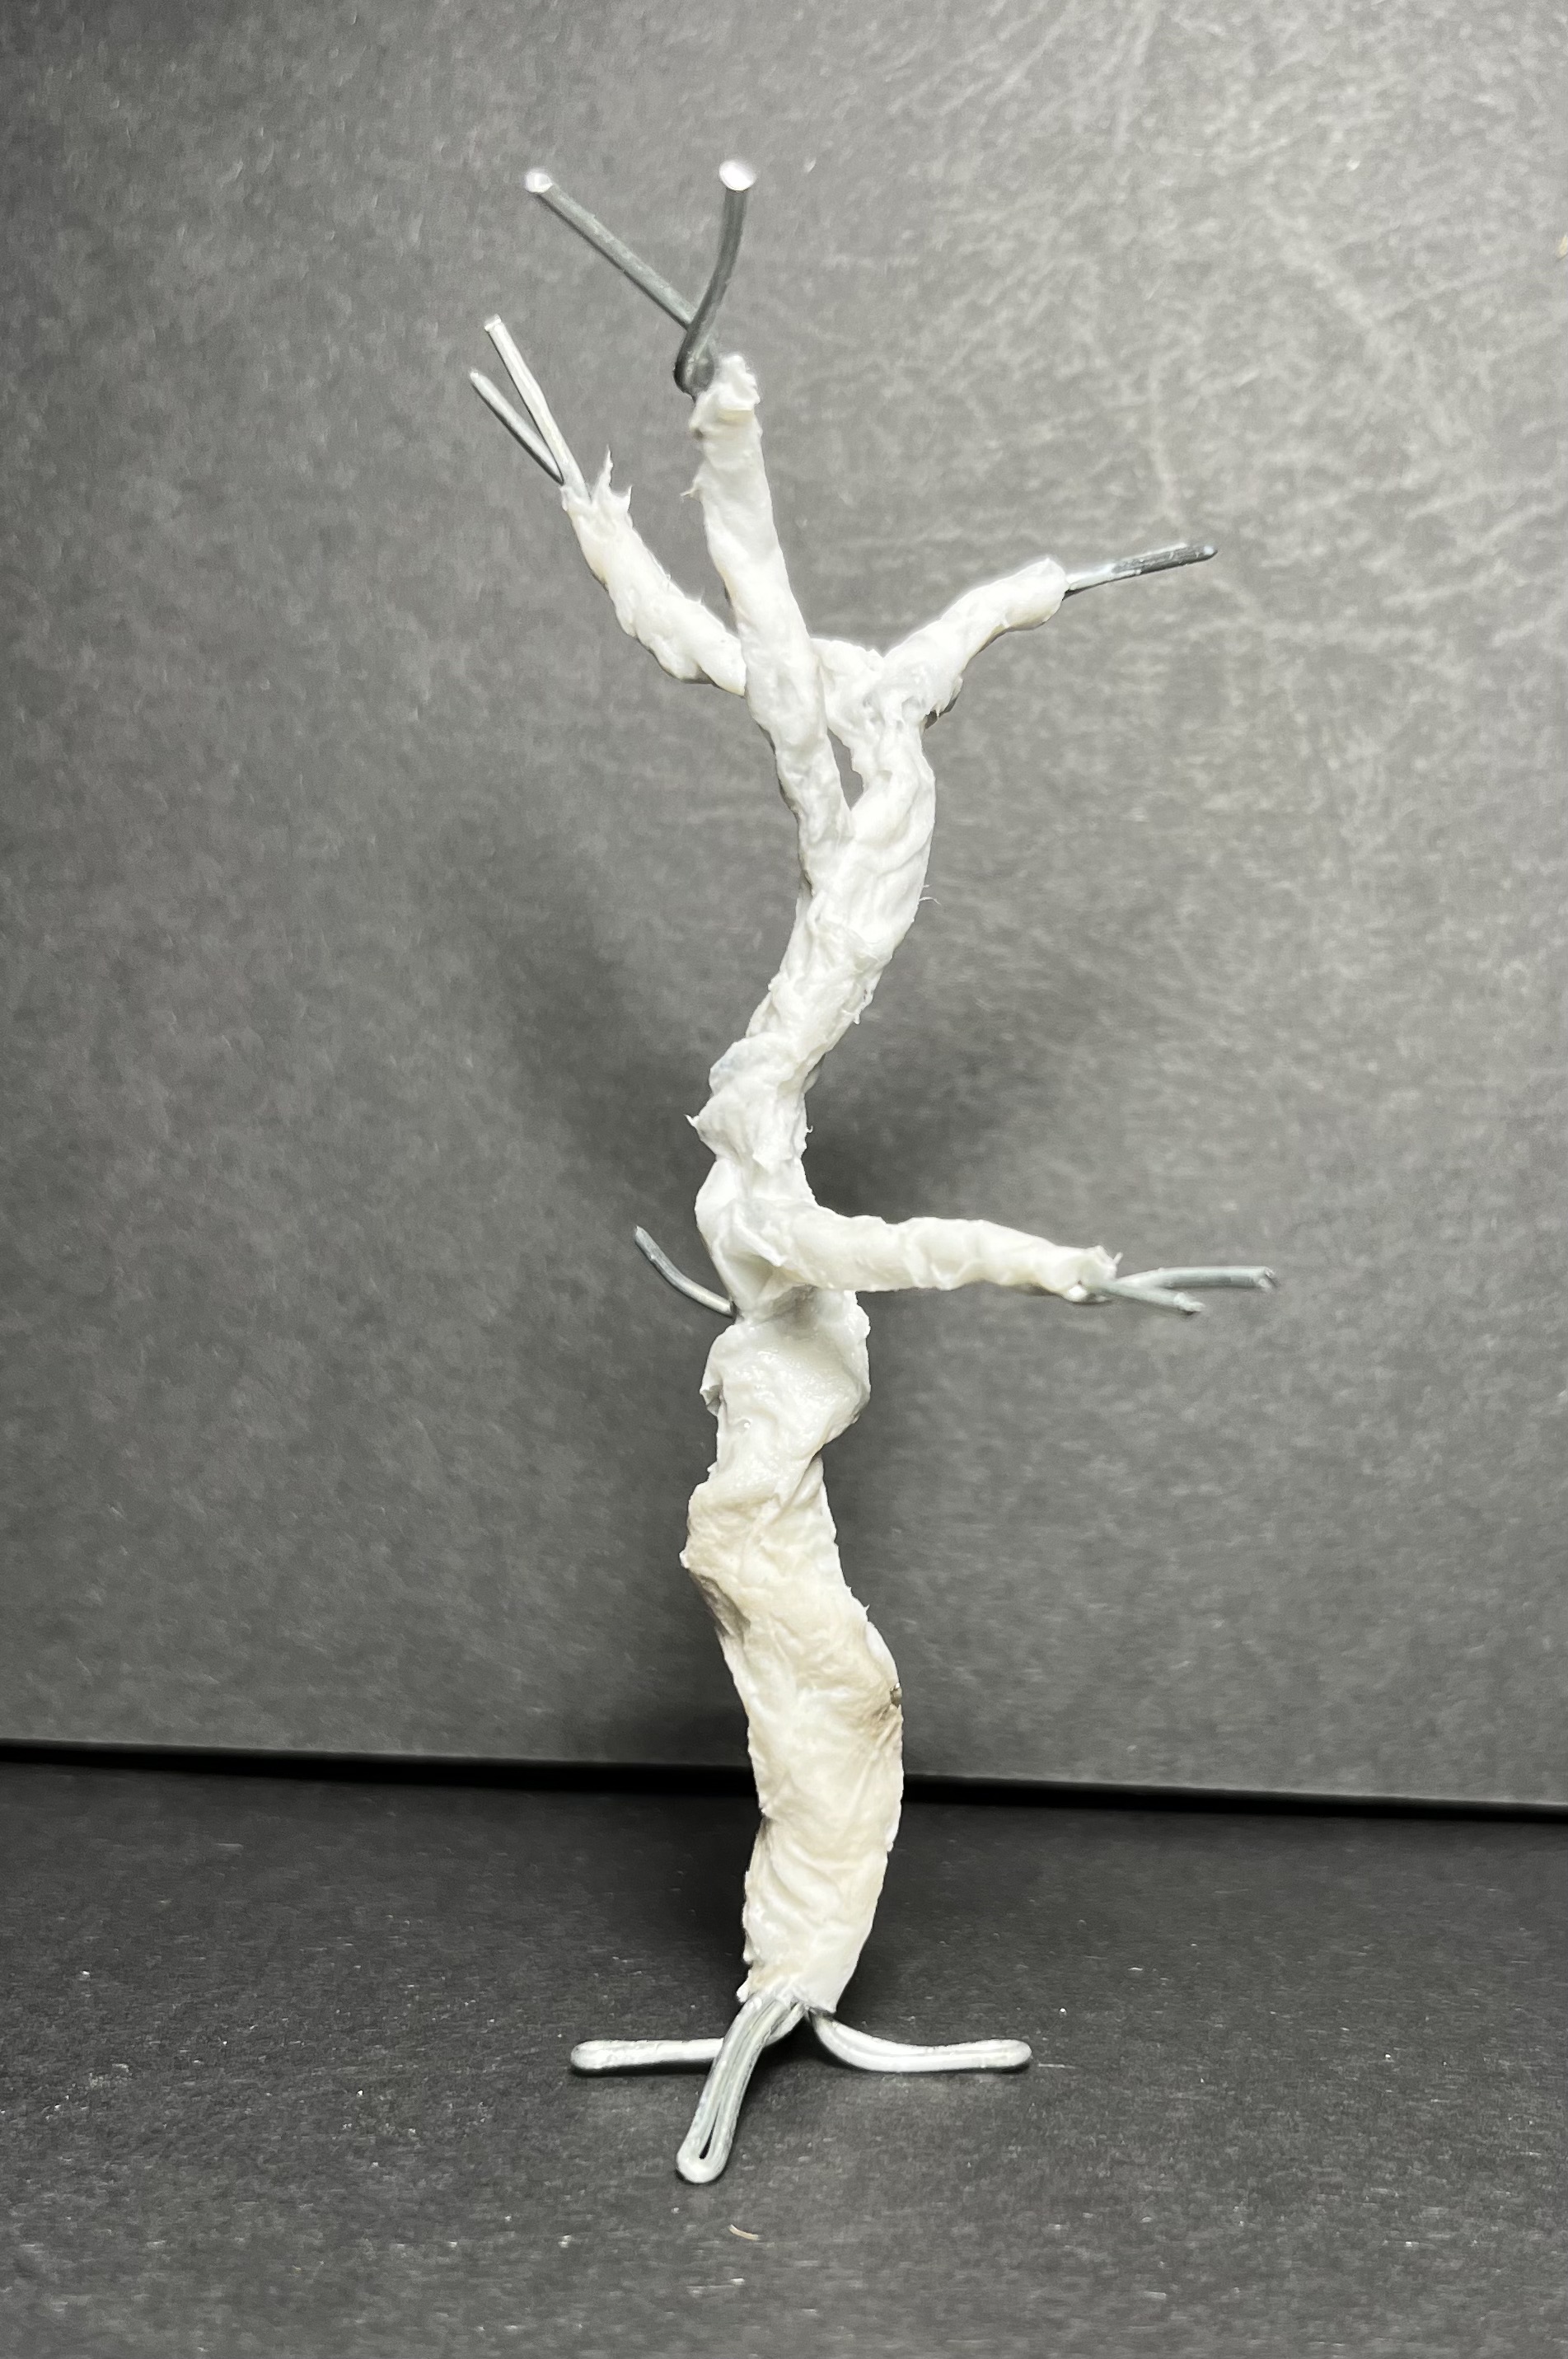
For this exercise I have used some 18 gauge (1.25mm diameter) tie wire, although 20 gauge wire is preferred - I just didn't have any to hand. I cut four pieces of wire between 200mm (8") 300mm (12") long and folded them in half.

Then holding the bent end of the wire in a pair of pliers about 12mm (half an inch) in from the end, I loosely twisted the two strands of wire together, leaving the open end in a fork of about 12mm.

Next I took one of the long pieces and one of the shorter pieces and holding both ends again about 12mm from the bottom and twisted the shorter piece around the larger one, leaving about 40mm (one and a half inches) bend out at an angle from the 'trunk'.

I continued to twist the other pieces around the trunk again leaving about 40mm bend out at an angle from the trunk. As these pieces are twisted together the trunk thicken and distorts the shape into gnarly trunk. I bent and twisted the branches as required.

I bent out the bottom pieces out at angles to the trunk to create the roots. At this point some lower branches were added by twisting shorter pieces of wire through the trunk. With a lighter gauge wire it is possible to add quite a few more branches if needed and I would normally put three of four more on than I have here, but it since this to a tutorial piece I will leave it at one extra.

The next step is to create the trunk over the wire. For this I use toilet paper and PVA glue. I coated the wire with PVA and begin wrapping the toilet paper around the wire. I kept wrapping the paper around, applying water thinned PVA as I went. As the paper built up and the trunk took shape.

I kept working up the tree and around the branches. Before the paper and PVA dries it is possible to etch some lines to give the appearance of bark, but I haven't done that here because I am happy enough with the wrinkled appearance. The paper and glue were left to dry.
Once dry the armature was then fixed to a base and the wire roots were covered with more toilet paper papier mâché.

Then the armature was painted. I start with a burn sienna, then drybrushed two or three lighter tones over top. With a little bit of ground texture around the base it's job done. Certainly this is not a quick process and it would be quicker to user a commercial product (although if you are reasonably organised, working just a couple of hours a night will see a pretty good number of armatures completed over a week), but making it yourself is hugely satisfying.

Now onto the conifers.
The Materials List
- Bamboo Skewers
- Coconut fibre hanging basket liner
- MDF bases
- Can of black spray paint
- A small amount of Sculpey
- Woodlands Scenic course turf, conifer, flock
- PVA glue
- Model paints - a couple of brown tones
- Ground covering
- 6mm x 3mm rare earth magnets


 |
| Now to the messy part as each tree has PVA applied. The glue is another important component in making these trees wargamer-proof, binding the coconut matting even more. I prefer to apply it by brush, but I suppose it could be dipped or spray adhesive could be used, although I have had variable results with the spray. Then sprinkle the flock over the glue and leave it overnight to dry. |


As we discussed at yesterday's game Mark, your deciduous trees are really very nice - but I think I like the latest versions even more. They really look very realistic.
ReplyDeleteI am really pleased with these. I may make some more in the future...will need them is I ever get the Russo-Swedish War armies sorted out.
DeleteWonderful tutorial, really interesting and very inspirational.
ReplyDeleteThanks. I particularly like the smaller trees.
DeleteSplendid! And a great how to article as well. Thanks for sharing this.
ReplyDeleteThanks and you are welcome.
DeleteIngenious and effective as always Mark. Lovely stuff.
ReplyDeleteand amazingly easy to make.
DeleteThaks for the tutorial, I think it's a good method and the results are very nice.
ReplyDeleteonce can never have enough trees as they say, and it's cool when even the trees are individual creations. 😁
No problem Stew. I agree you can't have too many trees...especially on a Civil War battlefield, although oddly the 26 tree stands that I made look quite sparse when the are set up on the table...I can see the need for some more at some point.
DeleteTerrific work Mark, they look very effective.
ReplyDeleteThanks Ray. I am quite chuffed with them.
DeleteSplendid work indeed Mark…
ReplyDeleteI like how you’ve made the Fir Trees…
All the best. Aly
Effective and relatively cheap...I got a good buy on the coconut matting ($5.00 marked down to $2.00)...grandma Strachan would be pleased.
DeleteThey look fabulous, the loo paper in pva is a new one to me and such an effective idea, I had been using milliput, a much more messy job. Also like the coconut matting effect. Good post.
ReplyDeleteThank you Norm. The matting does a good job of creating bulk.
Delete