So I have been making things again.
First up is a small piece I made to fill in while I waited for more figures to arrive. The basic inspiration was the pump and water trough in this fragment of the painting of Rezonville by Édouard Detaille.
I decided I didn't want to make such a tall pump and I wanted it to be a little less rustic that this one - more like something you might find in a town square. I made the trough and pump from various bits of plastic card and left over weapons from various plastic figure projects in the last year. The main part of the pump was made from a piece of plastic tubing. The cap was a literally the cap off the spare head of a War of the Roses figure. The spout and the handle were made of a left over medieval pike, bent as required. The base is two left over plastic bases with the pump and trough glued on. The whole base was then covered with Green Stuff and the flagstones were etched in. The water in the trough is the clear artists texture that I have mentioned in other posts. Here is the result.
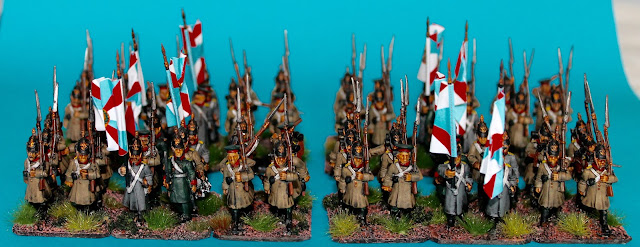
Second, in the last year or so I have been a convert to basing with grass tufts. I have bought various types of these in the last year from Silflor, Heki, Noch, Faller, Busch and Gamer's Grass. They seem such an extravagence, but in truth they aren't all that expensive, adding only a dollar or two to the overall cost of a unit, but there is something about this hobby that challenges me to make things and when I went to my friend's place one day and saw him with a battery operate fly zapper, I remembered seeing an article on Eric's "Shed Wars" blog about how to make a grass tuft maker (http://shedwars.blogspot.co.nz/2015/05/a-fly-swat-sieve-and-soldering-iron.html) and I decided I had to have a go.
So I purchased all the components: a fly zapper for $7.00, a stainless steel sieve for $2.00, an alligator clip for $1.25, a set of ten connectors (although I only used two) for 5.75 and a bit of Emerkit epoxy putty at around $0.50, giving an all it cost of $15.50. Following Eric's instructions (actually I didn't follow the instructions to the letter because I made a couple of safety enhancements) I put the whole thing together in about an hour.
The Zapper in its original form...
The only other item I needed was a metal plate. Fortunately just as I started thinking about this little project, I had a software vender I deal with at work came to visit from Japan and brought with him a gift of some sweet shortbreads for the staff in the office. These came packed in a tin, the lid of which was a perfect size. When the tin was emptied - which didn't take long - it came home with me.
And attached to thectin plate, ready for work.
My first attempts were not all that successful. The first thing I did wrong was use PVA glue. It proved to be too rigid. I soon corrected this by using some Woodlands Scenics "Foam Tack Glue" that is used to glue foliage to model trees, is latex based and much less rigid.
The second mistake was to use only the 3mm flock I had on hand. It was too short. I needed to use 6mm flock, but this proved a little more difficult. First I searched for a local supplier but to no avail. Then I found a UK supplier that sold 100g bags with two specific wargames colour mixes for mere £7.00 each. Two bags would make me many thousand tufts. Enthusiastically I added them to the shopping cart and whipped out the credit card...then whoa…what is that...£35.00 for freight! That is over $110 for two bags of flock! I quickly emptied my shopping cart. After I recovered from this shock I found US supplier of model railway supplies that sold bags that were a little smaller, but three bags and freight came to $50.00 and will still make several thousand (possibly tens of thousands) of tufts.
Some 3mm yellow/green tufts
Some dark green 3mm tufts
A single light green 6mm tuft
A selection of 6mm tufts of varying colours
So with those mistakes behind me I got started making tufts. All it takes is my fly zapper static charge dispenser, some grease proof paper (to apply the glue to) and the flock. Soon I had 3mm and 6mm tufts in several colours. I made small tufts, medium tufts, and large tufts. Tufts in “L” shapes, “S” shapes, “T” shapes and some truly odd shapes. I even made some mixed pieces - with 3mm and 6mm flock.
I have enough grass tufts now to base all my current projects, and enough raw materials to make tufts for projects for the next few years.


