Saturday 29 June 2019

War of 1812 Indian Lodges

For the upcoming War of 1812 game at our annual weekend away there were two more pieces of terrain I needed...these two lodges/wigwams for a Great Lakes Indian village.


Attentive readers will remember that I started these a little over a year ago. When the weekend away was postponed due to illness I put these on the back burner, but with the event now less than 30 days away I needed to get on and finish them.


So here they are, three small structures to represent a Great Lakes Indian village. I made a few pieces of clutter for this village - a couple of fire places, a stack of furs and a couple of pots. I may add a few more items of clutter before the game.

Monday 24 June 2019

War of 1812 Fortress

For an upcoming War of 1812 game (set in 1814) I need to represent Fort Erie on the table, from the land side. The fort is quite large and while it will play an important part of the game there are other important aspects to the scenario so I don’t want it to dominate the proceedings. Instead I have opted to represent it on one table edge with just one of the bastions, the gate and the ditch.

When I looked at the plans for Fort Erie the gate stood in the middle of two substantial stone barracks between two bastions. I didn’t want to go to the extent of building the barracks so I have had to employ some artistic license. My Fort Erie is going to have only a passing resemblance to reality.

This also needs to be a quick build so I opted to use foamboard as the material of choice. Luckily I have a bunch of this that I have scavenged from various redundant promotional boards created by the internal communications team at work – I am sure you all of you in corporate life know these teams...the people with no budget, but thankfully their  wasteful use of this material can be very useful to a resourceful wargamer.

Since the bastion needs to be of a height more than man-height I chose to use some 10mm board that I had on hand and decided to use four pieces laminated together. I quickly sketched the outline of an elongated pentagon on the PC and printed it out. The size was 160mm on each axis. I then taped the printout to the board and cut out two solid pieces for the base and two hollow pieces for the walls.


The various pieces were then glued together with PVA and when the glue was dry I sanded the outer sides to even out the irregularities of the cut.


I like to have a variety of textures on my models so I decided that the interior of the bastion would be braced by timber. This is probably not correct, but it will have great texture and at any rate Fort Erie was in poor repair in 1814 by all accounts so this could well represent some sort of repair. To construct this timbered effect I used my old standard – matchsticks.


Once all the glue was set I went about marking up the stonework of the outer walls. This was a relatively simple task of drawing the “stone blocks” with a ballpoint pen, pressing hard enough to make an impression between 0.5 and 1 mm deep in the foam.


In modern images of the fort, the tops of the bastion wall are grassed, so my assumption is that they were filled with rubble and earth, some of which would be grassed in 1814 and some would not. So to gain some texture on the top I glued some coarse sand. On the interior I glued some fine sand to give the base a bit of texture and cover up any cut marks on the foam board.


At the same time I made two wall pieces that will extend either side of the piece. I removed the cardboard surface from the foamboard and sketched the stonework into the surface. At the same time I made the gate from matchsticks.


The various pieces were then painted – undercoated in black first then presented in various tones of grey/brown and washed with a thin coat of Aly’s Brown Liquid. The internal area of the bastion was given a suitable dusty floor look and the tops of the walls were made earth with some grassed areas. The whole surface was then coated with a brushed on matte varnish to seal the paint and provide a bit more rigidity to the foam.


The next thing to build was the ditch and the drawbridge. This was a simply a layer of 5mm foam board under the bastion and walls and then two pieces of 5mm for the outer mound, all fixed to a base of 4.75mm MDF.


For simplicity the surface was covered with coarse sand drybrushed various tones of brown, green yellow and white over black to create the earth and grass effect.


The stone supports around the base of the drawbridge are again foamboard etched and painted and all of the timber work is matchsticks.

The final item was to build a platform on which a gun, made from barrels left over from the earlier project with the Victrix British artillery set, will sit. Once again 10mm foamboard was used for the platform.


And there it is ready for play in a few weeks time.

Sunday 23 June 2019

20th Light Dragoons

The week has been a disrupted one...disrupted by wedding anniversary and birthday celebrations that  have impacted on productivity. So much so that only this one unit, the 20th Light Dragoons, has been completed.


I chose this regiment because it was one of the longest serving light dragoons regiments to serve in the a Peninsula, starting its service in 1808 and ending service in 1813, although it did spend Some time during that period in Sicily. As usual the figures are Perry plastics.


These figures do not represent my entire productivity for the week. The other part of the week’s work has been a fairly large terrain piece that will be completed tomorrow and I will probably post something about it on Tuesday.

Sunday 16 June 2019

44th Regiment of Foot

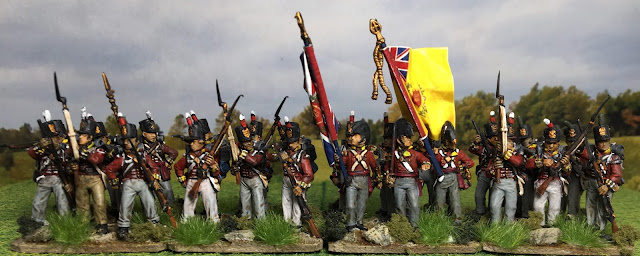
This week sees a return to the British Peninsular army with the completion of the 44th foot.


I have done this battalion in the firing line.


Also completed are eighteen figures for the 60th Rifles. I chose the 60th because three other players in our group all have the 95th! I would have avoided the rifles altogether had four figures had not come with the Perry British Infantry boxes. The six remaining command figures are yet to come, but won’t be ordered until August.


Friday 14 June 2019

British Napoleonic Flat Boat - Part 2

As promised previously here is the model of the flat boat complete with the water effect on the base.

Much of this was done last week, but the material goes on white (as below) and then air cures clear.


And that is all well and good in nice warm dry weather, which is far from the weather we have had here in this neck of the woods in the last seven days, so it has taken a bit longer that anticipated to post these image.


This model will be a little lonley for a while. The further two models intended for this group will not be ordered until late-July/early-August. In the meantime I have to move on to some more pressing projects.

Saturday 8 June 2019

British Napoleonic Flat Boat

I think that by nature most war gamers are magpies, attracted to the shiny things that flash across the pages of hobby magazines or on various digital platforms. I know that I am. 

A couple of years ago two shiny items caught my eye. The first was the dromedary troops from the Perry French in Egypt range and their model of the flatboats used by the British in the landings at Abukir Bay in that same campaign. These two items were the drivers for that rather large Egyptian campaign collection. With great effort I managed to resist the flatboats and made do with images printed onto card when we played the landing at Abukir Bay. But I knew it was only a matter of time before I would need the models, but I needed to find some sort of justification for the £42 per model expenditure (and a I knew it would not only be one boat). 

The justification came in two forms. First they could be used in the War of 1812. Second I had this idea of coastal operations in the Mediterranean and along the Spanish coast. So last month I ordered what would be the first of three boats.

The set is made up of three codes; the resin boat with six crew cast as part of the resin hull supplemented by another seven crew cast in metal; 20 seated infantrymen; a further 8 seated figures including, officers, ensigns, an NCO, a drummer and another 3 infantrymen. 


Taken from their boxes and laid  out there is an impressive number of components...


 That look even more impressive when painted, ready for assembly.


Finally all the components are assembled.


The last part to be completed on this model is the water effect on the base. I have actually completed this,  but the material is slow drying and in the cold a stormy weather affecting Auckland at present, it could be two or three days before it is set. I will make the completing of the base the subject of another post.

Thursday 6 June 2019

The Spanish Completed!

Smart readers will be wondering about a phantom parade that I erroneously posted yesterday. That particular text was the previous content of this post that somehow managed to be restored...that will teach me to simply press publish and not check the results! Less haste more speed my mother would probably have said. Anyway, here is the real post.

With these two units the Spanish army is completed.

First out of the uniform store is a unit from Eastern Spain, wearing British made sky blue jacket and pantaloons. With their yellow facings and round hats I think they look rather smart. The mix of coats over the shoulder and draped over packs gives some variety.


Second up is a fourth, belltop shako unit from northern Spain. Again the uniforms were British made and again I have given them an assortment of trouser colours.


The total figure count for the collection amounts to 529 foot figures, 30, mounted figures and 7 guns.

Will there be any more? Well there is nothing planned, but if the Perrys were to release some line cavalry, or some hussars, or anything really, I might be tempted.