Today we played our first game for the year - a Wars of the Roses game. The concept behind the game was originally posted here http://stracmark.blogspot.co.nz/2015/07/wars-of-roses-scenario-idea.html, but the actual rules for the game were as follows:
The Forces
Henry VII of Lancaster:
• One command base
• One messenger
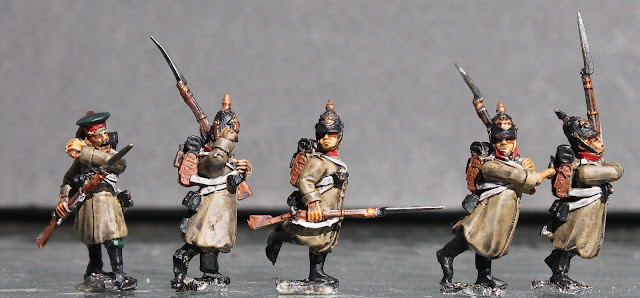
• One unit of three stands of mounted knights
Richard III of York:
• One command base
• One messenger
• One unit of three stands of mounted knights
Four Noble Retinues (Fauconburg, Talbot, Grey de Codnor, Audley) each of:
• One leader
• One unit of three stands of foot knights
• One unit of three stands of billmen
• Two units of three stands of archers.
Mercenaries (not assigned)
• Two units of three stands of Crossbowmen
• Two units of three stands of Handgunners
• One unit of three stands of Pikemen

The Terrain
The table contains six specific domains, each of which contains a village, farm or keep as a home base and each is about 1500mm apart. Each domain is has a logical boundary (stream, river, road, hedge row etc). The terrain is rolling with many hedged fields and a few woods.
Deployment
Before the game commences six black backed cards, each one representing Richard, Henry and the four nobles, are randomly placed face down, one each in one of the home bases. Seven mercenary cards (one for each of the units and two blanks) are placed face down on the table in their start locations. The mercenary cards must be placed at least 500mm away from any of the player cards.
At the beginning of the game the each player will draw a card from a second, blue backed, stack of Noble cards to determine which force they will command. All the noble cards on the table are then turned over and the units belonging to that command are deployed in place. All units deploy within 150mm of the limits of their home base.
Mercenary cards remain face down until a unit, leader or messenger comes within 200mm of the card, at which time the relevant unit is placed on the table.

Initiative
At the commencement of each turn Henry, Richard and any noble who has not declared allegiance will draw a card to determine the order of play. Once a noble has joined a faction, they will move with that faction.
Declaring Allegiance
Once the rival standards are raised, i.e once Richard and Henry are deployed, the players declare their loyalty.
And so the game develops, until one side concedes defeat or if Richard or Henry are captured or killed.
Mercenaries that are approached by a unit, a messenger or noble (within 200mm) will roll 1xD6 and a score of 4,5,6 will see them join the approaching noble or messenger, otherwise will remain neutral this turn. Mercenary units will not move or fight until they have joined a faction. If all nobles join one of the Royals, all of the mercenaries will immediately move to join the other Royal.
Treachery
There is no requirement for players to remain aligned to one side for any length of time, and may change sides at will. Similarly no one needs to respect a noble's neutrality and neutral nobles can be attacked by any faction. Neutral mercenaries, however cannot be attacked.
Home Base Defence
Home bases will have an intrinsic defence value equivalent to one unit of peasants (3 stands). The peasants are free to move from building to building within the home base. They are armed with bows but fight at a lower rate than retinue troops.
So how did our game go?
Richard and Henry appeared at diagonally opposite ends of the table and only Grey stood with Henry. To make matters worse for Henry, of the three mercenary cards near him, two were blanks! Henry and Grey decided to try to defend the line of the river.

Richard, with Talbot on the right, Audley on the left and Fauconberg in the centre, gathered up the remaining four mercenary units and marched up the table.
Audley, finding no opposition in front of him (baring a large flock of sheep - that caused a fair amount of comment) crossed the river easily, but then found it difficult to manoeuvre around the woods on the opposite bank. Talbot secured the high hill above the river and then edged forward to engage Grey.

Henry, hoping he could break through and get at Richard, who kept his mounted knights behind the lines, charged at Fauconberg with his mounted knights, driving back two units of archers, but took such heavy losses that he could push no further. The knights withdrew across the river.

Talbot pushed across the river and drove back Grey with some accurate archery, while Henry called "Rally on me!" and led the mounted knights into Audley's leading unit of archers, routing them. But again Henry's knights ran out if steam.

However, the shock of the attack of Henry's attack must have shaken Fauconberg's resolve because he changed sides, attacking Richard and Talbot. Richard's knights easily beat Fauconberg's mercenaries back and Talbot, having forced Grey back, turned back to face the new threat.

Fauconberg's treachery soon turned against him as his command was slowly taken apart by Talbot and a unit of German crossbowmen. After a couple of turns his command collapsed and fled the field.
Richard then turned his attention to Henry and Grey. The writing was on the wall, and although Grey checked Talbot, Audley was largely untouched and pressed forward, destroying Henry's only mercenary unit.
A final fight between Henry and Richard, led to Henry's demise. For his treachery Fauconberg was found hanging from a tree, while Grey, bound to a chair, watched with alarm as Richard and Talbot heated pokers in the fire.