I finished painting the French in Egypt 6-horse limber set, for use with the horse artillery set, earlier this week, but since it’s basing is quite involved I put that task off to the weekend. I have included the process of the basing in this post.
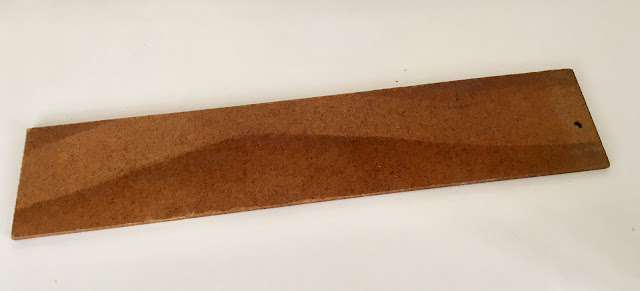
For this model (since it needs to be large to accommodate the gun, limber and six horses) the base is 250mm long and 50mm wide. This is a little too long for my usual cardboard bases which would warp and since many of the connecting “ropes” are quite fragile connections the model could damage easily. So instead of cardboard I chose to use a piece of 3mm hardboard that I had in the garage. I cut this to size by scoring both sides, then simply snapping the required piece off. I then rasped and sanded the edges.
The next step was to roughly position and mark location of the various pieces on the base.

The material I use on the surface of the French in Egypt bases is an artist’s moulding paste, usually used to build up texture on canvas, applied with a palette knife. You can buy this as a smooth or textured finish.

I prefer the smooth type to which I add sand - in this way I can control the depth of texture by varying the coarseness or volume of sand. For this base I have used a very fine sand. My technique is to roughly apply the paste to the surface, then add a pinch of fine sand and mix it in. I keep adding pinches of sand until I get the texture I want. Then I spread it over the area of the base.


I started with area around the limber and as far forward as the middle pair of horses spreading the paste to a thickness of between 1 and 1.5mm and smoothing it off with a palette knife, wetting the blade of the knife as required to get a smooth finish.

I then pushed the horses bases into the surface of the pasre until they are hard against the base and with the pallet knife and a cocktail stick spread some of the paste over the top of the base. When the paste sets, it will hold the models to the base without the need for glue. I then carefully positioned the limber model, pressing the wheels slightly into the paste and gluing the ropes to the limber model.

I then positioned the wheel horses and glued the ropes to the limber.

I then mixed up some more paste and applied it over the rest of the base. Before fitting the gun I used a cocktail stick to mark some wheel ruts for the limber in the paste.

I then placed the gun, again with the wheels slightly set in the paste, again etching some wheel ruts. I then added a few small stones to represent rocks, pressing them into the paste and adjusting with a cocktail stick as required.
The next phase is pretty much like the first. Mix and spread the paste. Fix the horses and glue the ropes to the limber for the middle pair of horses. Then fix the lead horses

Then to my horror I noted that the base had warped! I didn't think that the water soluable paste would penetrate the hardboard surface. I should have painted the surface first. Then I figured that the paste would contract as it set and should level out. So I set it down on a flat surface with some weight in the edges to hold it flat and left over night to fully set. To my relief the next day confirmed my belief and when I removed the weights the base sat flat on the table.
I then painted the whole surface with a sand colour from a local paint manufacturer.

When the base coat was dry I applied a wash of thinned down Games Workshop Seraphim Sepia to the whole surface and let it dry.
The ropes for the lead horses are not supplied with the kit so while the wash dried I made some by taking a strand of 22 gauge wire about 500mm in length and folding it in half. I put the folded end in the chuck of a battery drill, held the other end in a pair of pliers and pulled the trigger on the drill until the two strands of wire are wound tight. I then cut the “rope” to length. Because the horses are standing I want the ropes to be slack, so I bent them to sag appropriately, then painted them, before gluing them in place and touching up the paintwork where they glued on.
I then lightly dry-brushed the surface with an off-white shade to tone down the wash a little and to provide some highlights.

The final step was to add a few dry grass tufts from Gamer's Grass.


Beautiful display, Mark!
ReplyDeleteThanks Jonathan. It is a great set to work with. I still have a four-horse limber in the lead pile to complete...maybe next weekend.
DeleteWhat a wonderful basing Mark...Beautiful figures need beautiful bases!
ReplyDeleteThank you Phil. It is a simple but effective technique.
DeleteThis is a great looking model Mark - I have always admired your basing technique - I might try to replicate it for my RCW armoured car
ReplyDeleteIf you follow the technique the moulding paste is available at Stationery Warehouse, the finest sand comes from a West Coast beach (and will justify my visit to Piha during the summer) and for the base paint I used a test pot from the Resene "Woodsman" range called Uluru - a really thin paint that is perfect for this application.
DeleteVery nice Mark.
ReplyDeleteI particularly like the colour of the drivers coats.
All the best. Aly
P.S. I bet it weighs a bit...
Thanks Aly. The coat colour is a blend of GW Flash Gitz Yellow and Skrag Brown. I keep a reference mix on my palette and often use it as a base colour when painting large areas of yellow.
DeleteYou are right, it is rather weighty - not quite as heavy as the dismounted camels mind you. I think it will be one of those stands that will have the instructions to "pick it up by the base!"
Limber teams when done well, as yours is, are such dramatic pieces. I am sure yours will feature proudly for many games. Thanks for the wire to rope tip. I may have need of some of that technique soon.
ReplyDeleteThe finished product is only as good at the manufactured product and in this case the model is superb. When you wind the "rope" experiment a bit - it is a fine line between under- and over-winding the wire.
DeleteA lovely display piece that you can game with! Nice basing technique, Imine is similar but always good to see other people's wip.
ReplyDeleteBest Iain
Thanks Iain. I can see some other applications for that basing technique - wall rendering for the inevitable Middle Eastern buildings for one.
DeleteNice looking limber and the idea of the twisted wire is a good one. It was a nasty moment when that hardboard warped, but at least you were able to resolve it with some quick thinking.
ReplyDeleteYes it was quite a shock when I saw it warp...and it was no small warp either - about 3mm. I was considerably relieved when I took thecweightvoff on Sunday morning and there was no warp.
Delete