Friday, 16 October 2020

Paraguayan Line Cavalry

 Yesterday saw the completion of the first of three Paraguayan line cavalry units.

There is a good variety of figures for the Paraguayan troopers with a command set of three figures and then three separate sets - couched lance, lance upright and then lance sort of in between - and each set has three different figures. This combined with three different horse types means that no one figure is repeated in the unit.


The bright red coats really make these guys pop. The other regiments may be given a little more variety with the occasional white shirt and different coloured trousers.

Wednesday, 7 October 2020

Brazilian Cavalry

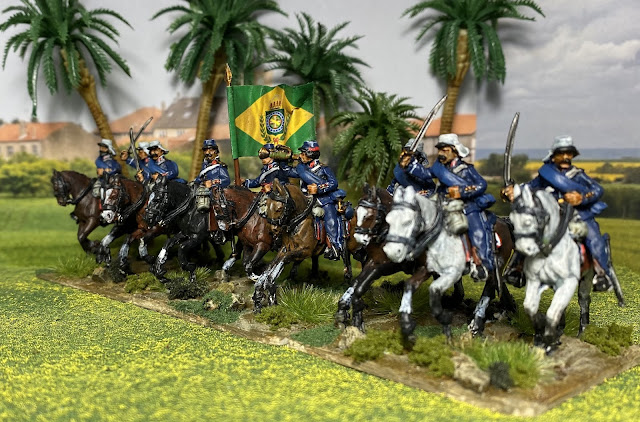
Today saw the completion of the first of the Great Paraguayan War Cavalry.

This one is a regiment of Brazilian line cavalry.


A second line regiment and a regiment of lancers will join them before the project is completed.

Next on the production line is the first of five Paraguayan cavalry units.

Saturday, 3 October 2020

Dark Ages Game

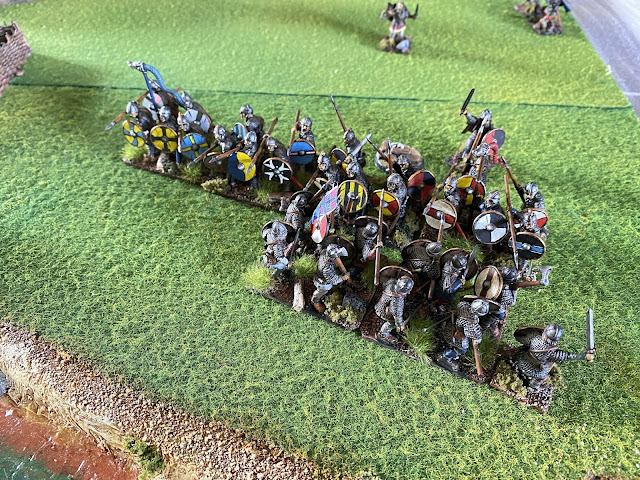
Yesterday I played another solo game and again I wanted to use armies that had not seen the table for a while. In this instance I chose to use troops that have never been on the table, the Dark Ages Saxons and Vikings that I had painted some years ago. I had even written a simplified set of rules, based around my standard rules concepts.

I decided to play a small game with the Vikings attacking a Saxon village. I set up a small 1200mm x 1200mm table with a village in the centre of table. 

The Saxons could have up to three units in the village at the start of the game. First they roll 1xD6 and if the score is “6” then there will be three units, otherwise there will be just two. Once the number of units is determined they will roll 1xD6 for each unit and a 1,2 or 3 will mean the unit is spearmen, while a 4,5 or 6 will mean it is bowmen (only two units can be of the same type). All other troops arrive by dice roll to arrive on the table.

The Vikings will arrive at positions V1-6 and each turn will require a score of 4+ to bring on each of the following: 2 leaders, 2 musicians, 4 units of Hirdsmen, 2 of spearmen and one of bowmen. Once arrival is determined the units will roll again to determine which of the arrival points they appear at. 

The Saxons will arrive at positions S1-6 and each turn will require a score of 4+ to bring on each of the following: 2 leaders, 2 musicians, 4 units of Thegns,  1 or 2 of spearmen and one of bowmen. Once arrival is determined the units will roll again to determine which of the arrival points they appear at. 

The Vikings win if they push the defending units out of the village and then hold it for two turns or if they destroy half of the Saxon force.

So how did the game run? Well a bit chaotically is the simple answer. In their initial set up the Saxons managed to get a unit of spearmen and one of bows to occupy the village. The Vikings got the most figures on the table first, but both sides struggled with motivation and neither were keen to engage. 

Action started on the eastern side of the table with a unit of Hirdsmen boldly crossing the river. They were promptly attacked by a unit of Thegns and the Vikings were pushed back but not broken. The Hirdsmen came back and supported by a unit of spearmen pushed back disrupting two units of Thegns.


Meanwhile the bulk of the Vikings arrived on the southwestern quadrant (except for the unit of spearmen that moved to support the western Hirdsmen), but they struggled with motivation and the spearmen from the village, seeking to catch the Vikings before they could get organised, advanced to meet them, while the bowmen from the village came forward and rained arrows on the Vikings near the ford.


East of the village, the situation for the Saxons worsened and one of the units of Thegns was destroyed and other pushed back and disrupted.

Then suddenly the Vikings in the west moved rapidly and attacked the Saxon spearmen from the village. The spearmen fought bravely and threw back the first attack, but when a unit of Hirdsmen hit them in the front and a spear unit struck their flank, the Saxons were destroyed and the victorious Vikings fell on the rear of a unit of Saxon Thegns who promptly routed into the spears of another unit of Hirdsmen and were destroyed.


At last the much delayed northeastern Saxon wing, consisting of two units of Thegns and some bowmen, came forward. At first they pushed some Vikings back, but when the Vikings counterattacked, the Saxons came off the worst.


By now the village was vacant and more than half of the Saxon units had broken. The battle was ended and the Vikings looted the village.

The simplified rules worked OK, but needs a few tweaks.


Friday, 2 October 2020

A Little Parade.

 Last night saw the completion of the sixth battalion of Paraguayan infantry. This is the last infantry unit in the lead pile for a while.


And now for a parade of the Great Paraguayan War armies so far.

Six battalions of Paraguayan infantry.

Eight battalions of Argentine infantry

Two Brazilian battalions


Next up is the first of the cavalry for the Paraguayan War.

Sunday, 27 September 2020

National Guard Battalion ‘San Nicolas’

When reading through the Terry Hooker book on the Paraguayan War I spotted the description of the Argentine National Guard Battalion ‘San Nicolas’. The uniform consisted of a lead grey coat, with sky blue collar and cuffs, sky blue trousers with a white stripe, a blue blanket roll and a kepi with a white cover. This variant of an otherwise blue or khaki uniform was too tempting.


This represents the eighth Argentine battalion and the last of this current batch of Argentine units, although as new figures are released in this range I am sure the army will expand.

And speaking of expansions, just as the ground beneath of the lead pike was beginning to show through the first of three parcels of Paraguayan War cavalry (plus a box of Civil War plastic cavalry) appeared on the doorstep. It took a mere 15 days from placement of order to delivery which is pretty impressive in these crazy days of COVID disrupted supply lines.


There are another 15 little black boxes like those above are still to arrive, hopefully during this next week.


Saturday, 26 September 2020

Napoleonic Wargame

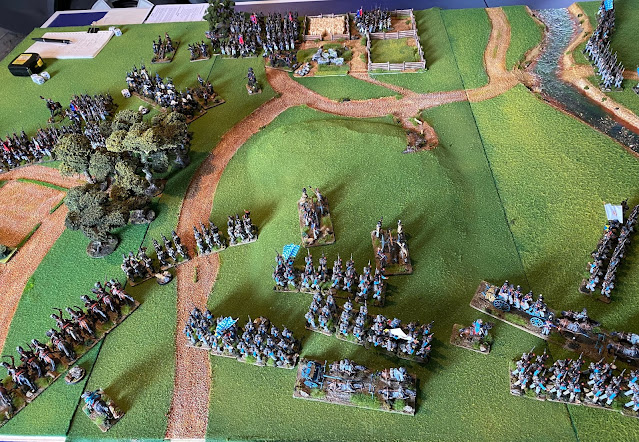
With gaming activity at its lowest for many years and a low probability of any games before another few weeks, I decided go run a small solo game. Now I haven’t played a solo game in 25 years, maybe more, so this would have to be a bit of an experiment. I also wanted to make use of the terrain boards that I made earlier in the year.

I had intended that this was going to be a First Carlist War game, but when I went to the storage to get the Carlist figures out, they were at the bottom of the stack and I didn’t feel like taking everything out of the cupboard to get to them so I changed the game to the Napoleonic period and what could be better than the 1813 Bavarians, that have never seen the outside if their boxes since I painted them last year, against the French.

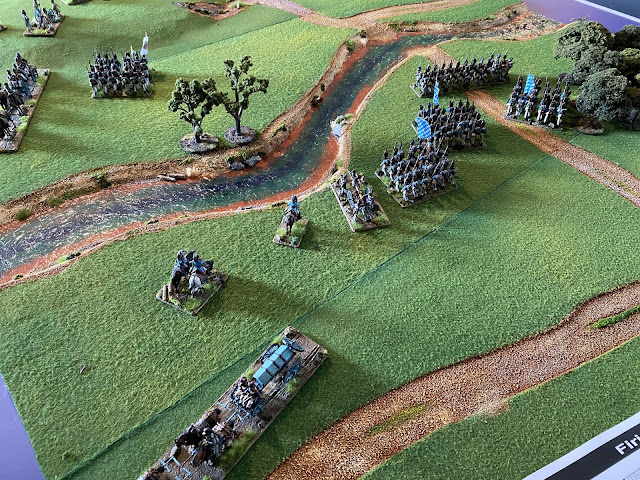
So I set up a table 2400mmx1200mm (8’x4’) with a broad stream running across it. The scenario would be that a Bavarian force would be charged with intercepting a French force retreating after Leipzig. The French force would have to brush the Bavarians aside and cross the stream. The stream would be passable at all points, but artillery could only cross at the ford.

Deployment would be random dice roll. The Bavarians would have three options on one side of the table while the French would have two on the opposite side. The Bavarians would be on from turn 1, but the French would have to dice to determine which turn they come on, with the exception of a cavalry brigade that would be on in zone 1 from turn 1.


The Forces

French

  • Cavalry Brigade - 2 hussar regiments and a horse battery
  • First Brigade - 7 battalions and a regimental gun
  • Second Brigade - 5 battalions, a regiment gun and a field battery

Bavarian 

  • Cavalry Brigade - 2 cheveauleger regiments and a horse battery
  • First Brigade - 2 small light battalions, 2 line infantry and 2 militia battalions and a field battery
  • Second Brigade - 1 light battalion, 2 line infantry and 2 militia battalions and a field battery

The Initial deployment 

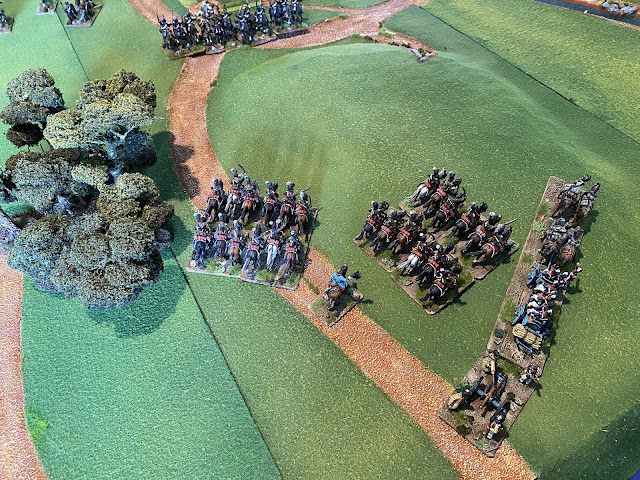
The Bavarians deployed first. The First Brigade and the cavalry both rolled 5s and the Second Brigade rolled a 2. So a gap lay between the two wings. The French Hussars deployed in zone 2.


Turn one

The French won the initiative roll and the cavalry brigade moved forward to face the Bavarian First Brigade. The horse artillery dashed forward and deployed ready to fire with the 9th Hussars to the left while the 5th Hussars dashed forward on the right and deployed at the foot of the hill.

Widely split the Bavarians could either consolidate and defend the river crossing or defend with some of their force and attack with the rest attack on two fronts. They chose the latter holding the right with the second brigade, while the first, supported by the cavalry would try to spoil the French deployment. The two battalions of the 4th line regiment pressed forward, forming a double line amongst the hedges. The 5th light battalion formed to the right of the line regiment while the 6th light occupied the wood. The two militia battalions remained to the rear in column so as not to mask the battery.

Meanwhile the two regiments of chevaulegers and the horse battery moved up onto the hill. The Second Brigade moved to cover the ford while the 2/6th battalion crossed the stream to form a link with the other brigades.

The action stared on the Bavarian left with the battery opening on the 9th Hussars. Three hits were scored followed by three saves!

Turn Two

The French retained the initiative and managed to roll to bring on their First Brigade, a big brigade consisting of the 48th Regiment and the Joseph Napoleon Regiment, seven battalions and couple of regimental guns. When they rolled for the arrival point they arrived in Zone 1, directly opposite the Bavarian First Brigade.

With the infantry on the field the cavalry felt free to try to take the hill and the 5th Hussars moved forward deployed across the back edge of the hill, a risky position with the enemy cavalry so close while the 9th Hussars took position behind them. The horse battery opened on the Bavarian chevauleger regiment scoring three hits, none of which were saved. 

Now that the French infantry had arrived the Bavarian found that their position was poor. They could not form up properly amongst the hedges and were in serious danger of being overrun. The battery was badly positioned although it did manage to cause a casualty on the 1/Joseph Napoleon battalion.

The Bavarian cavalry was also in a tricky position having taken those three casualties it was a risk of being driven off (in my rules units can take up to three casualties an still be in good order, which allows them to pretty much do as the player wants, but once they get to 4 casualties order starts to breakdown and they are likely to not do as the player wishes and in some situations will rout or quit the field). So rather than risk being shot at again the Bavarian chevaulegers charged. By chance the Hussars had advanced so close that they could not counter charge, but they at least had the advantage of being uphill. In the ensuing melee the disadvantaged French troopers managed to score 4 combat points to the Bavarian 2…causing the Bavarians to rout and, because the difference was two or more, giving the French the option breakthrough onto any target within normal move range they chose to take on the second unit of chevaulegers and broke it too, so much that it ran straight off the table, never to be seen again. Hooray for the 5th Hussars!!! But now they were well forward of their lines and disordered. They needed to rally before they could act again.


Turn Three

The Bavarian stole the initiative

The remaining cavalry regiment rallied from rout but needed to spend a whole turn doing nothing to recover, while the horse battery blasted the 5th Hussars, but even at canister range failed to score a hit.

The Bavarian First Brigade decided that their position was untenable and moved to join the Second Brigade across the stream. Leaving the 1/4th and the 5th Light in the front line to face the French infantry the rest of the brigade moved to the left. The 6th light, in the woods opened on the 5th Hussars and scored one casualty. Meanwhile the Second Brigade began to form up on the edge of the stream.

The French Second Brigade failed to arrive, but the First Brigade got a Quick Time activation which allowed them to storm forward into musket range of the Bavarians. However, the French columns possessed little firepower and scored only a single casualty from the four battalions that fired. The 5th Hussars retired to reform while the 9th came forward to cover the withdrawal.


Turn Four

The Bavarians retained the initiative and luckily the Bavarian First Brigade got a double time activation, which allowed them to move all of the line and militia infantry away, leaving the two small light battalions to cover the retreat. The Second Brigade meanwhile secured the stream edge. The Bavarian horse battery and the field battery of the Second Brigade opened on the 9th Hussars, scoring 4 casualties, disrupting the Hussars.

In the French turn the Second Brigade, consisting of 5 battalions of the 33rd Regiment, arrived in zone 2.

The hussar brigade rolled poorly for activation and the 9th regiment, with it commander out of control range, decided that they had had enough and quit the field.

The French First Brigade attacked the Bavarian light infantry, but the Bavarians were able to evade and the French infantry found themselves in an awkward a position as the Bavarians had been amongst the hedges. The regimental guns fired ineffectually at the Bavarian Militia, while the horse battery fired at the Bavarian 1st light battalion across the stream, causing a casualty.


Turn Five

The Bavarians retain the initiative, which was just as well as if the French had taken it they would have been able to get amongst the rear of the retreating columns of the First Brigade.  By luck the Bavarian First Brigade again got a double time activation which allowed them to put good distance between them and the French First Brigade. The remaining chevaulegers regiment deployed to cover the retreat while the horse battery and the field battery opened fire on the 4/33rd battalion causing slight casualties.

The French 48th regiment was badly tangled in the hedges while the two battalions of the Joseph Napoleon regiment occupied the wood. The 5th Hussars reformed behind the infantry, while the 33rd Regiment turned towards the river, supported by the horse battery that inflicted two casualties on the leading militia battalion of the Bavarian Second Brigade.

Turn Six

The Bavarians still retain the initiative, but it suddenly occurs to them that the attempt to retreat across the stream was doomed, because the guns could only cross at the ford and the French Second Brigade was going to block that very soon. A defence of the hill was now a necessity and luckily they again got a double time activation. The 4th regiment turned back and formed a line on the left, with the 5th Light next to them, then the batteries and on the right was the 6th light. The two battalions of militia formed to the rear.

The chevaulegers, its job done turned and retreated while the 2/6th battalion from Second Brigade that was preparing to fall back across the stream of the took position to protect the extreme right of First Brigade.

Both French brigades achieved quick time activations which meant that 1/48th could rush forward and form line to pour fire into the retreating Bavarian cavalry causing heavy losses. At the same time the two battalions of the Joseph Napoleon Regiment advanced out of the woods and opened on the 5th light battalion inflicting losses. The French artillery concentrated on the 6th light severely damaging it too.

The 33rd Regiment meanwhile was struggling to pass through the fields on their front.


Turn Seven

Again the Bavarians retain the initiative, but fail to take a real advantage of it. The initiative rolls were poor, so bad in fact that the chevaulegers quit the field and the battalions on the hill only just held on.  The guns blasted the 1/Joseph Napoleon Battalion causing enough casualties to disrupt it. The 5th Light infantry, not in the best shape itself scored lucky hits on the 3/Joseph Napoleon leaving it too in poor shape. Meanqwhile the 2/6th Battalion advanced to threatened the flank of the French 33rd regiment in the hope of disturbing urs advance against Second Brigade.

The French First Brigade scored badly on activation and 1/Joseph Napoleon decided that enough was enough and quit the field. The 1/48th advanced into range of the Bavarian 1/4th and opened fire causing enough casualties on the Bavarians to severely disrupt them. The 3/Joseph Napoleon fired at the 5th light and there were five hits, four of which were saved.

The 2/33rd cleared the farm and opened on the Bavarian Militia causing two casualties. Two other battalions of the 33rd also began to clear the fields while two remained within the fields.


Turn Eight

Again the Bavarians cling on to the initiative and the First Brigade, severely damaged as it is now. The First Brigade just passes its activation and holds ground. The 1/4th opens fire on the 1/48 but score only a single casualty. The rest of the Bavarians on the hill do damage to infantry on their front, but there are still four untouched battalions to the rear.

The 2/6th battalion opens on the flank of 1/33rd and scores six hits, but the lucky 1/33rd saves three.

In the French turn the 1/48 moves to the attack, advancing on the 1/4th Bavarian while the rest of the brigade close up. In the fight that follows the 1/4th fails to damage the French battalion, but the French shake the Bavarian infantry and when they close for the fight the Bavarians disperse. Other units of the First Brigade also do damage and on a short space of time the 5th and 6th Light battalions are in a serious situation

Fearing a flank attack 1/33rd the 5th Hussars attempt to move to a position from where they could counterattack, but they roll badly for their activation and are tardy, unable to get close enough to countercharge if needed. But the 33rd is coming up fast. The 2/33rd fires again at the Bavarian militia across the river, disrupting it. The 1/33rd fires on the 1st Light, scores 5 hits, but the lights save 4!! The artillery opens on the  1/6th that had also crossed the stream and causes 5 hits, of which 4 are saved.


Turn Nine

The Bavarians retain the initiative and only just pass their activation. The 2/4th fill the gap left by 1/4th but their musketry is pitiful scoring only one hit. The 5th Light and the field battery on the hill fire at 2/48th and score 5 hits, but 3 are saved. The 6th light and the horse battery fire on 5/48th but score no hits!!!

In the Second Brigade the militia lining the stream fail their activation and are dispersed. The second militia battalion steps forward to fill the space and opens an ineffective fire.  The 2/6th fires into the flank of the 1/33rd again, supported by the Second Brigade’s field battery and is severely disrupted. The 1st Light battalion lends is weight to the fire and scores three hits all of which are saved.

At the French turn comes around the game is at a critical point. The 5th Hussars charge the now shaken 6th Light. At the same time the 4/48th charges the disrupted 5th Light and the 1/48th attacks the 2/4th. In the resulting combats the 6th Light is destroyed by the hussars who breakthrough onto a militia unit behind which is in turn routed. The 4/48th destroys the 5th light and then wheels onto the flank of the Bavarian horse battery whose gunners re driven off. Only the 1/48th has an adverse result, pushed back from an equal fight with 2/4th

In the Second Brigade the 1/33rd had had enough and routed, but there are three untouched battalions in the brigade. Two of which open on the 2/6th causing 5 hits, four of which are saved…this unit I blessed with good fortune for after four turns of combat it carries only two casualties.

But fortune is not so good for the First Bavarian Brigade, forced to do a brigade morale test because four of its seven units are destroyed, shaken or disrupted. It fails the test and the brigade quits the field. At this point the Bavarian commanders have struck their tents and are on their way back to Munich. 

The game is ended.


I have enjoyed my return to solo gaming.