For the Samurai Invasion of Korea game I wanted the terrain to be spectacular. Part of the spectacle that I envisaged was to cover between a quarter and a third of the table in mountains through which three narrow valleys would wind. These valleys would be packed with a village, a stream, paddy fields small woodlots and bamboo groves, all carefully designed to channel players through an area that was perfect for guerrillas to lurk.
The first thing I needed to do was to decide just how to represent the mountains. Putting something under the cloth just wasn’t going to cut it because it just wouldn’t have the impact I wanted. So I would have to make something that would sit on top of the cloth and it would have to be modular and have a use beyond this game.
I needed to figure out how to make the modules and then I remembered this post in the Shed Wars blog from back in 2014. Now Eric’s construction was robust but likely to be too heavy to be carted around and would require a workshop to which I do not have access. I needed to adapt the design so that I could create it with a simple set of tools and using the same 250mm x 250mm squares of 3mm MDF from a local craft store that I have used for a variety projects recently.
After a bit of design work on the computer I came up with a template that I could easily use to cut the MDF with a jigsaw. There were to be two basic pieces: end pieces that were set at 90 degrees, curves if you like, and straight pieces. Into that template I incorporated a feature that would prevent the modules from separating or drifting during play and that was to embed rare earth magnets into the sides of the pieces to hold them together.
So over the 2020-2021 Christmas break I made use of my new template and setup and cut out six pieces, four ends and two straight pieces. The end pieces were to be the proof of concept.
 |
| The MDF components for an end piece, the holes in the sides are where the magnets will be located. |
The pieces were easily assembled using a short piece of 25x25mm finished timber to reinforce the joint.
 |
| The basic structure |
 |
| The two pieces together, held in place by rare earth magnets. |
The next thing to do was to fill the space with polystyrene, but rather than just fill the whole space I just cut and laminated strips. This allowed me to use the polystyrene more economically. The first part of this process was rough, just looking to ensure that the edges of the template were covered and the basic shape was defined.
 |
| The two pieces held together with their magnets. |
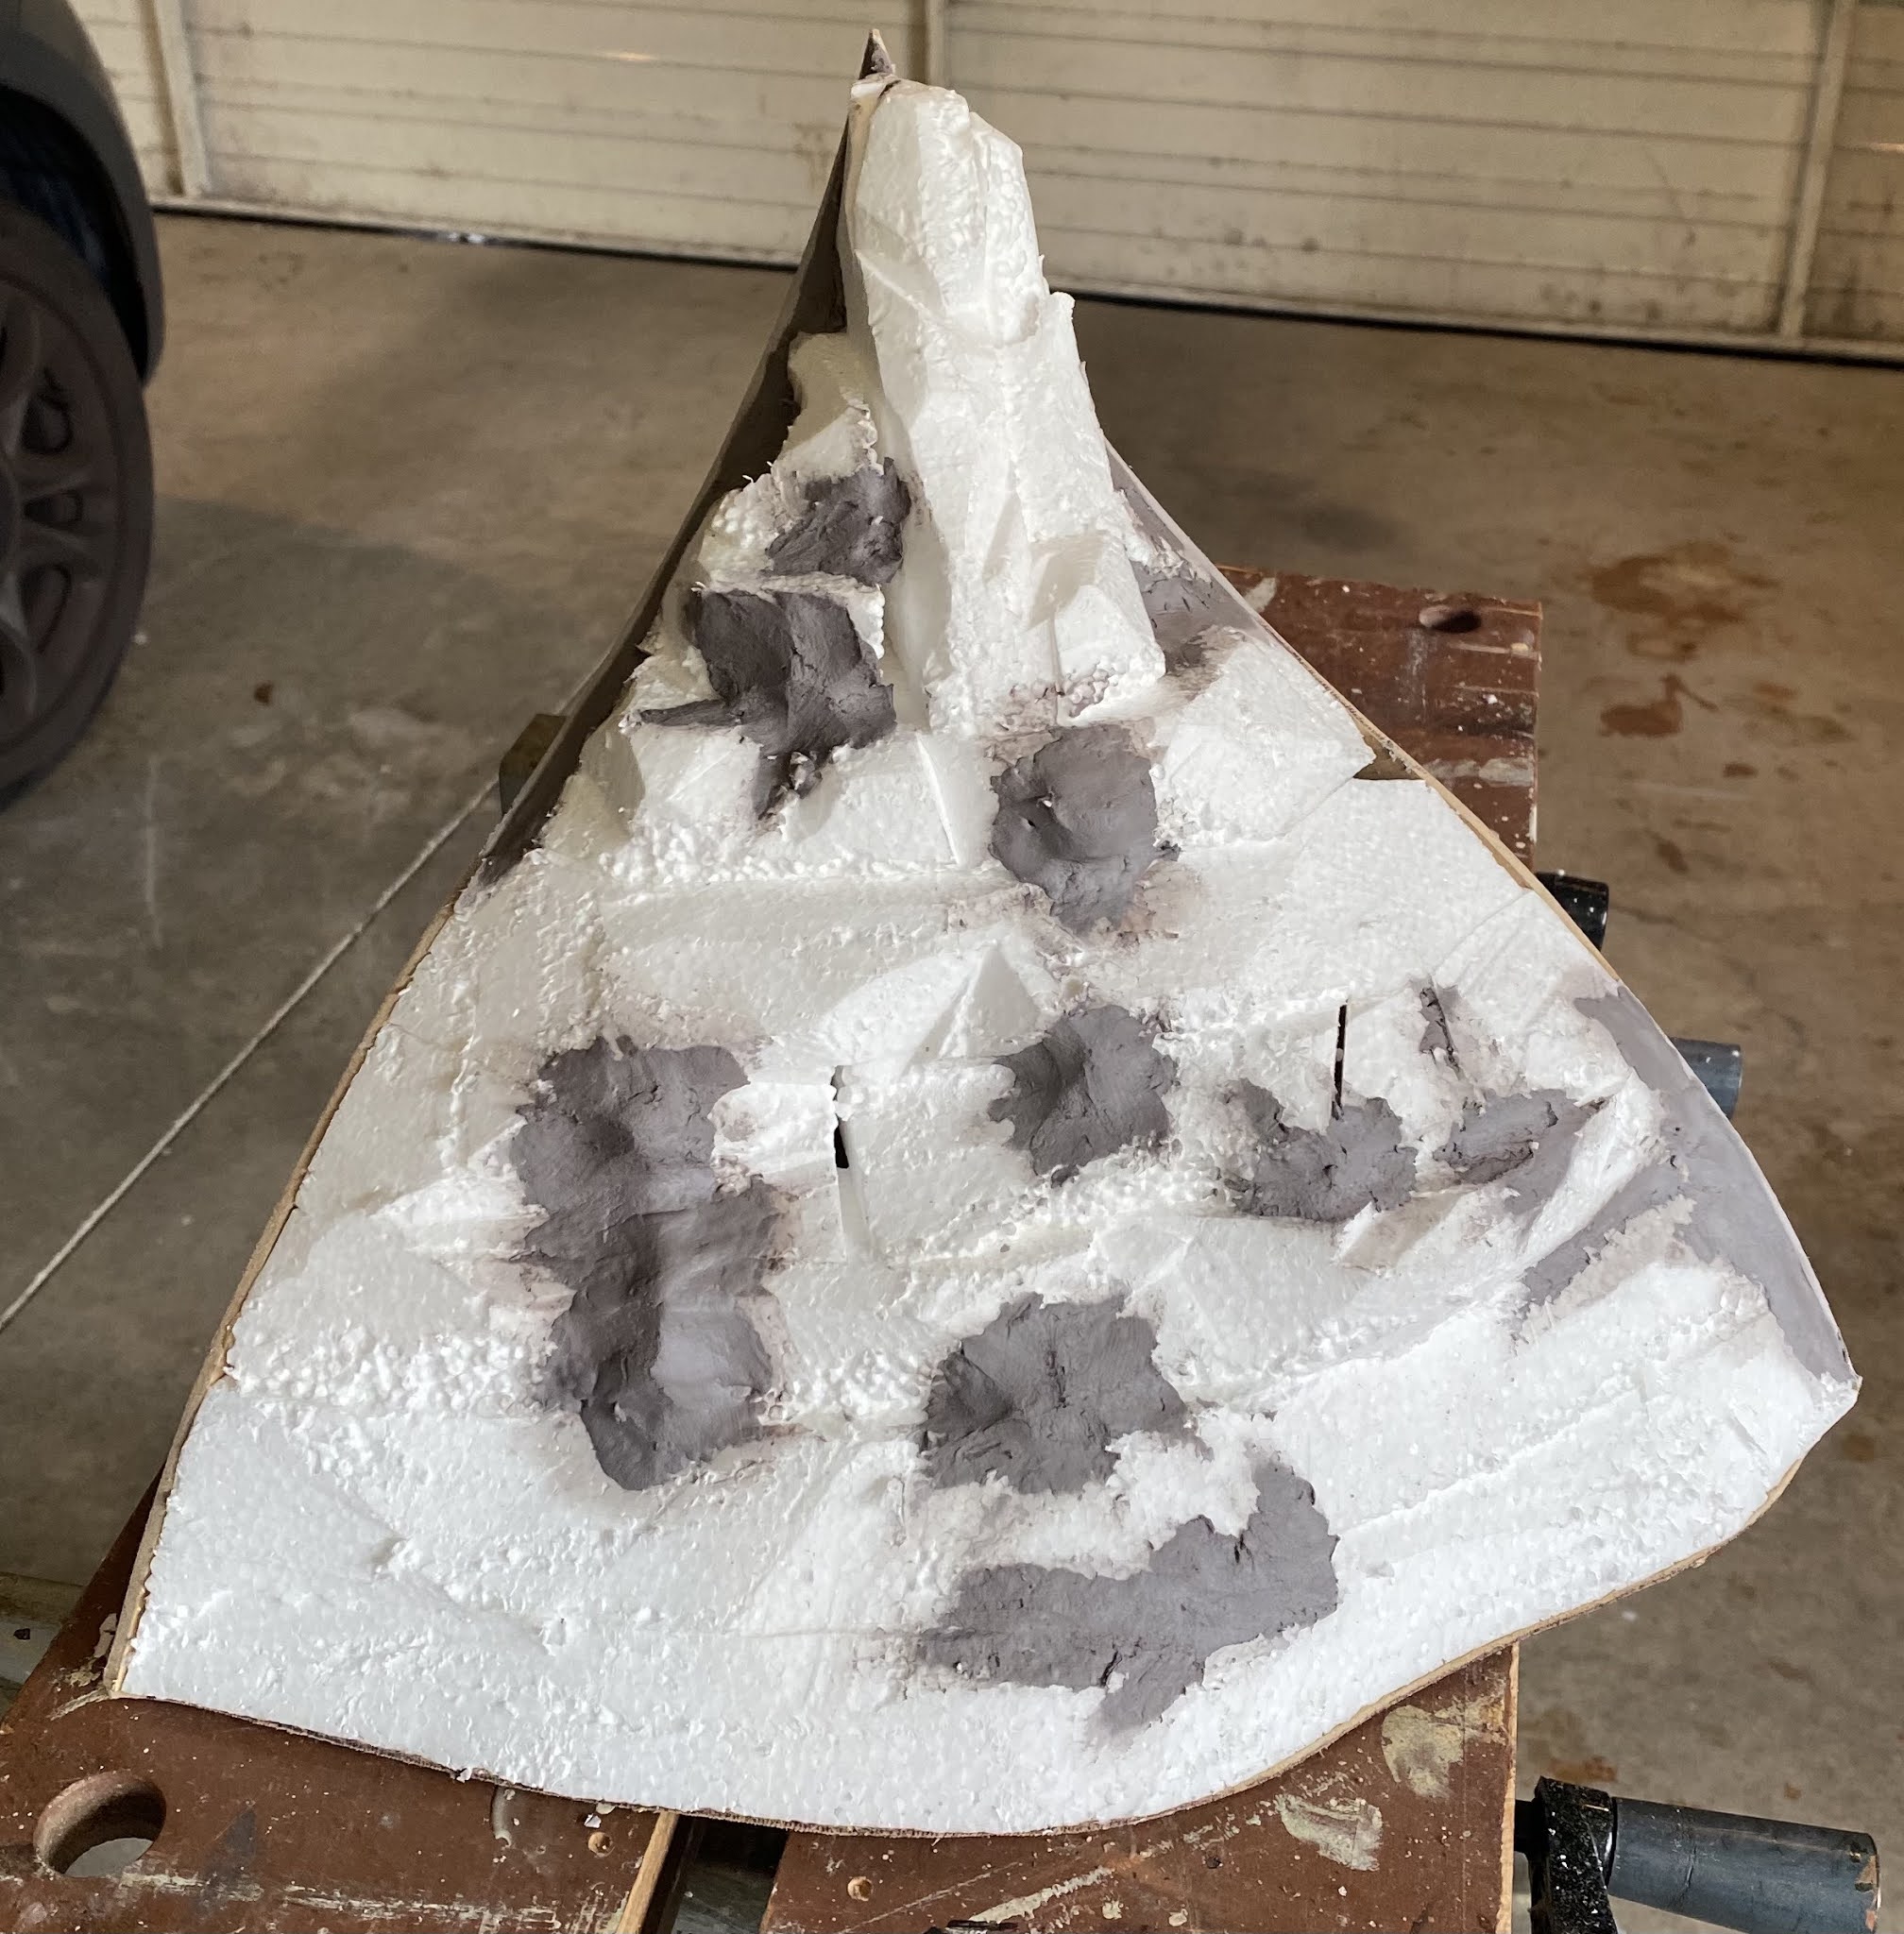
The polystyrene was then carved, making sure that the edges conformed to the curves of the MDF. The carving didn’t have to be precise, just the basic shape, and where gaps appeared on the edges they were finished with filler.
 |
| The carved item that her indoors refers to at the Pavlova (or merengue cake) |
 |
| Again the two pieces joined with magnets |
With the basic forms created I needed to create the final texturing and for this I chose to use two tried and tested techniques. The first involved coating the surface with PVA glue onto which toilet paper is applied, and while the glue is still wet the surface is stippled with an old paint brush so that the surface wrinkles and distorts. Additional glue and paper is applied to accentuate the wrinkling. When painted this will give the effect of a rock face, or eroded earth, and creates quite a durable surface. The second technique used is the application of coarse sand and road gravel to represent rock slides or broken earth areas.
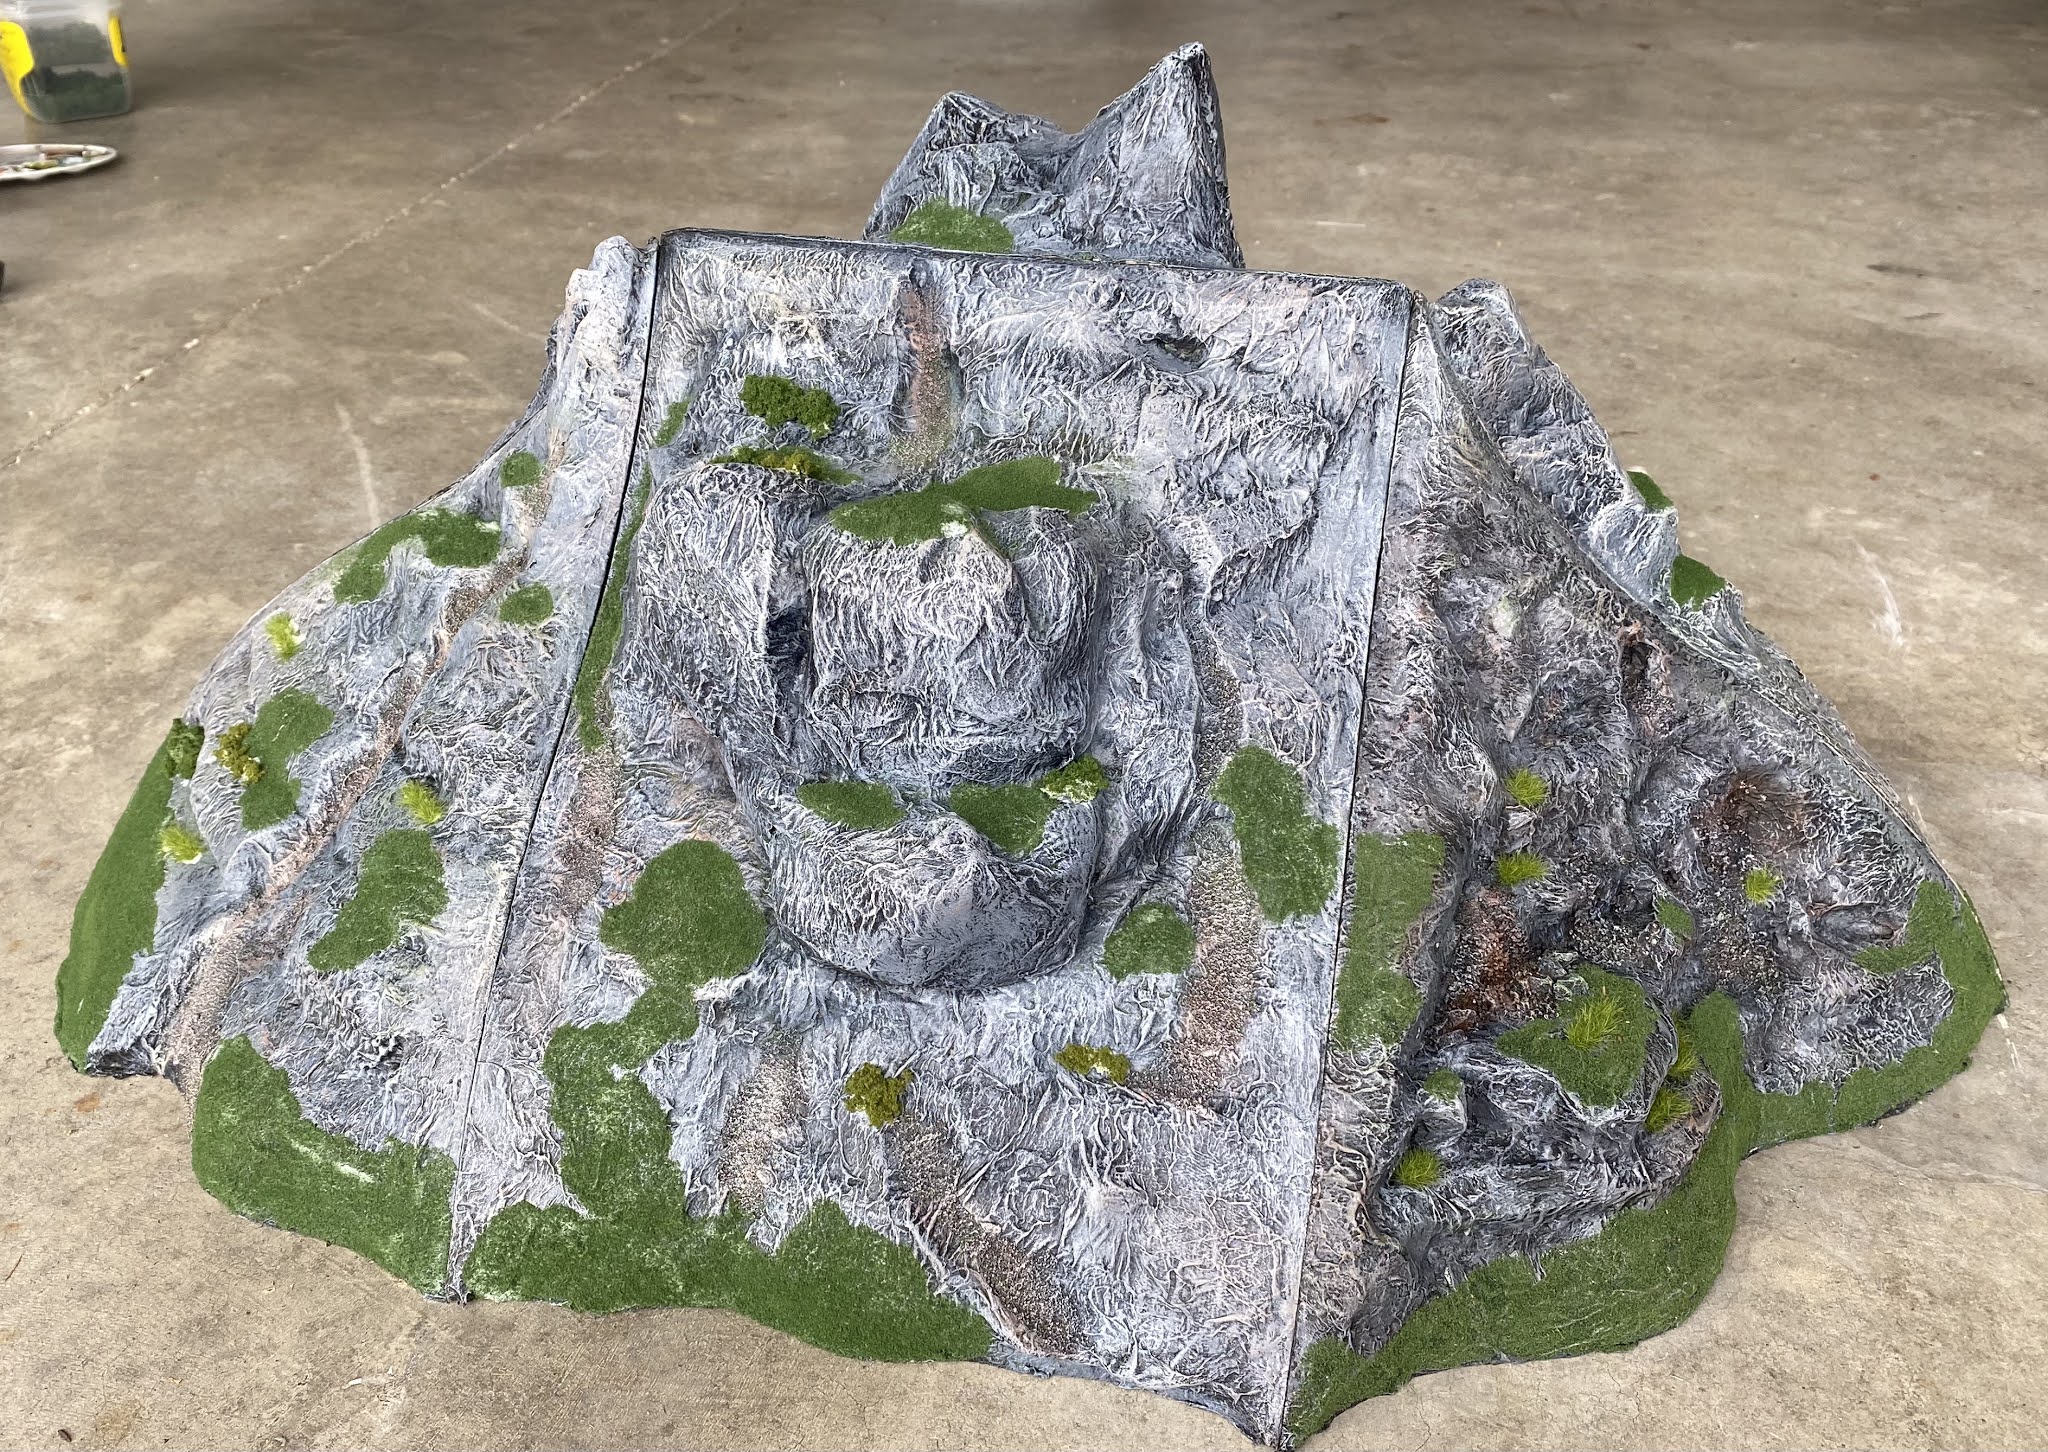
But having completed this work I wasn’t happy with the still step like appearance and went back and filled in many of the ‘steps’ with some air dry clay. When the clay was dry I applied toilet paper to provide a consistent appearance. Then I painted the pieces black then various tones of gray with a dusting of Burnt Sienna and green for additional tone.
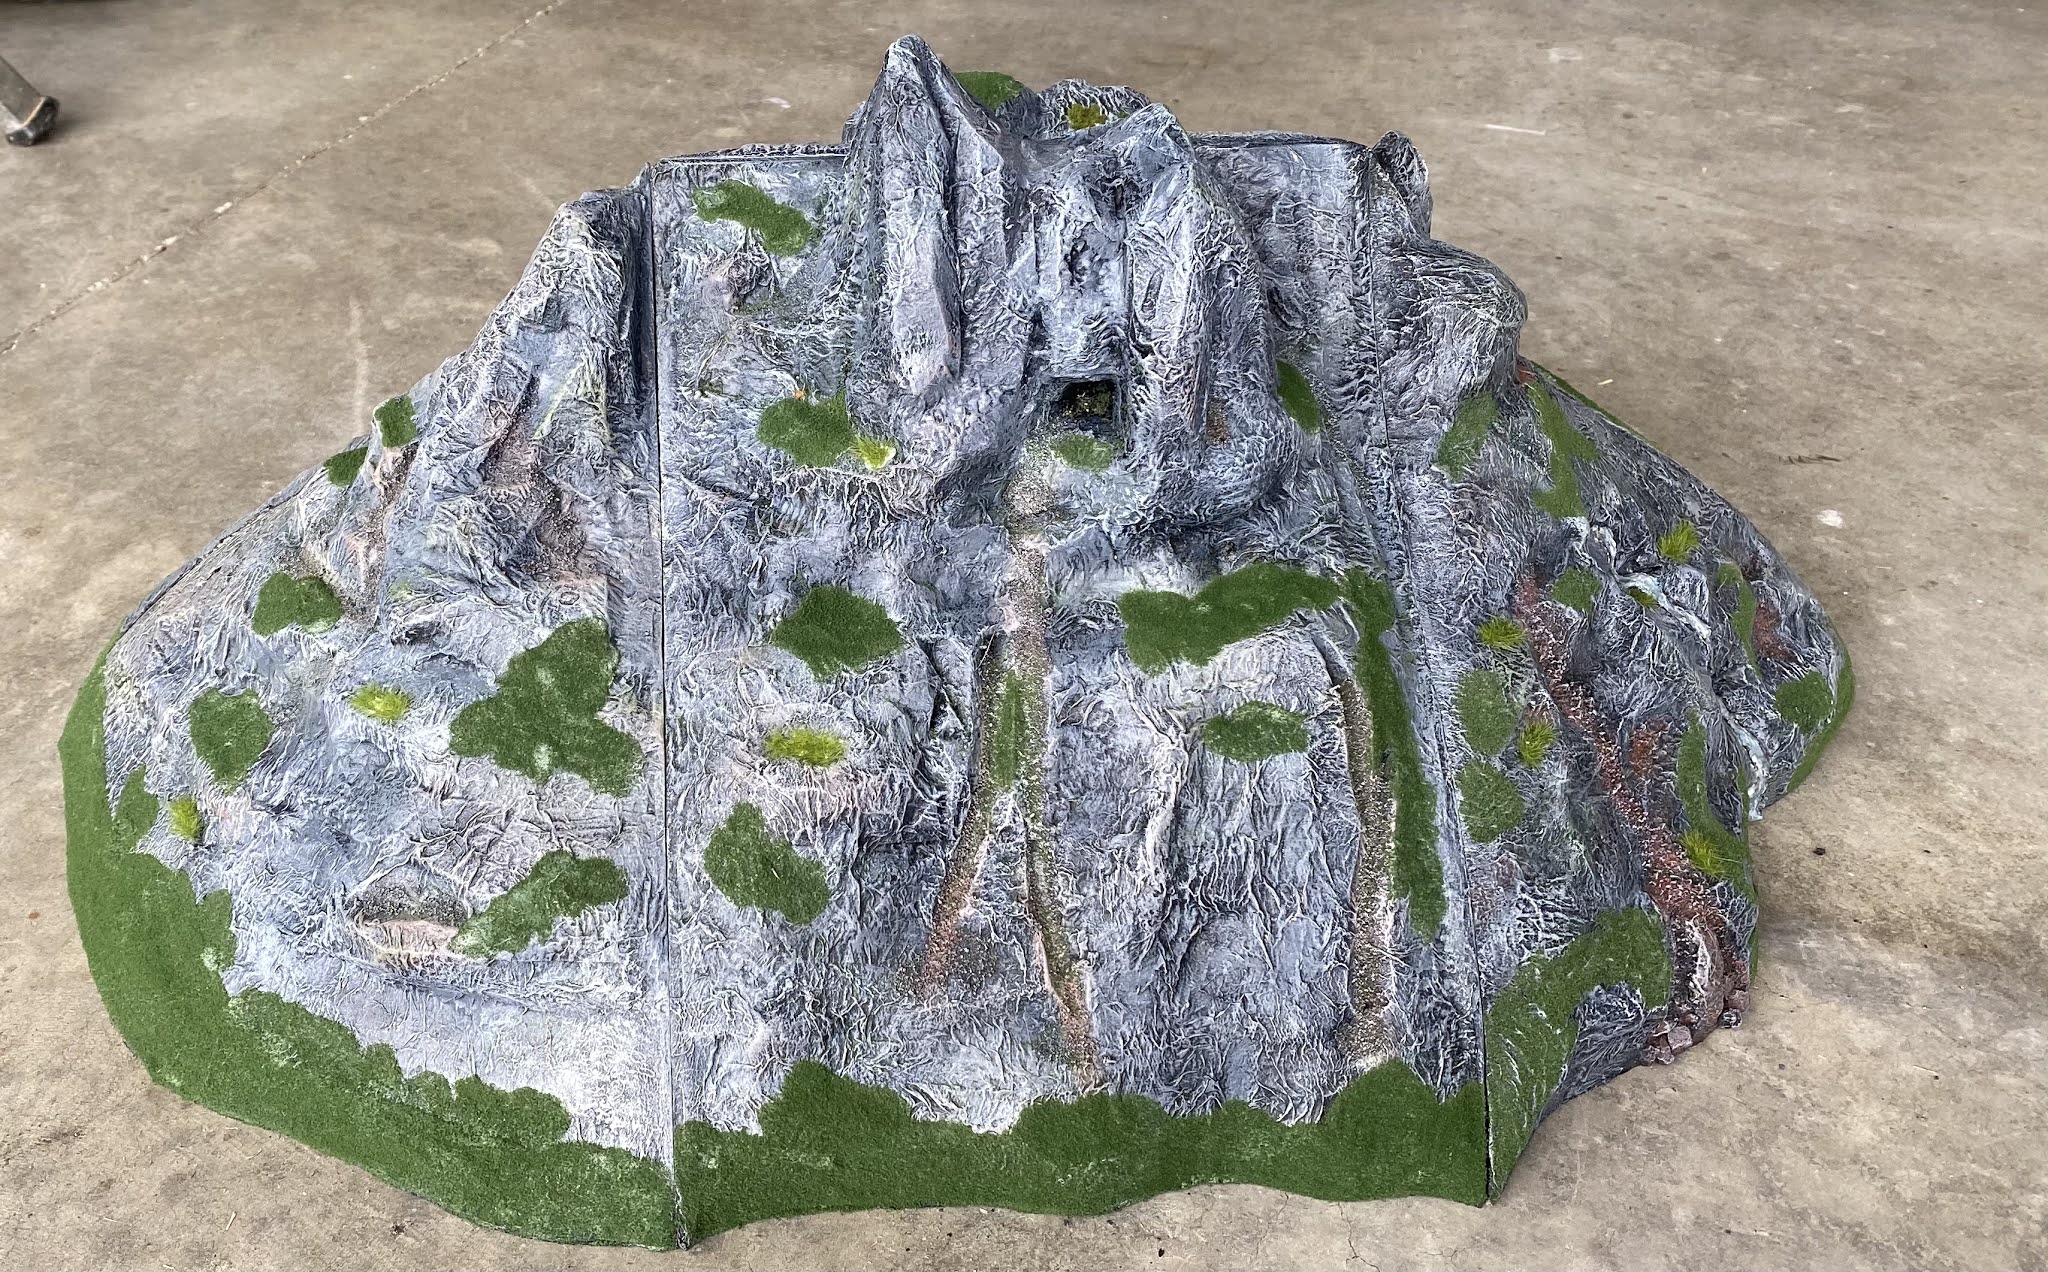
Next I applied some flock and grass tufts. The lower image has a bamboo grove tho cover the place where a waterfall tumbles down the face of one of the pieces.
With the concept proven I noted a few points for improvement and prepared to work on one a week for the next ten weeks to complete what was needed. But my enthusiasm got the better of me and I finished the first six in the time I had off work over Christmas and made the rest in short order, completing them all before the end of February.
Some of the other pieces in various stages of construction...
And the finished sections.


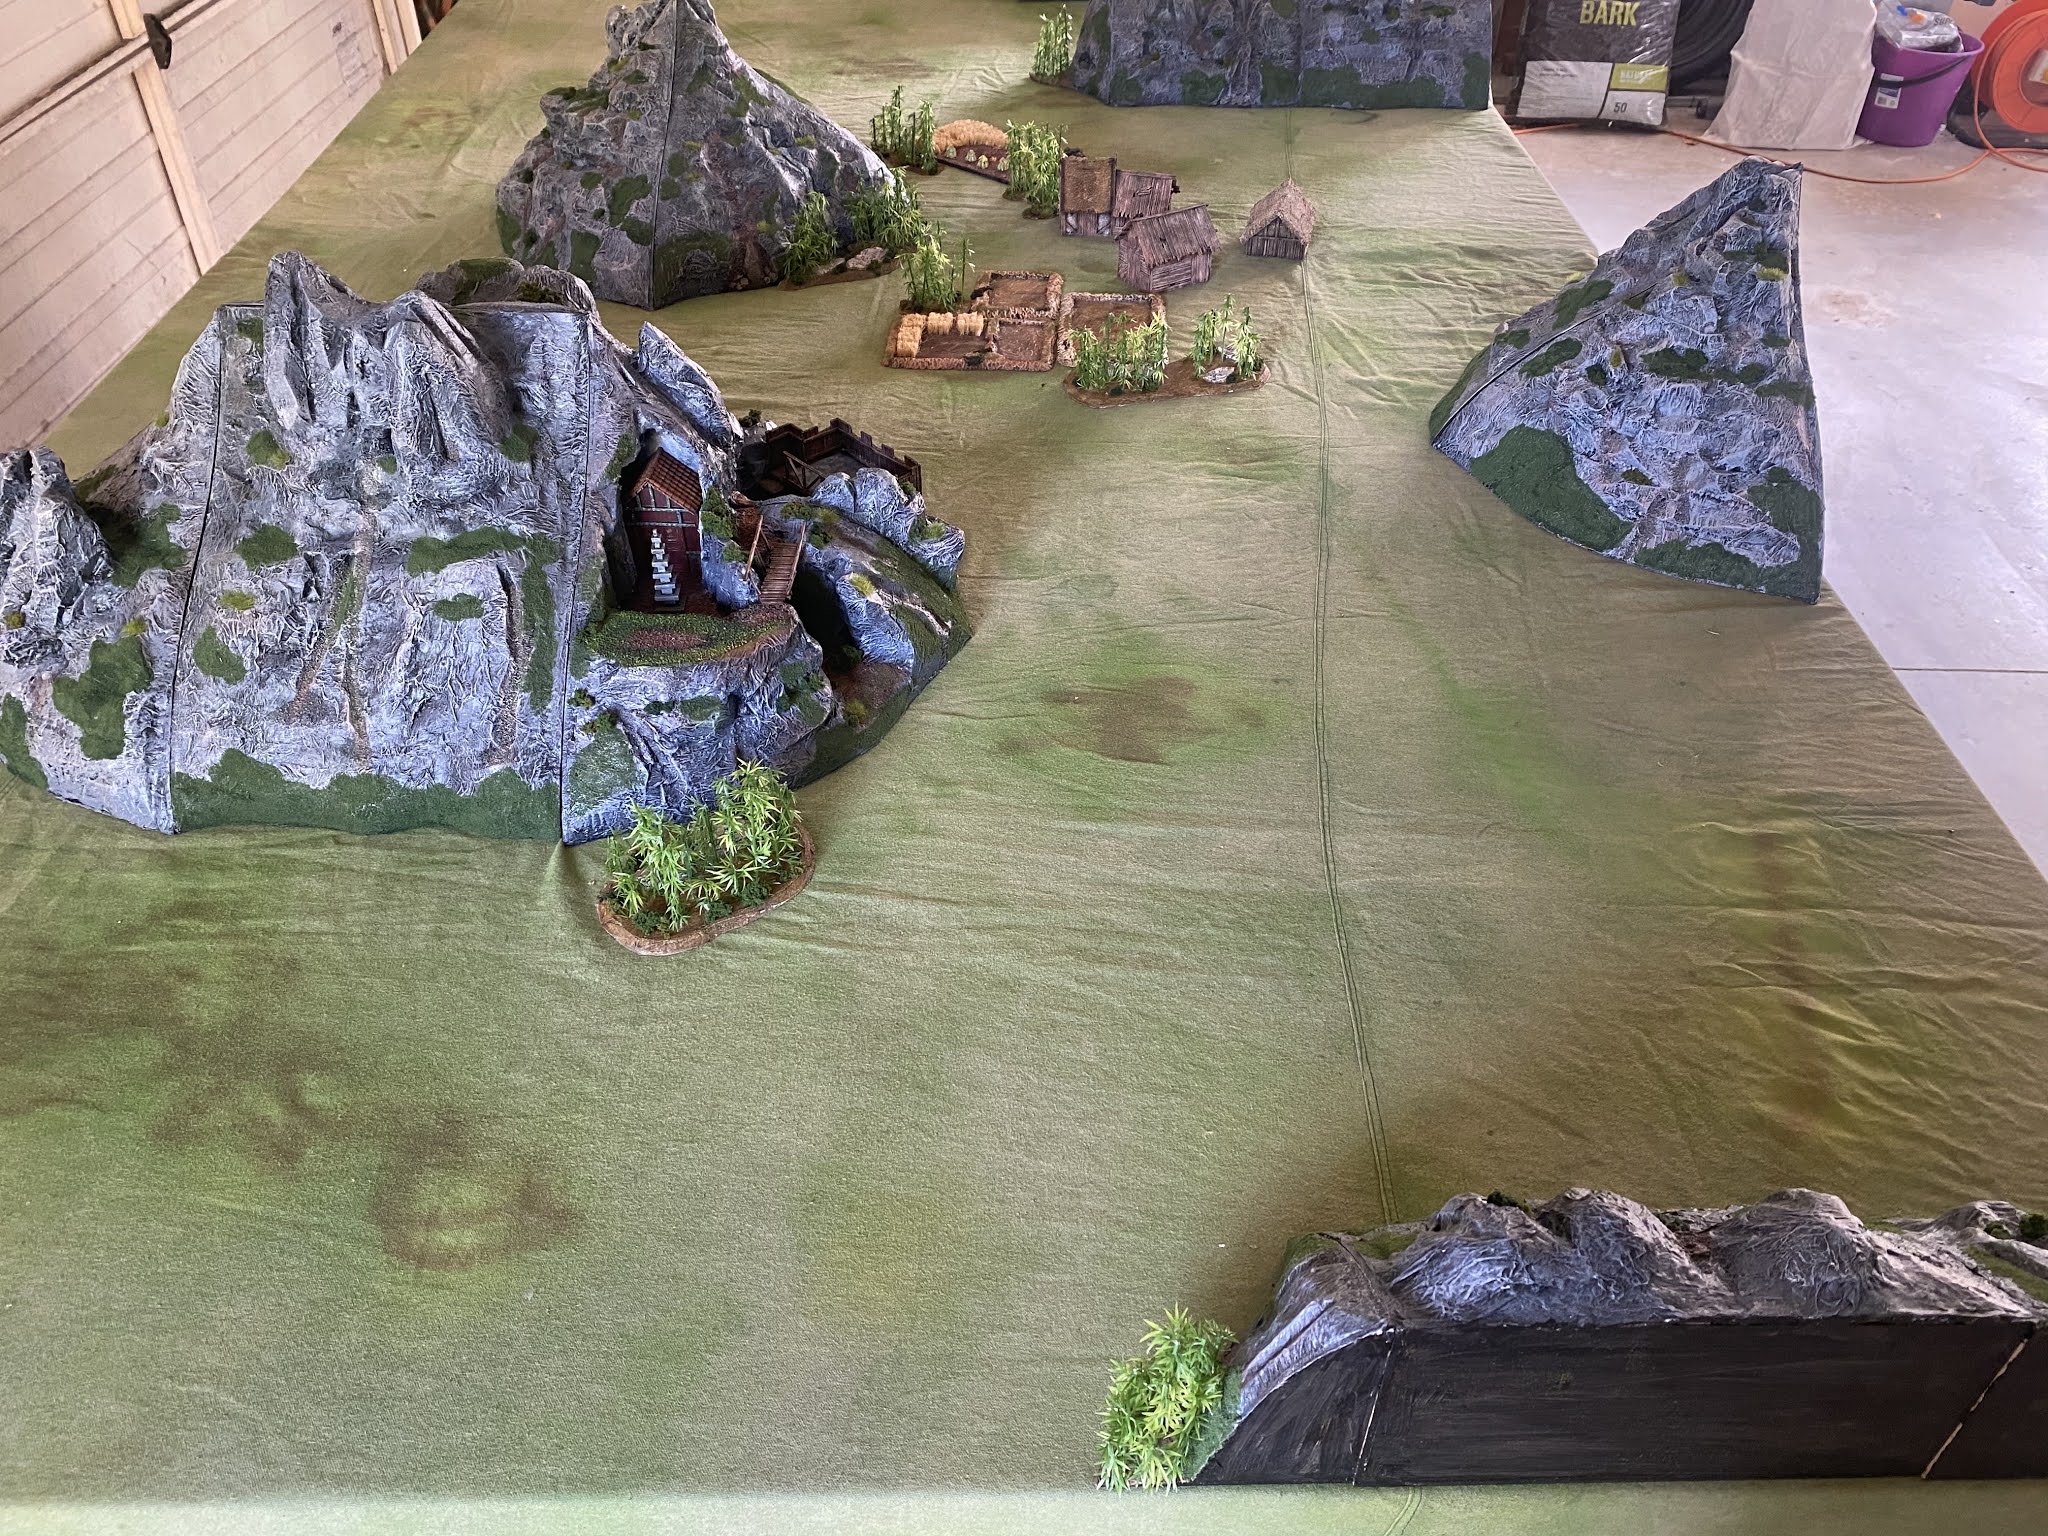
I also needed two special pieces in which the Temple of Infinate Harmony would be situated from which the Monks could emerge yelling and screaming, or rain arrows down on unsuspecting Samurai. The same basic forms used for the mountain blocks were used, so that they would conform with the others, but two sides were altered so that they could be used side by side. Of course this limits their use in that they will pretty much always have to be used as a pair. My first thought was that the temple buildings could be replaced by other mountain buildings for other games (I am thinking of alpine villages here for the Suvarov campaigns in the early-Napoleonic Wars), but this idea died an early death. The temple itself was built into the mountain, as though built as a part of a cave system, and is accessible only by a stairway and bridge, with a fortified gatehouse at the foot of the heights. Here is the finished product.


About half way through the build I realised a problem with the overall table design. The original plan called for the design below with 250mm high mountain modules shown in dark brown.
I realised that the pieces on the long edges of the table were going to inhibit players reaching figures on the table because they would not be able to reach over the pieces that stand 250mm (10 inches) high and then another 900mm (3 feet) into the table. But I still wanted some sort of restrictive terrain along the edge otherwise the players would just skirt along the edge of the table to avoid any ambush spots...you know what wargamers are like, right? Plus I wanted that visual impact. So I decided to make some smaller pieces, rising no more than 125mm. I decided not to make specific end pieces for these, but rather made some special bamboo groves and here is the result.
And now with all sixteen pieces layed out on the garage floor...
...the test layout...
And just over six weeks the project, that I thought would take three to four months, was complete.
Part two of this post will cover the construction of the other items that were required for the game - the fortress, the buildings, bamboo groves and paddy fields.