I have been thinking of expanding my collection of Bohemian buildings that appeared in a previous entry (http://stracmark.blogspot.co.nz/2013/01/bohemian-village-buildings-i-builtthese.html), that I also hope to use as a feature in future Crimean War games.
I was rather impressed by this stunning model and thought I would do something similar, but with a thatched roof.
The first thing to do was think about how to make the mill wheel. This would be made of Emerkit and Green Stuff epoxy putty. The former has great strength, while the latter can be scribed with greater detail.
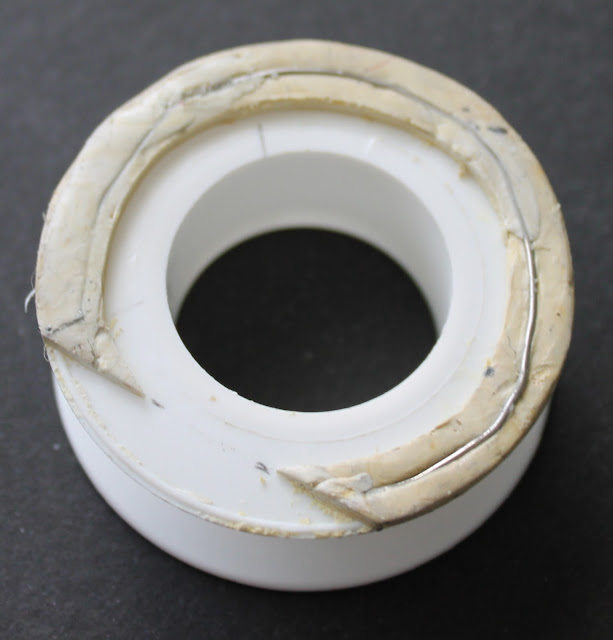
I started by scribing a circle of 50mm on a piece of cardboard and cut it out, but then, when I had to do a quick plumbing repair, I found that the spool on which some plumbing tape was wound on was the perfect diameter. What was even better was that the spool is plastic and the Emerkit and Green Stuff would not bond to it easily, so they could be prised off with some ease. In short the same spool could be used for both sides of the mill wheel.
I started by putting a bead of Emerkit around the outer edge of the spoot and flattened it out to about 1.5mm thickness. I then cut the excess putty away from the outer edge. To provide some additional strength I pushed a length of steel wire into the putty. I then cut around the inner edge to create a width of the wheel to about 6mm. I am not too concerned about getting this perfect at this stage. I then cut 8mm off the bottom of the wheel - this will be that part of the wheel that will be immersed in the water.
I left this piece to cure and moved on to making the main form of the building from carboard.
The structure is to be two storeys, with the mill below and the living quarters above. Access to the upper level will be by a set of stone stairs on the face of the building opposite wheel. The base level will have a stone and timber base. The upper level will be a mix of timber and timber and plaster.
The roof, as I said will be thatched. Using a thatch finish has the distinct advantage of covering a multitude of sins in the construction!
Here is the completed cardboard form (although I may yet add some other features as the build goes on). It stands 110mm high, with a length of 100mm and a depth of 90mm.


Nicely done!
ReplyDeleteThanks Phil, I am starting to get a feel for the project now.
DeleteGreat start Mark, looking forward to seeing how this shapes up.
ReplyDeleteCheers
Stu
Thanks Stu. This should pull together pretty quickly, thanks to the warm summer evenings the putty cures pretty quickly.
DeleteLooking Very Good! Interesting Scratch Build. Beano Boy
ReplyDelete