 |
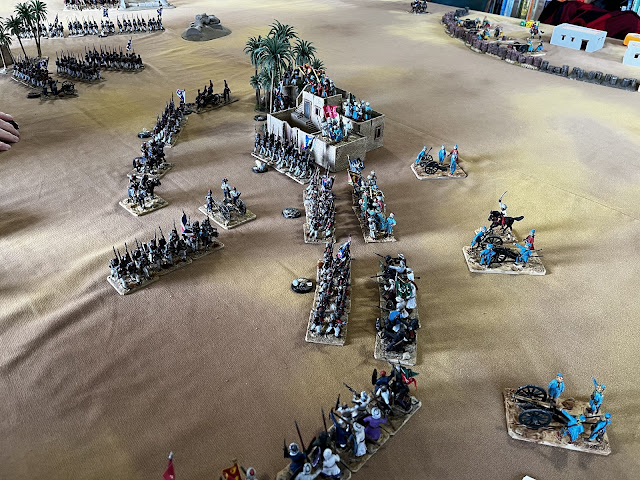
| My quick sketch of the battlefield |
Pages
Monday, 29 July 2024
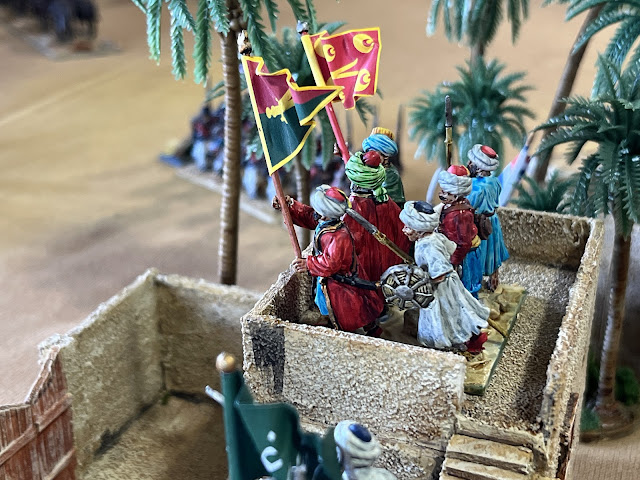
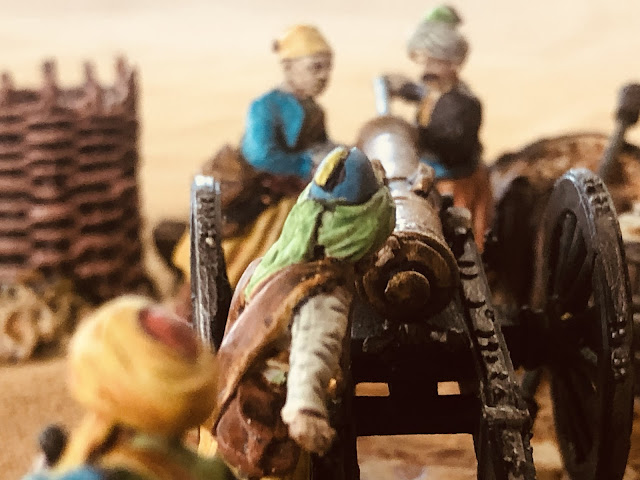
Action with the Mamelukes
Friday, 26 July 2024
Dutch Lancers of the Garde Impériale
Tuesday, 23 July 2024
More Staff and a few Mamelukes
I have now completed the second set of Napoleon's staff - the emperor and others dismounted.
This include the Emperor, Marshal Ney (leaning on the table) Marshal Soult, Drouot (ADC to the Emperor), Colonel Gourgaud (Napoleon's faithful ordinance officer) and a Hussar officer acting as ADC.
Also completed are three Mamelukes that will be assigned the role of officers in my Ottoman army that will take the field on the 28th.
Saturday, 20 July 2024
The Grenadiers of the Guard
Over the years I have shied away from building up elite units...having said that in my first Franco-Prussian War army (yes there has been more than one...three in fact) I did build a force of 12 battalions, plus cavalry and artillery...but that was a long time ago.
Now with my plans for solo campaigning developing I felt I needed something to represent the French Imperial Guard, something that is in balance with the line troops. So since the line troops in my French army has five brigades of five or six battalions I figured that a brigade of guards wouldn't go amiss. By coincidence a local retailer had a special on Victrix figures and had two boxes of Guard Grenadiers in stock that I snapped up giving me 120 figures - enough for five full battalions. It would have been nice to have six battalions but it was what it was. Then I had an "ah ha" moment...I had a sixth battalion already.
Nearly thirty years ago I painted a unit of Front Rank grenadiers for my friend Jim's seventieth birthday. Jim died in 2001 and his daughter gave the unit to me as a momento of our 21 years of wargaming experience. For the last 23 years they have been sitting on my bookshelves literally gathering dust. So why not press them into service and use them as an active unit, as Jim would have liked to see them? They were duly removed from their display base, dusted off, retouched, rebased and given a flag.
They have been joined by the first two Victrix battalions - possibly the worst figures to assemble because of the sheer number of bits to be glued on, but the easiest to paint because they are wearing greatcoats.
To support the infantry brigade there will be a guard cavalry brigade (Dutch Lancers and Chasseurs à Cheval - more Victrix that were on special...and I thought the infantry figures had a lot of parts), two guard batteries, one field and one horse, and three commanders.
Wednesday, 17 July 2024
Solo Campaigning
I have always liked the concept of a wargames campaign, but the few campaigns I have been involved in have all fizzled out when one or more players have lost interest. Now, with retirement approaching, I intend to make the time to experiment with the idea of a solo campaign. This initial attempt will not get under the way until some time in the New Year, but the intent is to start with a Napoleonic campaign based in Germany in 1813. If successful the concept might also be extended to other wars.
For me there are two big issues with the 1813 campaign:
- It was the largest of the Napoleonic campaigns with the biggest armies ever to take to the field in Europe to that date with hundreds of battalions on each side. How can I hope to reproduce this when my total French force consists of only 29 battalions with maybe another 10 Bavarian allies, and for the Coalition forces I can only raise 18 Russian, 17 Prussian and 16 Swedish battalions (plus another 11 Austrian battalions should they join in)?
- Since I don't have a split personality, well I don’t think I do anyway (I must ask myself), solo gaming by default has bias and that bias is likely to be magnified in a campaign. So how do I maintain a balance in the campaign?
The prevention of bias is a little more complicated, but for me the answer is to create a narrative for each side that guides their actions in the overall campaign. I have been quite loose in my interpretation of the strategic situation in Germany in 1813 so serious students of the campaign should probably stop reading now.
The French narrative is very straightforward. Napoleon needs to push the Russians back behind the Oder and bring the Prussians to heel before he can relieve his garrisons in Poland. This will bring all those states that had slipped the leash back under French control and deter further defections. He needs to retake Hamburg to reestablish communications with his Danish allies. With those objectives achieved Sweden would be left out in the cold.
The Allied narrative, however, is far more difficult. The liberation of Germany is at the centre of their narrative. They must drive Napoleon out of Germany, but each ally has their own political considerations and complications.
- Alexander I of Russia believes that after saving Russia from Napoleon it is his destiny under God to be the saviour of Europe and is determined to make it so, but the Russian Army is exhausted from its exertions the previous year and is filled with many conscripts. He needs Prussian and Swedish involvement to sustain his efforts.
- Bernadotte is keen to establish Sweden's place in Europe, but would be powerless in Europe without Russia.
- Prussia is conflicted. While the middle class and the army are strongly supportive of the liberation, Frederick William III is less supportive and is deeply concerned that if things turned in Napoleon's favour there could be retribution against Prussia that could cost him his crown and see the kingdom carved up.
- Duke Frederick Francis I of the Duchy of Mecklenburg-Schwerin has similar fears to Prussia.
- The various Frei Korps that have sprung up in the northwest, and are occupying Hamburg, lack cohesive leadership and are likely to disperse if pushed.
- Francis of Austria can not afford to lose another war to France, to do so would surely break his fragile Empire apart.
- Saxony and Bavaria are the staunchest of Napoleon's allies and their leaders owe their crowns to the Emperor. Like the Prussians they fear that should they defect and things turn against them there would certainly be retribution. Saxony commences the campaign neutral.
Coalition pressure points for temperature change are:
- for any Coalition defeat in battle +1 or
- If it is a severe defeat +2
- Berlin occupied (Prussia only) +1 - +3*
- if troops from two or more of the Coalition states are involved in defeat +1
- if one of the other coalition partners withdraws +2
- for each Coalition victory -1
* Roll 1xD6: 1, 2 or 3 = 1, 4 or 5 = 2, 6 = 3
Obviously I need to determine what defines a severe defeat.
Criteria for pressure to build for non-Coalition nations:
- for any Coalition defeat in battle -1
- if one of the other coalition partners withdraws -2
- for each Coalition victory +1
- for each Coalition major victory +2
In addition when plus point is presented the Coalition forces or a minus point for the non-coalition forces:
- If the temperature gauge reads cool 1xD6 is rolled and if the score is 6 the value of the pressure point is doubled
- If the temperature gauge reads warm for a state 1xD6 is rolled and if the score is 4+ the value of the pressure point is doubled
- If the gauge reads hot 1xD6 is rolled and if a 3+ is scored and the value of the pressure point is doubled.
So to the rules of the campaign.
Forces
While actual armies on the table cannot exceed the number of figures actually available for play, multiple armies are possible, they just can't stack together. On this basis for armies can be built from the following commands:
France
Command | Sub-Command | Description | Max No of Commands | Stack Limit |
Infantry Division | Brigade | 5 light infantry 5 line infantry 1 regimental gun | 3 | 1 |
Brigade | 7 line infantry 5 line infantry 1 regimental gun | |||
Artillery | 1 horse battery 1 field battery | |||
Infantry Division | Brigade | 6 line infantry 5 line infantry 1 regimental gun | 3 | 1 |
Brigade | 6 line infantry 5 line infantry | |||
Artillery | 1 horse battery 1 field battery | |||
Cuirassier Division | Brigade | Cuirassier regt | 4 | 2 |
Brigade | Cuirassier regt | |||
Brigade | Cuirassier regt | |||
Artillery | 1 lancer squadron 2 horse batteries | |||
Dragoon Division | Brigade | 2 Dragoon regts | 3 | 1 |
Brigade | 2 Dragoon regts | |||
Artillery | 1 horse battery | |||
Light Cavalry Division | Brigade | 2 hussar regts | 3 | 1 |
Brigade | 3 Chasseur regts | |||
Artillery Reserve | Brigade | 5 batteries | 3 | 1 |
Imperial Guard | Infantry Brigade | 6 battalions 1 field battery 1 horse battery | 1 | 1 |
Cavalry Brigade | 1 lancer regt 1 Chasseur regt | 1 | 1 |
Bavaria
Command | Sub-Command | Description | Max No of Commands | Stack Limit |
Division | Infantry Brigade | 2 line battns 1 Jäger battn 2 Kreis battns 1 field battery | 1 | 1 |
Infantry Brigade | 2 line battns 1 Jäger battn 2 Kreis battns 1 field battery | |||
Cavalry Brigade | 2 light cav regts 1 horse battery | |||
Brigade | 2 grenadier battns | |||
Artillery | 1 Field Battery |
Russia
Command | Sub-Command | Description | Max No of Commands | Stack Limit |
Infantry Division | Brigade | 4 Musketeer Battns | 3 | 1 |
Brigade | 4 Musketeer Battns | |||
Brigade | 4 Jäger Battns | |||
Artillery | 1 light battery 2 heavy batteries | |||
Heavy Cav Division | Brigade | 2 cuirassier regts | 3 | 1 |
Brigade | 2 dragoon regts | |||
Brigade | 3 dragoon regts | |||
Artillery | 1 horse battery | |||
Light Cav Division | Brigade | 1 hussar regt 1 mtd Jäger regt | 3 | 2 |
Brigade | 1 uhlan regt 1 mtd Jager regt | |||
Artillery | 1 horse battery | |||
Guard | Infantry Brigade | 6 grenadier battns | 1 | 1 |
Brigade | 1 horse battery | |||
Cossacks | Brigade | 4 Cossack regts | 3 | 1 |
Prussia
Command | Sub-Command | Description | Max No of Commands | Stack Limit |
Infantry Division | Brigade | 2 Musketeer Battns 1 Fusilier Battn | 2 | 1 |
Brigade | 2 Reserve Battns 2 Landwher Battns | |||
Unattached | 1 Jäger Battn | |||
Artillery | 1 field battery | |||
Infantry Division | Brigade | 2 Musketeer Battns 1 Fusilier Battn | 2 | 1 |
Brigade | 2 Musketeer Battns 2 Reserve Battns 2 Landwher Battns | |||
Artillery | 1 Field Battery | |||
Cavalry Division | Brigade | 1 cuirassier regt 1 Uhlan regt 1 Landwehr regt | 2 | 1 |
Brigade | 2 dragoon regts 1 hussar regt | |||
Brigade | 2 dragoon regts 2 mtd Jäger regts | |||
Artillery | 1 horse battery | |||
Reserve Artillery | Brigade | 2 Field batteries | 2 | 1 |
Sweden
|
Command |
Sub-Command |
Description |
Max No of Commands |
Stack Limit |
|
Division |
Infantry Brigade |
4 line battns 1 Jäger battn 1 field battery |
1 |
1 |
|
Infantry Brigade |
4 line battns 1 Jäger battn 1 field battery |
|||
|
Infantry Brigade |
4 line battns 1 Jäger battn 1 field battery |
|||
|
Cavalry Brigade |
2 dragoon regts 1 horse battery |
|||
|
Artillery |
3 Field Batteries |
Duchy of Mecklenburg-Schwerin: is a single brigade of four battalions.
The Frei Korps: an army consisting of 8 battalions and cavalry regiment and one battery ( are classed as raw troops) also exists but can never join the other Coalition forces.
In any one hex the Coalition can stack a maximum of one Russian, one Prussian, one Mecklenburg-Schwerin and one Swedish army.
The Map
I have created a map of Germany from Poland in the east to Frankfurt and Bremen in the West and Hei- delberg in the South. All major rivers and towns are marked and a hexagonal movement grid is overlaid. Each hex measures approximately 20 kilometers on the map, or one day's normal march for infantry.
The map has been printed A3 size and mounted as a folding board.
Initial Deployments
I opted to construct and deploy the armies as follows:
Prussians:
- Blucher with 10 battalions, 7 cavalry regiments and four batteries at Dresden
- 7 battalions, 3 cavalry regiments and one battery at Chemnitz
- 17 battalions, 10 cavalry regiments and five batteries spread between Brandenburg, Belzig and Lukenwalde
- 8 battalions, 4 Cossack regiments and one battery with Blucher
- 4 battalions, 3 dragoon regiments and one horse battery at Berlin
- 8 battalions, 10 line cavalry regiments, 4 Cossack regiments, three line and three horse batteries at the top entry point marked on the map
- Wittgenstein with 8 battalions, 10 line cavalry regiments, 4 Cossack regiments, three line and three horse batteries, plus the guard, at the middle entry point marked on the map
- 8 battalions, 10 line cavalry regiments, 4 Cossack regiments, two line and two horse batteries at the bottom entry point marked on the map
- 23 line battalions, 14 cavalry regiments, 3 light, 6 field and 6 horse artillery batteries at Magdeburg
- 23 line battalions, 14 cavalry regiments 3 light, 6 field and 6 horse artillery batteries and the guard and Napoleon at at Erfurt
- 15 line battalions, 8 cavalry regiments, 3 light, 3 field and 3horse artillery batteries at Gottingen
- 8 line battalions, 6 cavalry regiments 3 field and 3 horse artillery batteries as Coburg
Turn Sequence
- Check weather
- Determine initiative
- Activate and Move units
- Calculate any attrition from forced marches
- Where contacts occur:
- Determine type of contact
- Determine table setup
- Adjacent units can March to the Guns
- Fight engagement
- Defeated force retreats
- Determine battle attrition
- Adjust Political Temperature
Weather
Weather is rolled for each turn and can be either Fair or Bad. Weather either worsens from Fair to Bad or improves from Bad to Fair. The campaign starts with fair weather, but each successive turn 1xD6 is rolled, modified by +1 if it is April, May or October, and the result is as below:
Initiative
Initiative determines which side moves first in a game turn and is determined by rolling 1xD6 then adding dice to a pool for each of the following factors:
- If a victory was scored last turn +1
- If they held the initiative last turn +1
- More units activated than the opponent last turn +1
Each side pick the highest score in their pool and the highest score between the moves first.
Movement
Stacking restructions
No army greater than the total available number of wargames units available for play can occupy one hex in any circumstances.
Activation
All armies must activate to move. Activation can be improved if a leader is attached or can be worsened by the political temperature. Units that fail to activate do not move in that turn. Roll 1xD6 and the basic score to activate is 4+. The die roll is modified as follows:
- If Napoleon is attached +2
- If Blücher or Wittgenstein are attached +1
- If the National Political Temperature is warm -1
- If the National Political Temperature is hot -2
Movement Rates
Units move through the movement grid at the following rates.
Forced Marching
Units can also attempt to force march up to three additional hexes by rolling 1xD6 on the Forced March Table. The figure on the table is the distance a unit may force march, in hexes.
When a unit force marches there is a chance of attrition for any table result with an asterisk (*) beside it. Roll 1xD6 for each brigade force marching and a score of 4+ will weaken each unit in the brigade by one strength grade. Attrition from forced marching is temporary and strength is recovered after a day of inactivity. Units cannot force march in consecutive turns.
Crossing Rivers
Rivers do not affect units crossing at towns and cities. Away from towns and cities the unit can cross, but will not move the following turn. Units cannot enter or exit a hex containing a river in bad weather.
Battle
Battle takes place whenever opposing counters are in the same hex.
Action Type
Actions are one of three types:
- Encounter - an unplanned battle where both sides have moved into the same hex in the same turn
- Battle in position - Where one side has not moved and the other has moved into contact.
- Battle in a fortified position - Where one side has chosen the ground and fortified the position by re- maining in the location for five consecutive turns
Whenever contact is made any units that have activated and are within three hexes of the contact point may attempt to march to the sound of the guns by forced marching, so long as they have not already force marched in that or the previous turn and stacking rules are met.
If successful, reinforcements roll 1xD6 to see if they arrive either on the player's home table edge or on either flank as early as game turn 2, using the following table:
Table Layout and Deployment
Using the appropriate group of table plans (below) roll 1xD10 (for a battle in a fortified position only five table options are available so divide the score by 2) to determine the terrain for the battle.
Where a battle in a fortified position is being played the strength of the defending force may not exceed two thirds of the strength of the attacker.
After Battle
At the conclusion of a battle the defeated player immediately retreats two hexes away from the battlefield and may attempt to force march in their turn.
Battle Attrition
Any battalion, regiment or battery that has taken losses of 4 or more in battle will drop one strength value - i.e. large to standard, standard to small, small to tiny. Tiny units always remain tiny.
Units will not be reinforced during the campaign.
I am sure that many more rules will come up before the campaign is played.
Since I started writing this post I have been so inspired by this idea that I have already begun digging out other campaign maps I had drawn up previously (for the American Civil War and the First Carlist War), and have completed maps for the Imperial phase of the Franco-Prussian War, the Iberian Peninsula for the Napoleonic Wars and for the 1814 campaign. A map for the American War of Independence is in progress.
Before I leave work and lose access to the specialist drawing software that I use to draw them, I will also look to complete maps for other periods of interest like Egyptian Campaign 1798-1801, the Great Paraguayan War, the Austro-Prussian War, the War of 1812, Crimean War, Russo-Japanese War, the Imjin War and maybe Feudal Japan. All will be mounted as folded game boards.


