Pages
Sunday, 31 March 2019
The Almeria Infantry Regiment
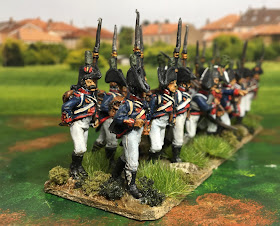
This was a two battalion regiment. The first battalion made it’s appearance a week or two ago.
Also completed is the high command for the army. The general figure first made his appearance on these pages back in January. Now he has been joined by an officer, who was originally a standard bearer who was given a pointing right hand from the Perry plastic French infantry set and a map in this left hand, and a fusilier who was a free figure supplied by Eureka Ministures.
Saturday, 30 March 2019
Third Battalion, Guadalajara Regiment...and a Gun
First is the third battalion, Guadalajara Regiment, again in mixed dress.
Combined with the other two battalions the regiment had a satisfying muddled look.
Second is a gun set with the gunners loading the gun.
As I wait for 2 April to see what effect the demise of Google+ is going to have on this blog, I am working on two battalions for the 1809-1811 collection.
Tuesday, 26 March 2019
Second Battalion, Guadalajara Regiment
Saturday, 23 March 2019
1st Aragón Light Infantry
Wednesday, 20 March 2019
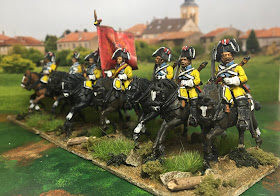
The Almansa Dragoon Regiment
Sunday, 17 March 2019
Almeria Infantry Regiment
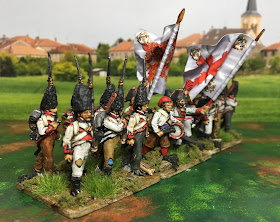
There will be one more battalion in this regiment, but next off the table is a regiment of dragoons.
Saturday, 16 March 2019
Back to Spain...
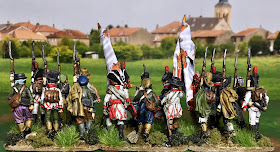
It is my intention for this regiment, and another one that follows, that the troops are in mixed civilian and uniform dress. This allows me to use these units in the latter part of the early period (1805-1808) when the area was particularly poorly supplied with uniforms and through into the middle period (1809-1811). However, while there are two codes for the fusiliers in mixed uniform there is only the full uniform for the grenadiers. My solution here was to add some trousers over the gaiters of about half the figures with some green stuff and to paint some of the gaitered figures with trousers of varying colours and with some patches painted on them.
Sunday, 10 March 2019
The Battle of Alexandria, or Canope
Today we fought the third game in the series recreating the British attempt to evict the French from Egypt. The scenario is based on the Battle of Alexandria, or Canope, fought on 21 March 1801.
The Scenario
British Briefing
Following the Battle of Mandara on 13 March 1801 the French retreated to the Alexandria fortifications. It is known that they have been heavily reinforced. The British army has consolidated at the site of the Mandara fight and is preparing to lay siege to Alexandria. However, the lack of transport is severely hampering operations. All supplies have to be ferried from the fleet in Abukir Bay through the shallow Lake Abukir to a depot and then hauled by hand to the front. The result is that although the troops hold relatively good forward positions, keeping them supplied, particularly with ammunition, is a significant problem. Until secondary magazines can be established there is no possibility of any further action against Alexandria.
In the seven days since the Mandara fight the Army has managed to establish a redoubt in front of the Roman ruins, beside the Mediterranean and a further two near the head of Lake Abukir. Two smaller works have been constructed on the broad ridge than links the other two positions.
On the morning of 21 March 1801 the French launch an attack.
The British force available and initial deployment is:
Moore’s Brigade
• 23rd Foot (in camp)
• 28th Foot (in the forward redoubt)
• 42nd Foot (in camp)
• 58th Foot (in camp)
• Corsican Rangers (in camp)
• One 12lb gun battery (in the forward redoubt)
Craddock's Brigade
• 8th Foot (in camp)
• 13th Foot (in camp)
• 18th Foot (in camp)
• 90th Foot (forward in the redoubts)
• One 6lb gun battery (in camp)
Stuart’s Emigré Brigade
• De Watteville (in camp)
• De Rolls (in camp)
• Minorca Regiment (forward in the redoubt)
• Dillon’s Regiment (in camp)
• One 6lb battery (in camp)
Guards Brigade – Stuart
• Coldstream Guards (in camp)
• 3rd Guards (in camp)
• One 6lb battery (in camp)
Unattached
• Two battalions of marines (in camp)
• Hompesch’s Hussars (in camp)
• 2 units Dismounted Light Dragoons (in the rear redoubts)
• 2 12lb artillery batteries (in camp)
The terrain on which the fight takes place is largely open with a broad sandy ridge which the British occupy.
At the start of the game the only troops in forward positions are in the redoubts. The remainder of the troops are in their camps as indicated on the map (not to scale).

Alexandria lies to the west. No troops may move before the first shot is fired.
French Briefing
Following the Battle of Mandara you have retreated to Alexandria and the British have occupied the high ground around and west of the Roman ruins. You have been heavily reinforced.
Rumours are that the British are vulnerable. They have serious transport problems and are depending on supplies being ferried through Lake Abukir to a depot on the lake shore, then carried by the men to the forward positons. These is an opportunity here to drive them away from their depot and force them back up the isthmus. Your commander, General Menou, has ordered an attack on the morning of 21 March 1801.
He has ordered that the attack will be made before dawn to catch the British by surprise. He has sent the brigade containing the Chasseurs a Cheval, the Dromedary Regiment and a horse battery to the right of the Alexandria Canal to threaten the British left and the connection to the depot, hoping to hold as many troops as possible in place there. He then instructed a strong assault on the British right, around the Roman ruins, with the intention of swinging right and driving on toward the British depot. The rest of the army is to support this attack.
Having issued the order to attack he has left it up to you, his subordinates, to direct the fight. You, as subordinates, need to interpret Menou’s vague plan and execute the attack.
The force available is:
Brigade
• 22e Demi Brigade Légeré (3 Battalions)
• 75e Demi Brigade (3 Battalions)
• Light battery
Brigade
• 4e Demi Brigade Légeré (3 Battalions)
• 9e Demi Brigade (3 Battalions)
• Light battery
Brigade
• 85e Demi Brigade (3 Battalions)
• 88e Demi Brigade (3 Battalions)
• Light battery
Cavalry Brigade
• 3rd Dragoons
• 14th Dragoons
• 7th Hussars
• One horse battery
Brigade
• 22nd Chasseurs a Cheval
• Dromedary Regiment
• Horse Battery
Unattached Artillery
• Light battery
• 3 x field batteries
Deployment
The chasseurs and Dromedaries must be deployed south of the canal but you are free to deploy the rest of your troops at any point between the northern end of the marsh and the Mediterranean (on the north table edge) 400mm in from the western edge, as indicated on the map.. Brigade structures must remain intact, but you are free to allocate the unattached artillery as you see fit.
Objective
You gain victory if at the end of the game you have succeeded in getting six unshaken infantry or cavalry units off the Eastern edge of the table.
Special rules this game only:
British Ammunition limitations:
British artillery units start the game with limited ammunition:
Before the game begins roll 1xD6 for each battery with the following results to determine the state of ammunition with the guns:
• 1 = 1 round of roundshot, 1 of canister
• 2,3,4,5 = 2 rounds of roundshot, 1 of canister
• 6 = 2 rounds of roundshot, 2 of canister
After the first artillery shot of the battle the limbers can be sent back to the supply point for more ammunition. They will wait for one full turn at the supply point and may then return to their guns. On return to the battery unlimited ammunition is available.
Infantry units will test for ammunition depletion every time they fire by rolling 1D6. A score of 4+ will indicate that ammunition is low. For any subsequent shot a 4+ will indicate that ammunition is exhausted. Small arms ammunition cannot be resupplied.
Terrain limitations:
• The slopes of the hills are classed as difficult terrain
• Artillery fired to or from higher ground will re-roll hits
• The Alexandria Canal is classed as difficult terrain
Night Effect:
The first four turns of the game are before dawn and limitations exist on movement and visibility:
Turns 1 to 3 are will be full darkness. Visibility is limited to 200mm and night movement rules apply:
If no enemy is seen, movement must be declared with any wheeling at the start of the turn then as in a straight line (no oblique movement), then roll 1xD6
• 1 or 2 deviate right – roll 1xD6 1,2,3,4= 30°, 5,6 45°
• 5 or 6 deviate left – roll 1xD6 1,2,3,4= 30°, 5,6 45°
• 3 or 4 no deviation
Turn 4 is prelight. Visibility is limited to 400mm and part night movement rules apply:
In no enemy seen, movement must be declared as in a straight line (no wheeling or oblique movement), then roll 1xD6
• 1 deviate right – roll 1xD6 1,2,3,4= 30°, 5,6 45°
• 6 deviate left – roll 1xD6 1,2,3,4= 30°, 5,6 45°
• 2,3,4, 5 no deviation
Units that collide during night movement will be ruled disordered.
Turn 5 onwards is full daylight with no restrictions to visibility or movement.
All night and pre-light moves are made using markers and figures are only deployed when they are seen or in full daylight from turn 5 on. You will have seven cards.
How the Game Ran
The French chose to hit the British right centre with all their infantry while the cavalry would operate against the British left.
From the off the night movement rules played havoc with the French advance. While the infantry were only suffered from slight deviations, but the cavalry and artillery soon was quickly dispersed across a broad front.
First contact occurred as dawn broke at the redoubt by the ruins and despite the strength of the position the 28th Foot only exchanged a single volley and then decided to abandon the place. The French left brigade swept around the redoubt, making for the ruins.
Moore’s brigade formed a line back from the ruins as the other two French brigades came forward. The extreme right hand French brigade moved against the redoubts on the hill where the 90th Foot held the position. The 90th suffered no initial losses, but next turn took three hits and then needing only a one to save the hits, rolled three “ones”...the were soon pulled out of the front line.
The French left centre and Moore drew closer and closer and were suddenly locked in close combat. Unexpectedly the French failed and were driven back.
At the same time the Guards came forward and drove the French back. Things were looking grim for the French.
On the opposite flank the French cavalry had managed to sort themselves out. A regiment of dragoons charged into the rear of one of the redoubts along the canal, smashing the dismounted light dragoons and a gun there.
The Hompesch hussars attempted to intervene, but came off the worse, routed and headed for the depot.
At this point hunger intervened and we broke for lunch.
Returning from lunch the future of the French infantry still looked grim. But the British were not in the best shape either and after a few bad die rolls and things began to change. Two of Moore’s battalions ran out of steam and their brigade morale failed.
The Guards too had taken a lot of damage and then failed their morale.
Craddock’s and Stuart’s Brigades formed on the hill, but they too began accumulate losses. Craddock failed first leaving Stuart and the unattached units on the field.
Craddock’s collapse...above before, and below after
When the Marines gave up their position and the French cavalry had a clear run to the depot, the battle came to an end.
So history was reversed, which presents me a with a challenge because now I need to create a follow up game to recreate a British evacuation from the Abukir isthmus.


